
Section 9: The other complicated bits
Two other parts were complicated by the fact that it was a French bike and/or a previous owner had been a bit too enthusiastic with taking a drill/grinder to the frame. These were :
- The stem, and
- The rear brake mounting point
- The rear derailleur which was a temporary solution but I decided to keep it, and
- The mix of components in the drivetrain and the number of gears/chain width (this was an important design consideration).
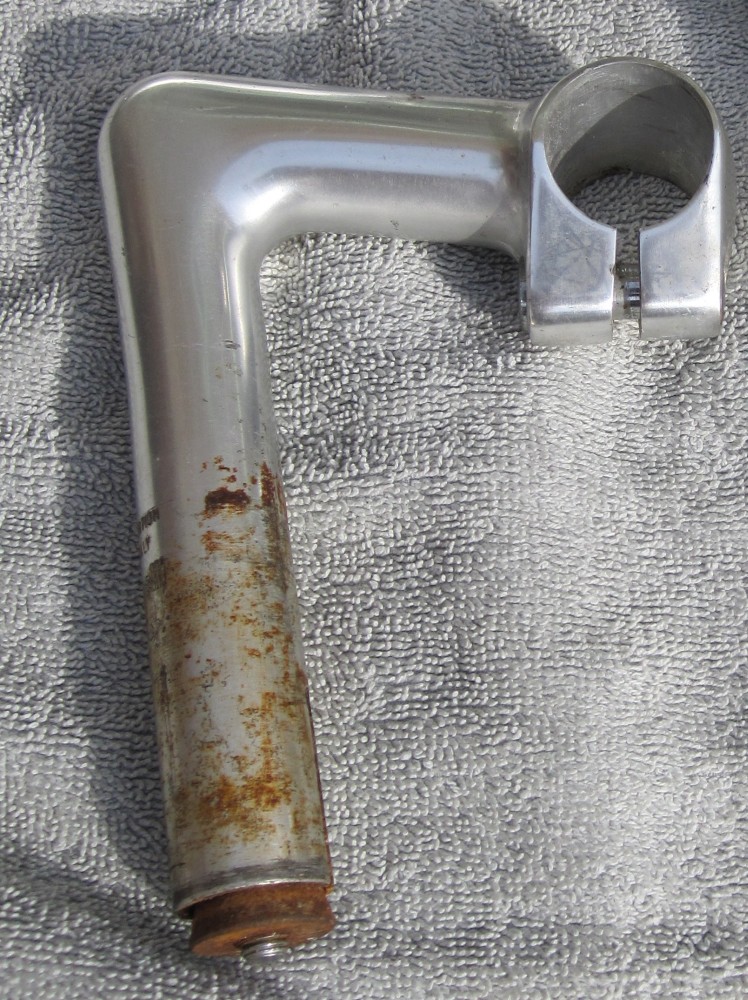
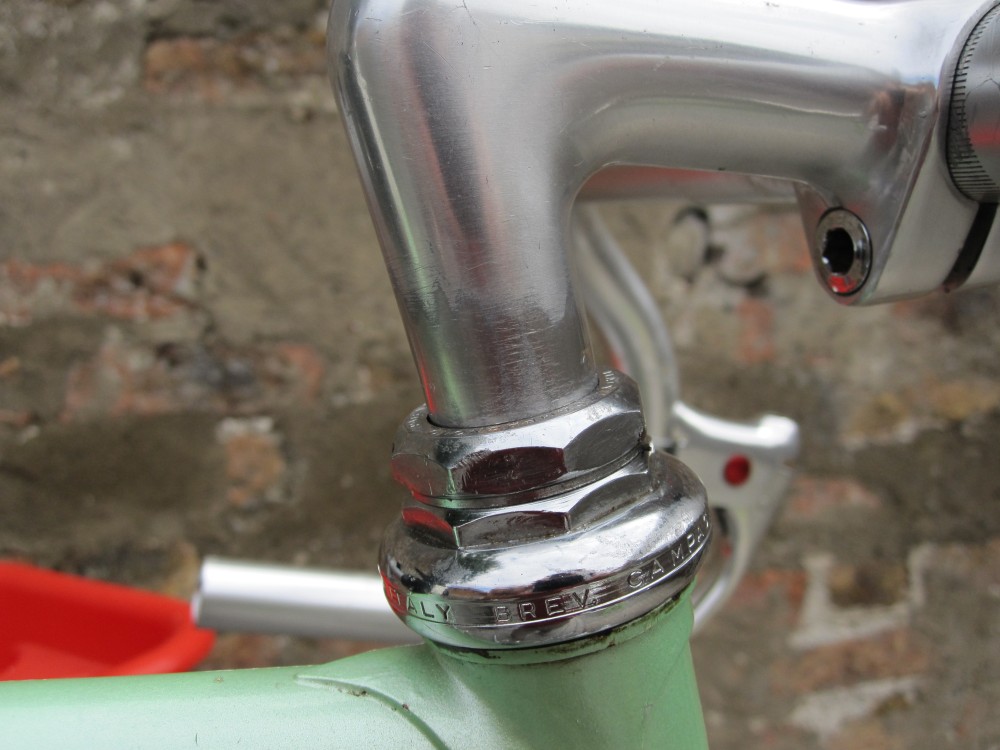
The Stem.
French standard stems are 22.0mm in diameter and the frame was designed for one of these. These stems can be difficult to come by, and I already had a Cinelli (Italian) stem lying around. Also, I rather wanted to use Cinelli handlebars and if I bought a French standard stem, then I think I would have had to also buy French standard handlebars (most of the French handlebars seemed to have a reputation for breaking - which was not an ideal solution). So the cheapest (and my preferred solution) was to use my Cinelli stem. Sanding the 0.1mm from the stem was (according to my Google searches) quite an easy thing to do. And it was - it took about an hour (maybe two). I simply wrapped a bit of sandpaper around the stem (the part inserted in the steerer tube) and twisted until the edge came off the sandpaper, then replaced the sandpaper with another piece, and repeated many times. I used 60 grade paper, then when I seemed to be getting close to a fit, reduced it to 100 grade, then 150 grade, before using a very fine 1200 grade to shine it up. It worked a treat, even if I had a sore hand/wrist for a few days.
Photos of the Stem - a bit difficult to illustrate too much

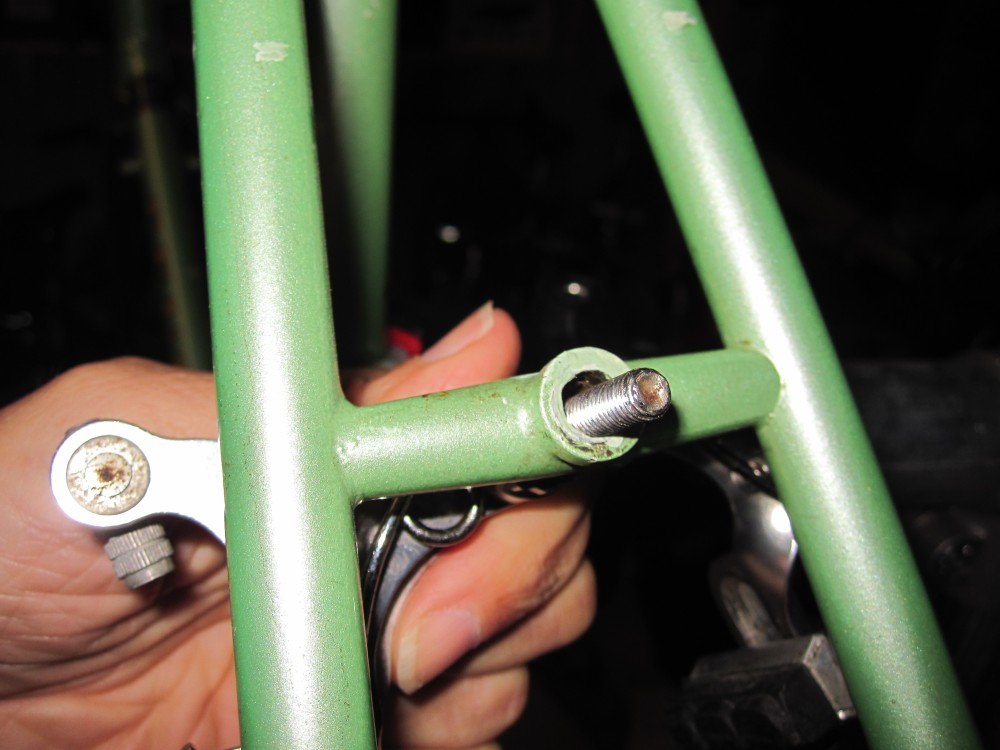
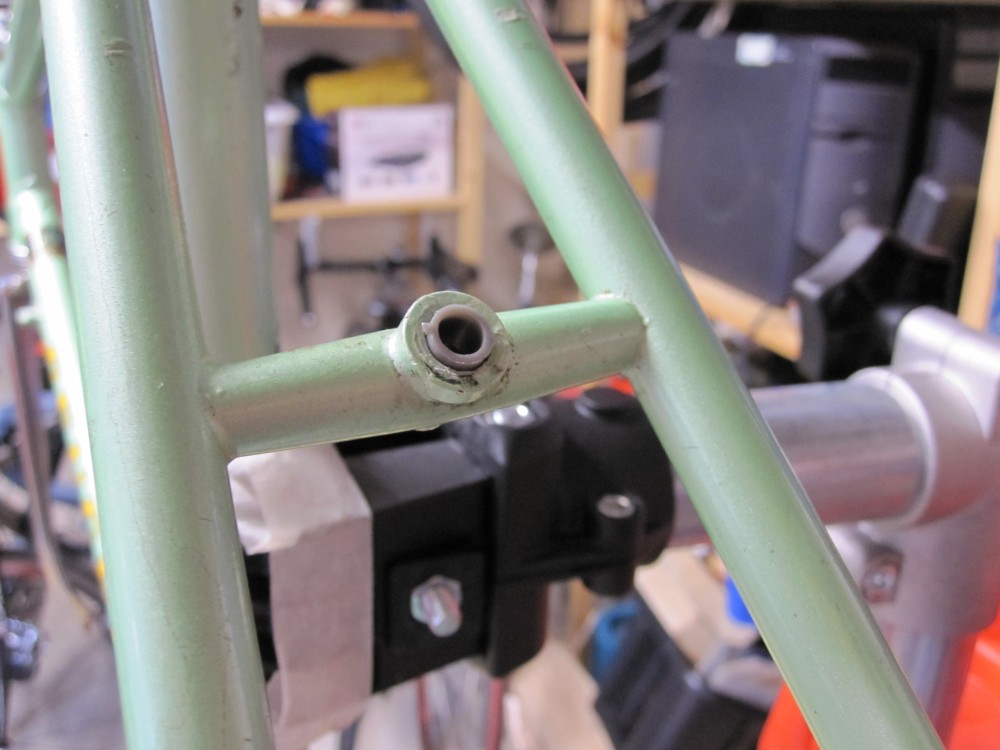
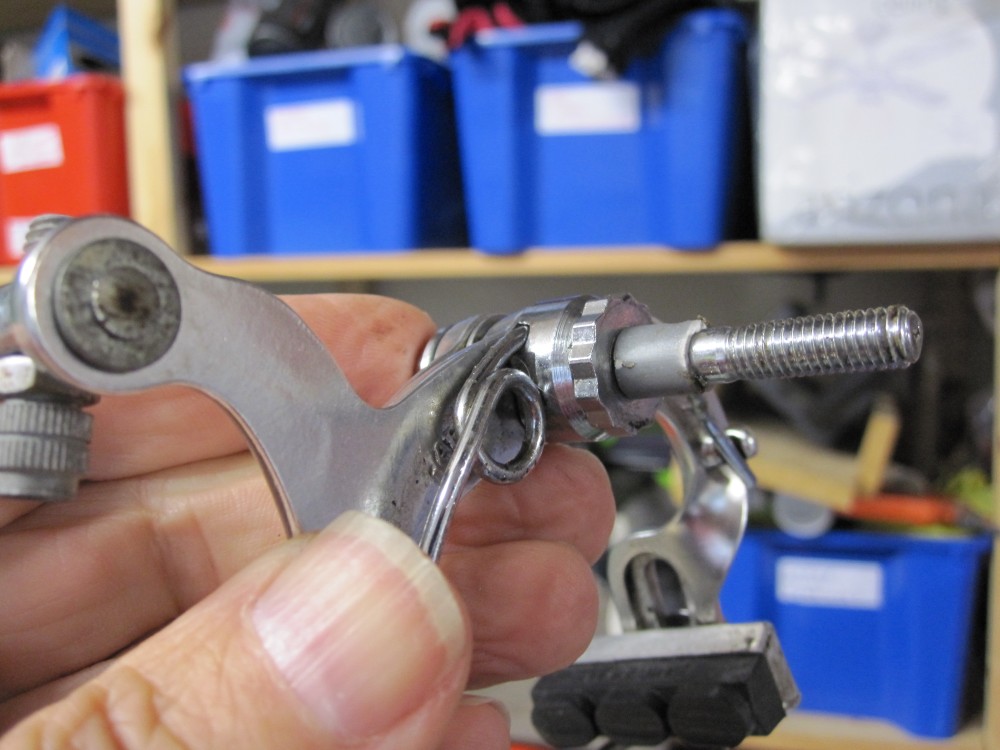
Rear Brake Mounting.
Apparently, you can fit a recessed (allen key) mounting brake into a frame designed for a nut mounted rear brake, if you are (a) prepared to mount it backwards, i.e. ahead of the bridge instead of behind, and (b) prepared to widen the mounting hole at the rear of the bridge to take the recessed allen key bolt. (The brake has to be mounted backwards because it is impossible to get a drill bit into the forward facing mounting hole as the seat tube gets in the way). Either way, this solution looks UGLY. The CFX10 was designed for nut mounted brakes and that is what I bought. But the rear mounting hole (as a result of being drilled) was a bit too wide and allowed some free play when the brake was mounted (not sure if this would be a problem, but I didn't fancy the idea much). As luck would have it, I rooted around for something to fit the gap between the brake mounting bolt and the mounting hole and found a plastic rawlplug (for putting screws into plaster/brick walls of buildings) in my toolbox. Cut short, this fitted around the end of the bolt and fitted neatly into the mounting hole. Being hard plastic, I think it will hold any movement.
Photos of the rear brake mounting - and the challenges
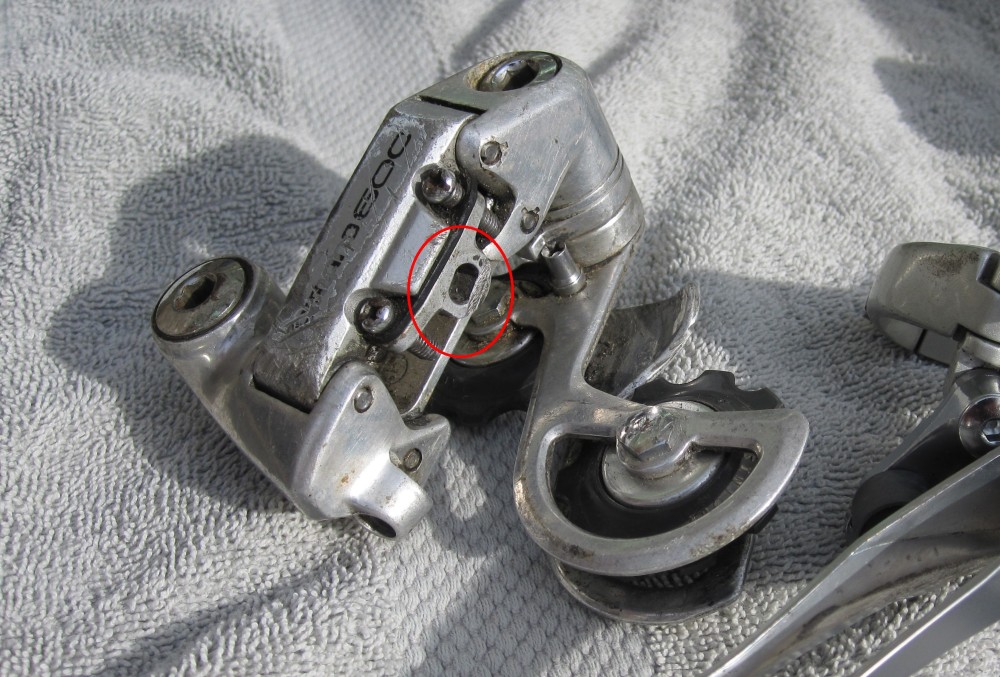
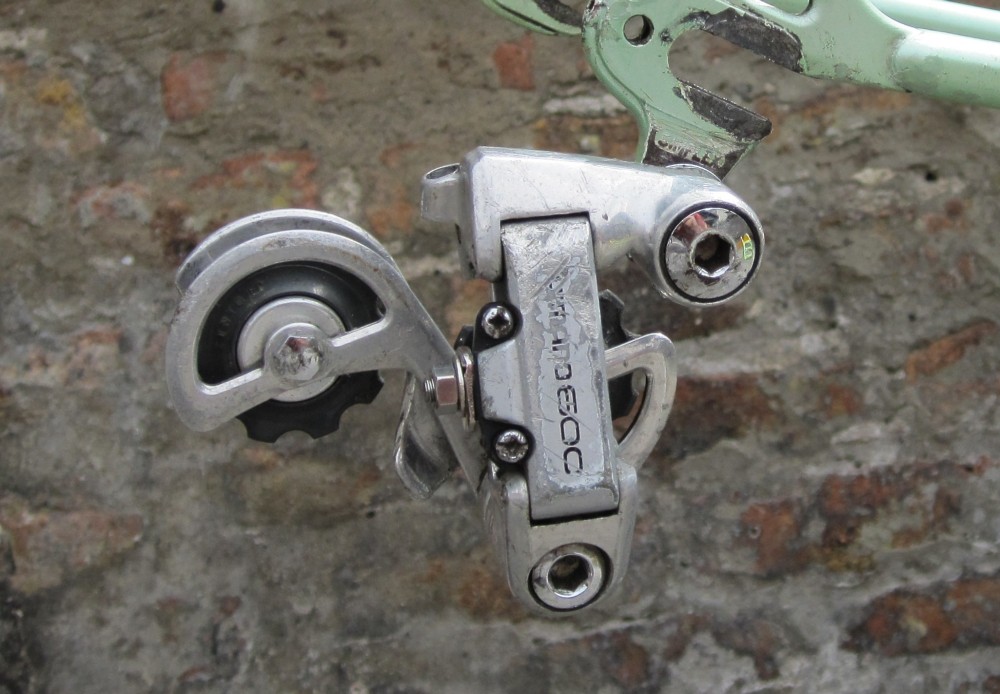
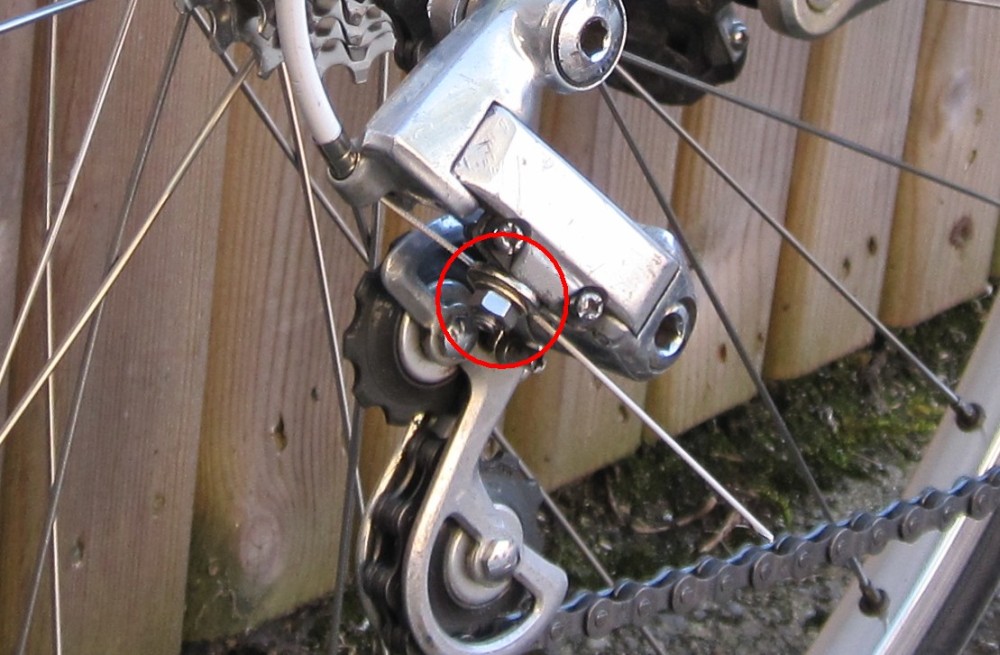
Rear Derailleur (not actually complicated but a good workaround)
I bought locally, a Shimano 600 Derailleur (RD-6207 see velobase.com) which was period correct but a bit scruffy and very cheap. My intention was to replace it with something much cleaner and smarter, ideally a Campagnolo unit. When I went to collect it, the seller was horrified to find that the cable securing bolt was missing. And, to keep his reputation intact on the market website, he offered me the unit for free with a bolt that could be made fit the unit (with a bit of filing etc). I appreciated the gesture, decided I could not take it for free, but split the difference with him. So I got a very cheap derailleur for half price, in other words very, very, cheaply. I easily filed down the bolt and made good use of it. Then my plan to secure a better derailleur began to flounder a bit - everything was a bit too pricey. So, just before a few eBay auctions that I was watching ended, I took some sandpaper to the scruffy bits of the derailleur and had a go a removing the scuffs and polishing the derailleur. And I was rather impressed with the effort. In the end, I decided not to proceed with buying a better one, and used my somewhat refurbished Shimano 600 derailleur (I did like its clean lines) for the bike - I can replace it later at my leisure if I want. I was pretty pleased with my nice, cheap, derailleur.
Photos of the rear derailleur
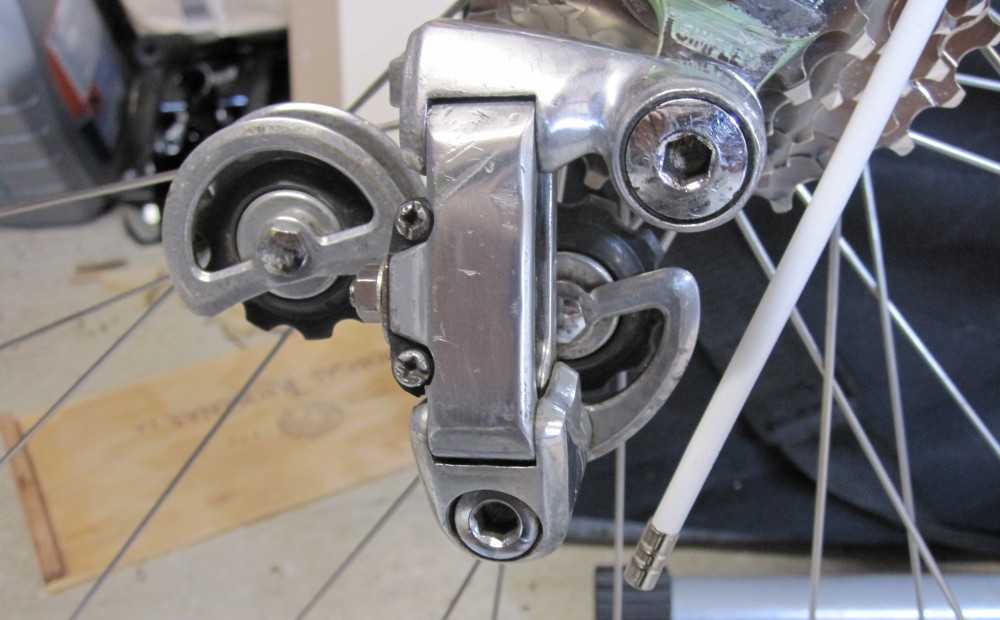
Components in the DriveTrain (a big design consideration)
I needed to decide what components I would put in the dirvetrain and what chainwidth/number of gears I would use. And I needed to make sure everything was compatible with each other. Also I needed to do this before I bought all, or most, of the bits. By drivetrain, I'm talking about Chainset, Chain, Rear freewheel/cassette/hub, and both derailleurs. So here is the thought process that I went through :
- The chainset was going to be Shimano (80s era) which made it most likely a 5 or 6 speed chainset.
- 5 or 6 speed chains are compatible with 7 and 8 speed systems (chains are the same width). It wasn't until 9 speed systems introduced narrower chains (and consequently the widths of cogs, and the spacing between the cogs, had to change).
- Therefore I could go right up to 8 speed without having a mismatch between my chainset and the chain.
- The CFX-10 supported a rear wheel spacing (axle length) of 126mm - max number of speeds within this constraint was 7 speeds. This determined my number of gears. (I could have had the frame "coldset" to increase this width and number of gears, but I didn't want to go this route).
- For the rear wheel, I could go with "freewheel" (older technology) or "freehub with cassette" (newer technology, introduced about 1988 and still current). Having used both technologies, and suffered many broken axles with freewheels (bearings are under more stress) and no breakages with freehubs, I preferred the freehub option if possible.
- Shimano brought out freehubs in 1988 and used a shortlived Uniglide (UG) standard which was quickly replaced by a Hyperglide (HG) standard which is still current today. There was a Shimano 600 "Tricolore" Hub which looked classy and was available from 1988 to 1992 and in its later years (not sure when) it was compatible with both UG and HG. If I could get one of those later ones, I could purchase new cassettes (HG) with a choice of ratios to select my ideal gearing system. A much better option than either Freewheels or Freehubs of the UG standard, where in both cases choices were limited (only old stock or part worn/vintage were available and both choices relatively expensive).
- I waited and watched eBay for an opportunity and found the perfect wheelset. Shimano 600 Tricolore Hubs and 7 speed UG/HG compatible. Bought them.
- Bought a new 8 speed chain, a new 8 speed Shimano HG cassette 13-26 ratios, removed the 14 tooth cog, and produced a 7 speed cassette of 13-15-17-19-21-23-26. Perfect. Incidentally this "homemade" 7 speed cassette fitted perfectly onto the 7 speed freehub.
- Bought two derailleurs from the period which were 6/7 speed compatible. And the drivetrain was complete.
A lot of the information about mixing and matching was found on Sheldon Brown's website - specifically here
Contact me by email : alan_cowzer@hotmail.com
Contact me through Facebook : My Peugeot CFX-10 Facebook Page
© 2018- 2026 Alan Cowzer