
Alan Super Record 1980
Every cyclist named Alan should really have an Alan bike. What do you think? Alan are a bike manufacturer in Italy. Founded by Falconi Lodivico in 1972, the Alan name comes from the first two letters of each of his children's names it was a process which allowed for the cheaper production of lightweight frames. They are famous as Cross Country bikes with many world championship wins but also their bikes have been used by professional road racing teams with many Grand Tour Stage wins.
My Original Alan Love Affair
Back in the 1990s, my first real proper racing bike, a Viking Triomphe, built from Reynold's 531 steel and fitted with a Campagnolo Triomphe Groupset (a beautiful bike) cracked... I only found out when I finished a mountainous training spin with a group of triathletes. I had cycled over 30 miles in the mountains with a strange noise coming from the bike and when I got home I found one of the main tubes had a crack running halfway around the circumference of the tube. You could push the saddle towards the handlebars and the tube just bent as the crack opened up. That could have broken anywhere on my spin and I had come down the hills at 60-70kph. The thought petrified me. On examination, I concluded that some moisture had gotten inside the frame and had caused the tube to rust from the inside. This was probably a manufacturing fault, but I decided my replacement frame would not be steel - no more rust for me. This left little option but to choose an aluminium Alan frame (only real option available at the time), and it seemed appropriate to what with my name being Alan. What I didn't know at the time, was that Alan frames also had quite a reputation for breaking (deservedly or not) - something to do with lugs cracking, glue failing, and tubes coming loose.
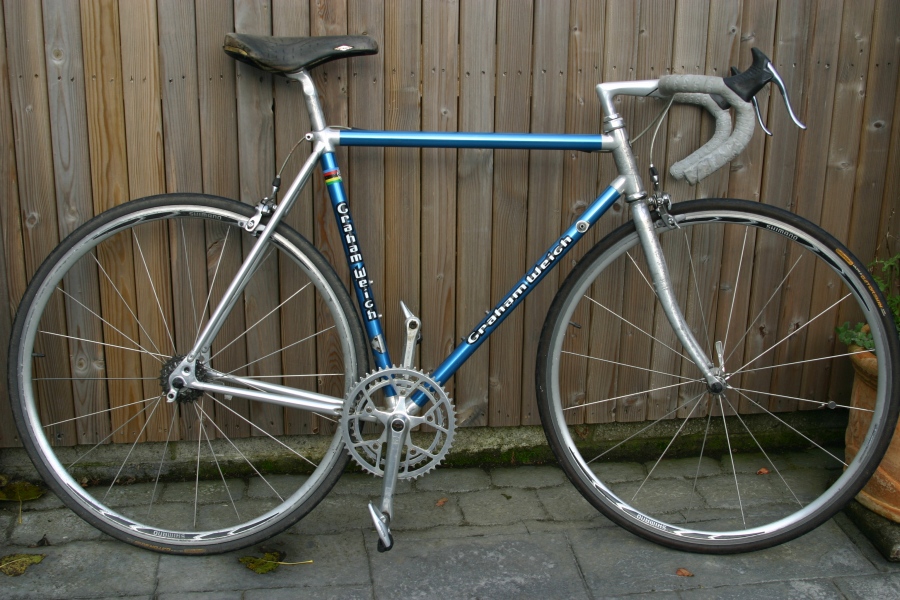
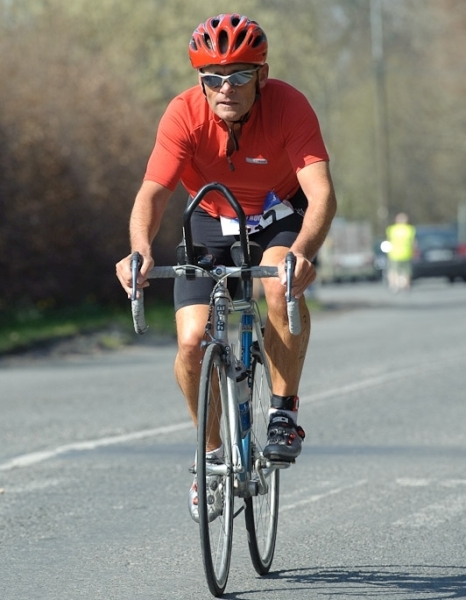
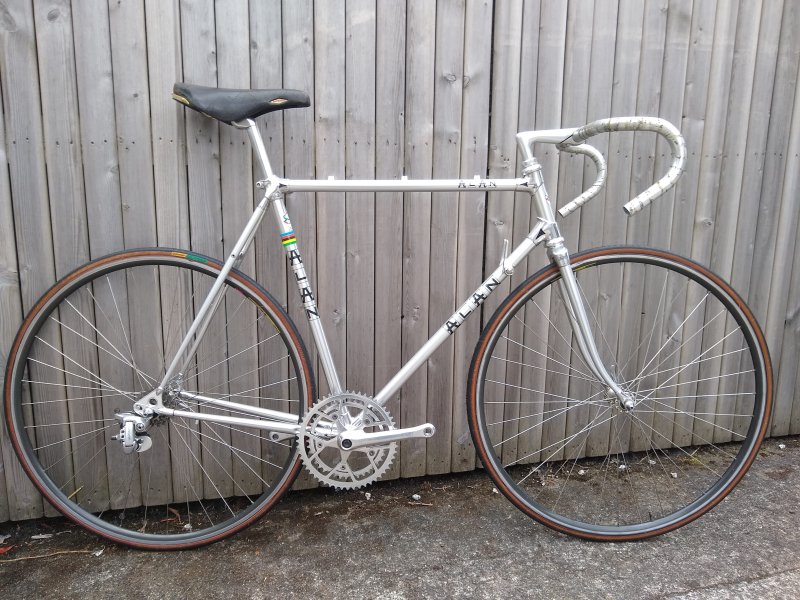
My Alan served me brilliantly however. My only bike (apart from a commuter bike) it covered many a sportive, quite a few triathlons, a Mizen to Malin (length of Ireland) and I used it for about 15 years modernising a few parts but always retaining it's classic downtube friction levers - even with old technology and probably due to my running training, I could keep up with anybody and anybody on new technology. I always enjoyed people expressing surprise when they got dropped by an old bike or someone showed their children the downtube shifters which the child had never seen before. But, eventually I moved on and the Alan became the fun bike, until it started to make strange noises from strange places in the frame. So in 2016, I retired it. And Ann, my wife, bought me another Alan frameset for my birthday, this time a proper classic Alan from 1980, which I decided to build up with the 1980s parts from my old Alan supplemented by period correct parts sourced elsewhere (chiefly Ebay). The modernised parts from the original Alan ended up on a Giant Cadex that got built up during coronavirus lockdown in 2020.
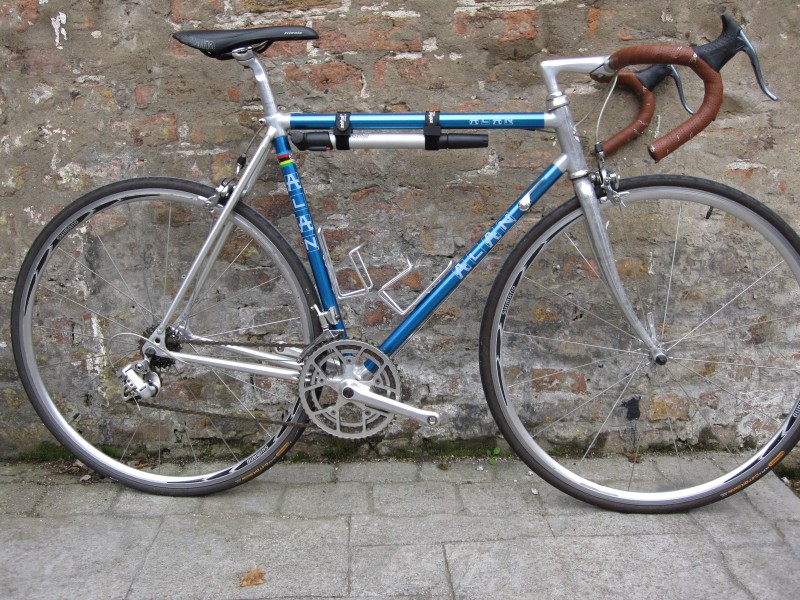
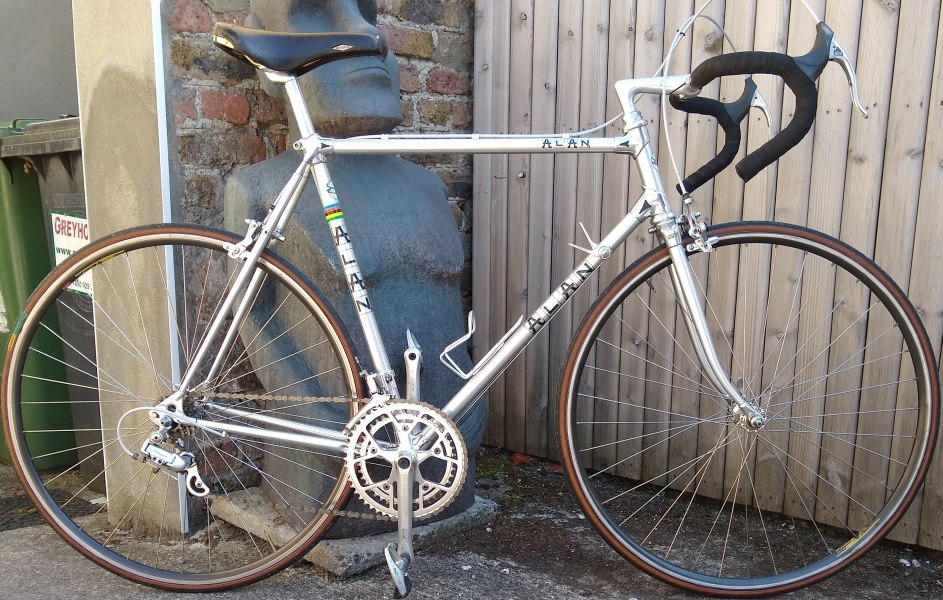
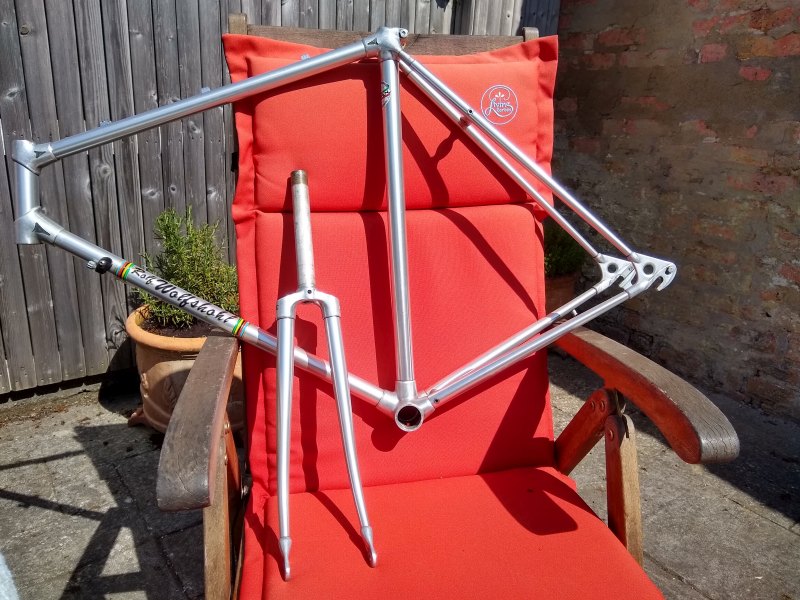
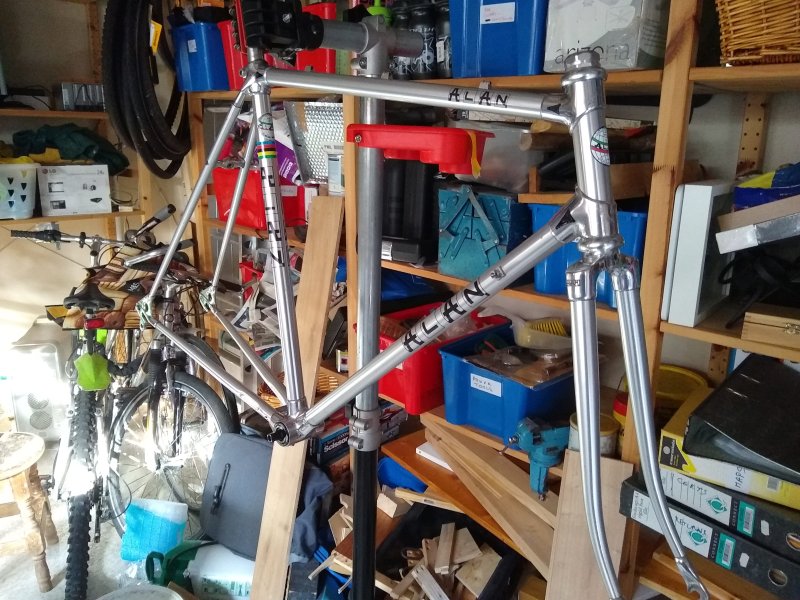
My Original Alan (Blue) and my new/older Alan SR (Silver) as completed
Cold Feet, Procrastination, and then the Coronavirus Pandeming and Lockdown
The very basic outline of the plan was :
- Clean up the frame while nothing was on it.
- Prepare the frame/headset and fit the headset. If anything went wrong here then scrap the project and the frame, otherwise proceed with step 3.
- Clean the components and build up the bike.
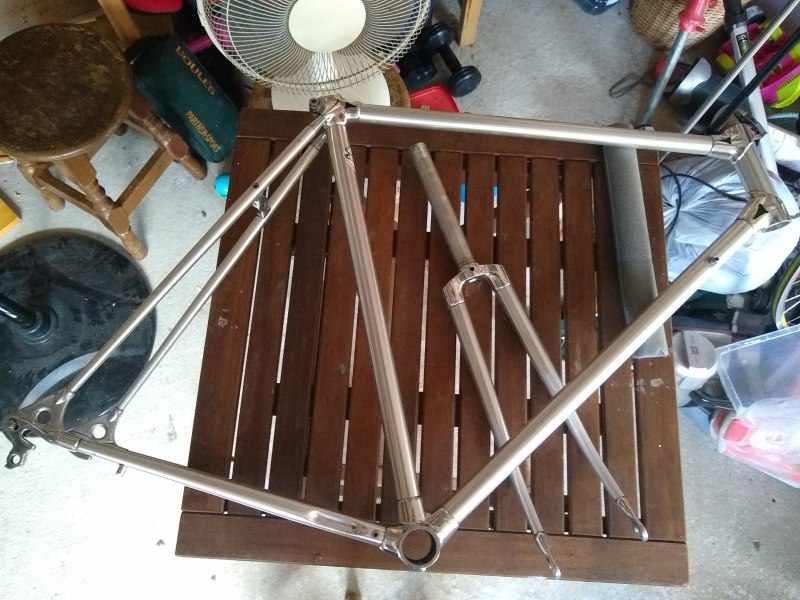
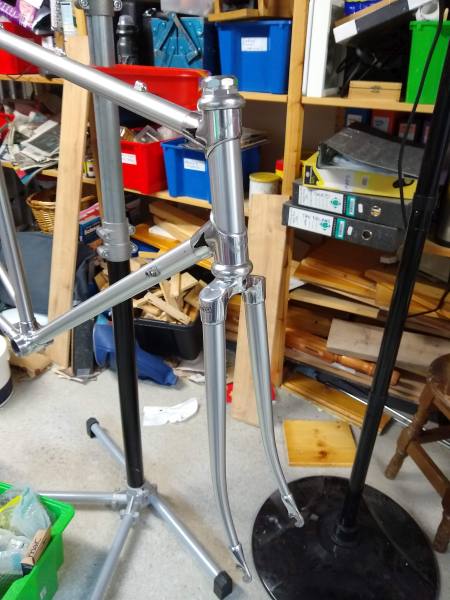
So I started with the Frame
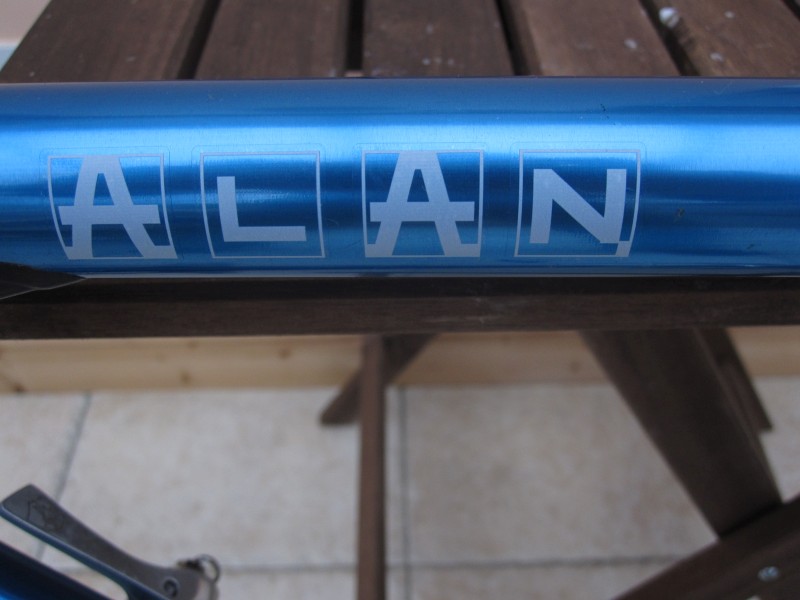
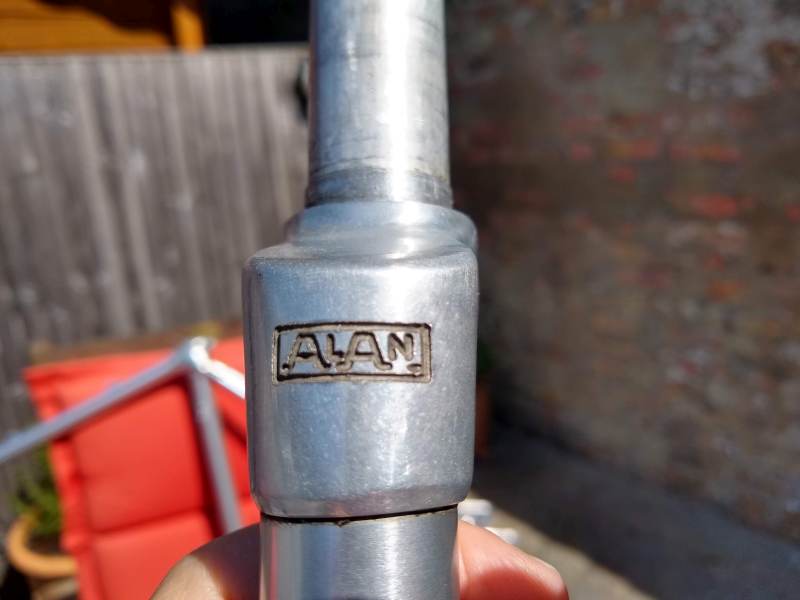
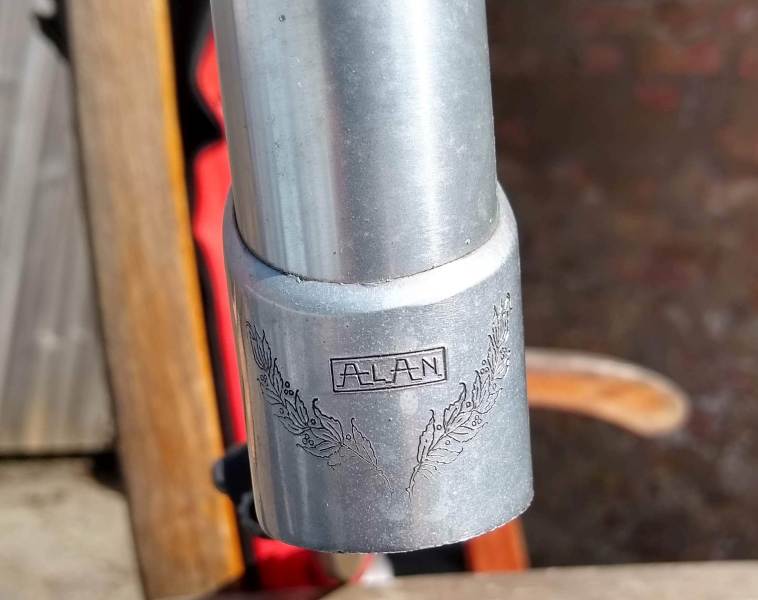
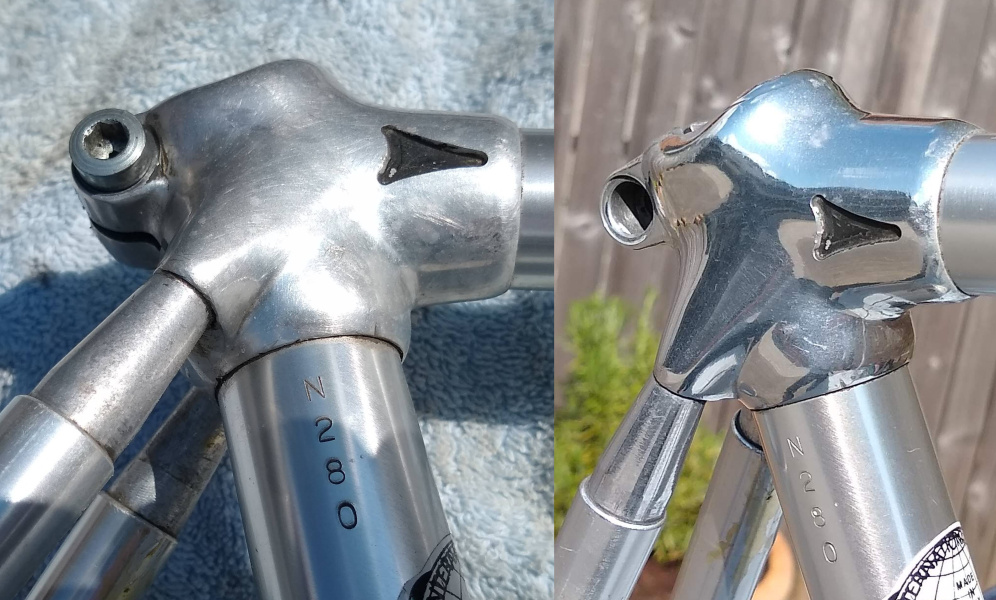
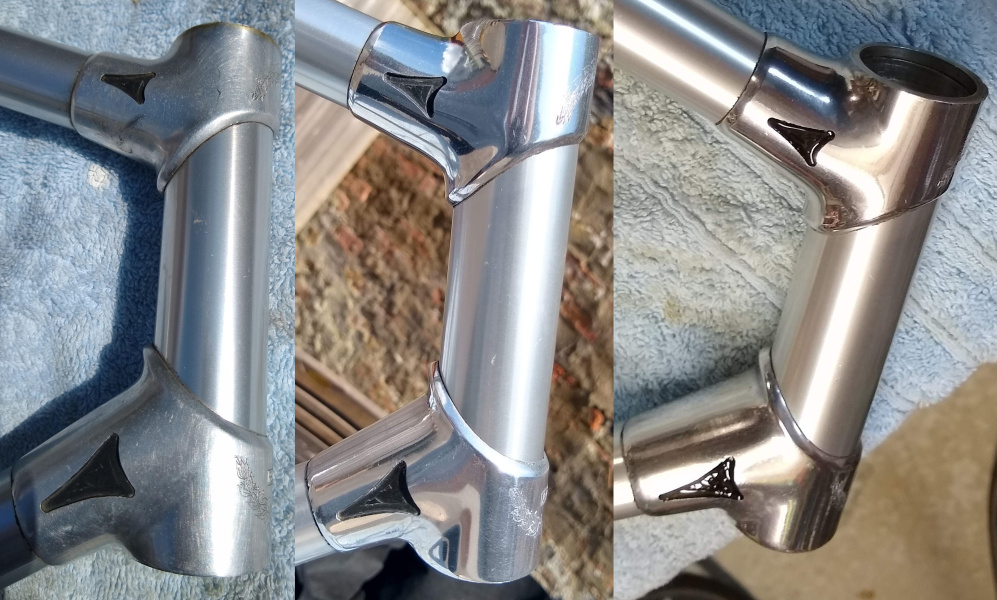
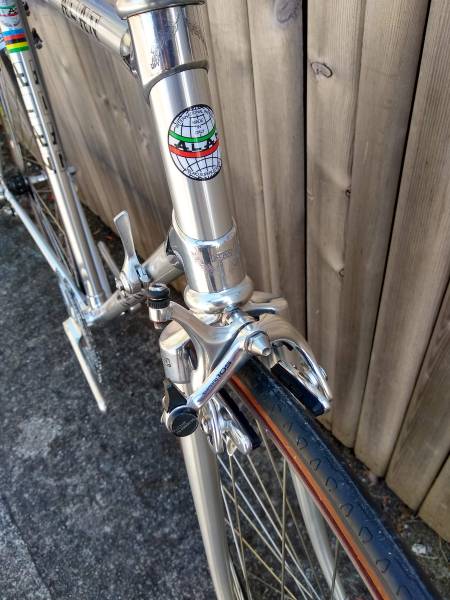
The stickers and glue It was a bit "grey" - natural anodised aluminium tubes and faded aluminium lugs. First I had to remove the "Rolf Wolfshohl" transfer and I wanted to badge it as "Alan". (Rolf Wolfshohl was a German cyclo cross and road racer with an excellent career history with 3 World Cyclo Cross Championship wins and winner of the 1965 Vuelta Espana - he set up a bike shop when he retired and this probably explains the branding). The glue behind the transfer nearly drove me demented. Trying to clean it off took me an afternoon. Any solvent just seemed to move the glue around and only lots of patience and effort and slow results got me anywhere. But after one day I was good to move on.
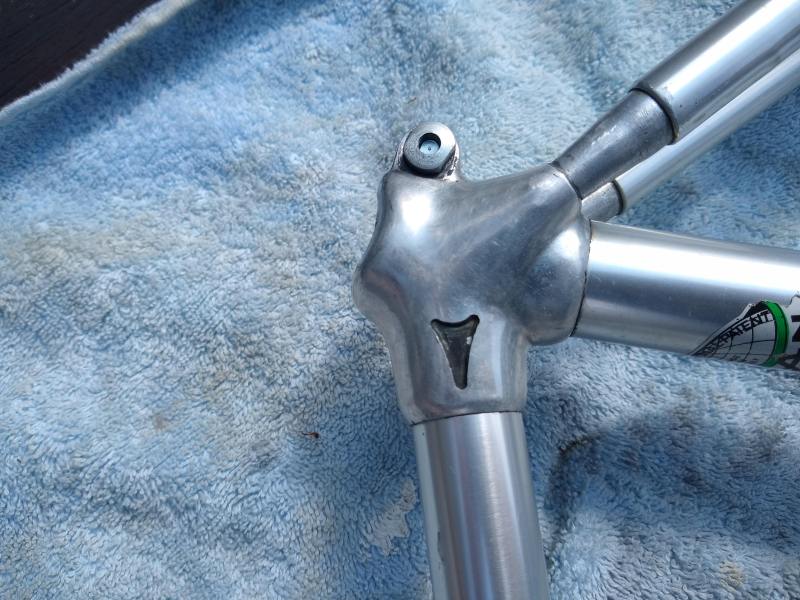
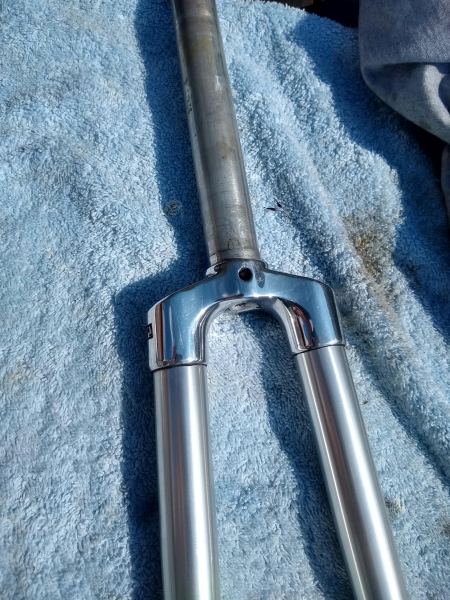
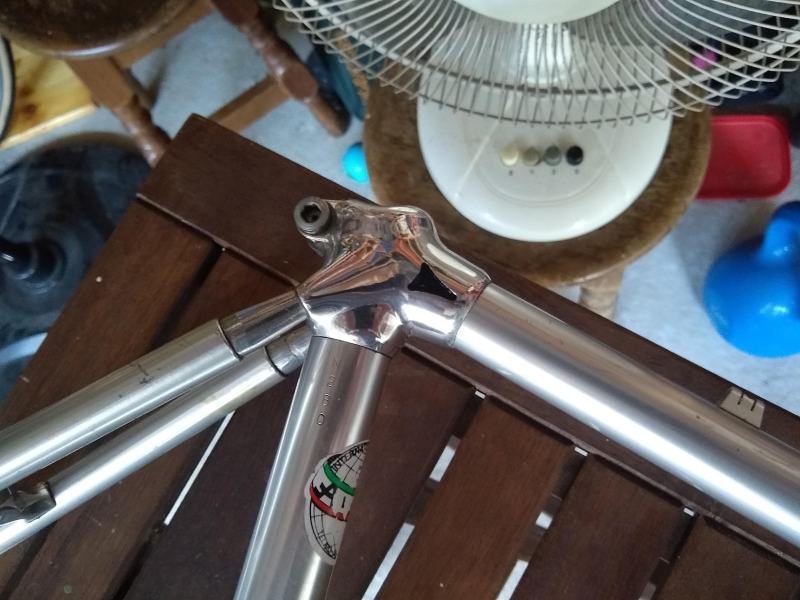
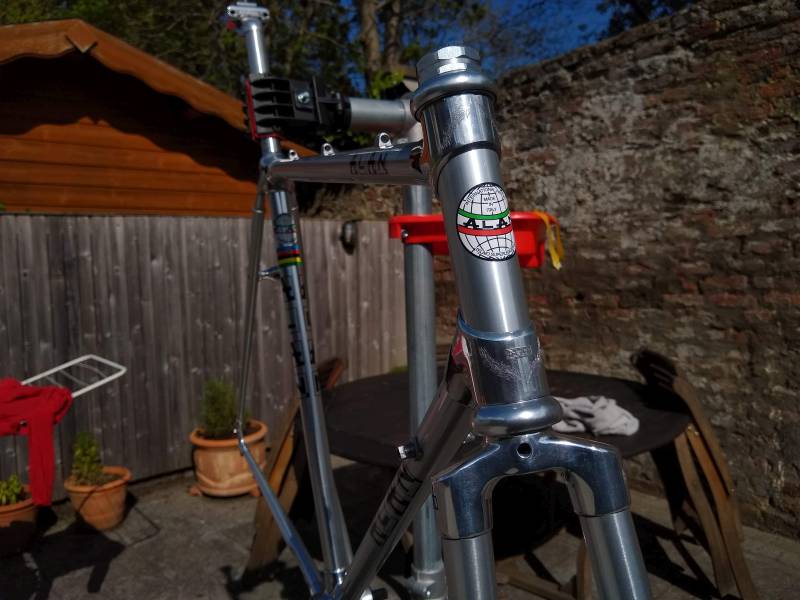
Clean and polish the lugs In contrast to the glue removal, this was a piece of cake. After my experience of cleaning and polishing gained on the Jan Janssen, I just started with T-Cut and Car Wax. Two rubdowns per lug with T-Cut followed by two coats of car wax and they were like mirrors. The quality of the aluminium alloy in the lugs must be much better than the alloy in the Jan Janssen, as it only took me about 5 minutes per lug to achieve excellent results. The following two days were taken to (a) paint the lug cutouts with Black Acrylic paint, and (b) apply clear coat over the black paint - the cutouts look like black jewels. This stage has been transformative for the frame and forks. It now looks stunning.
Frame (before and after cleaning) plus some closeups of the lugs.
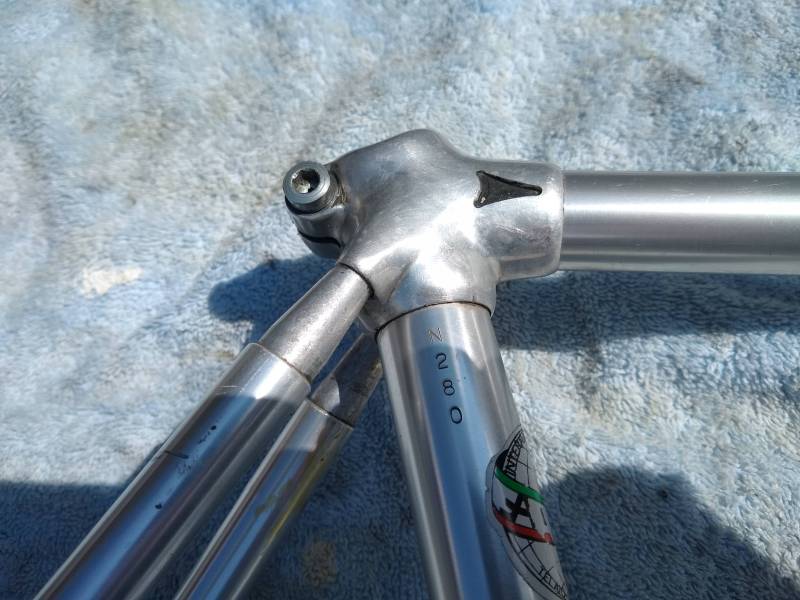
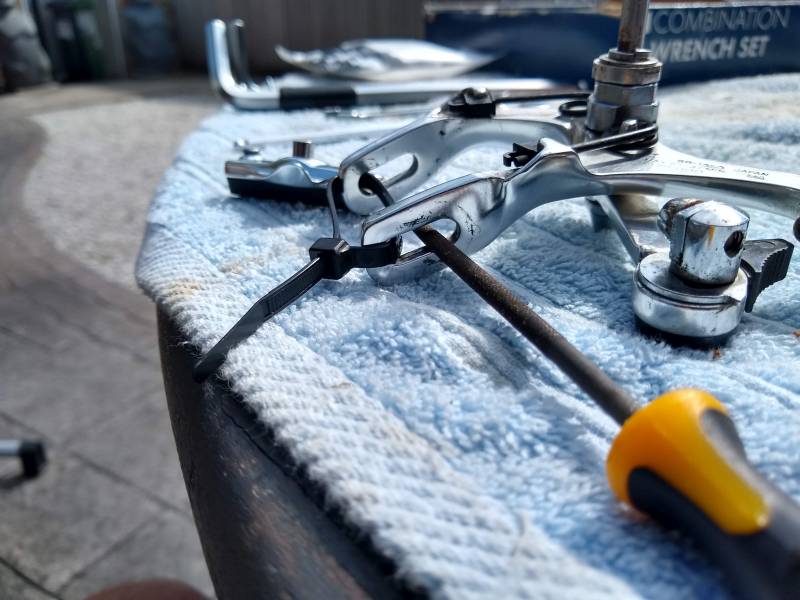
Tackle the headset dilemma
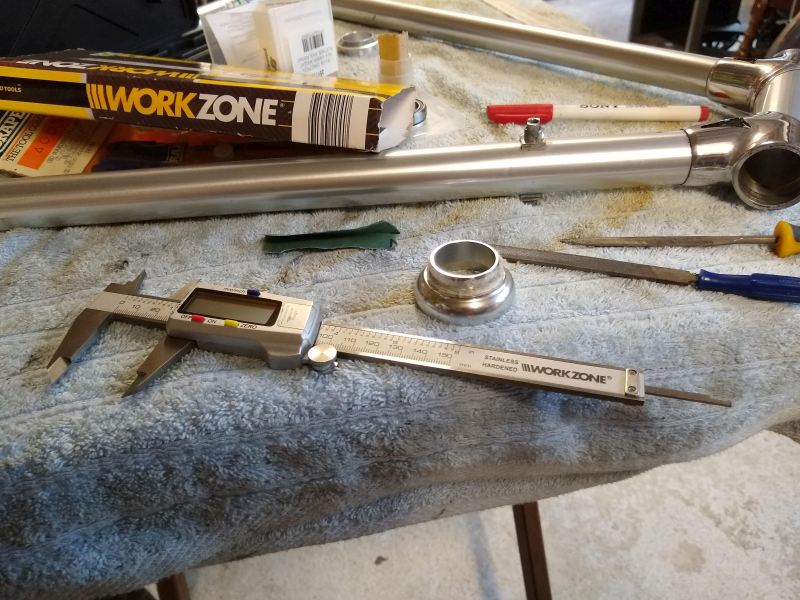
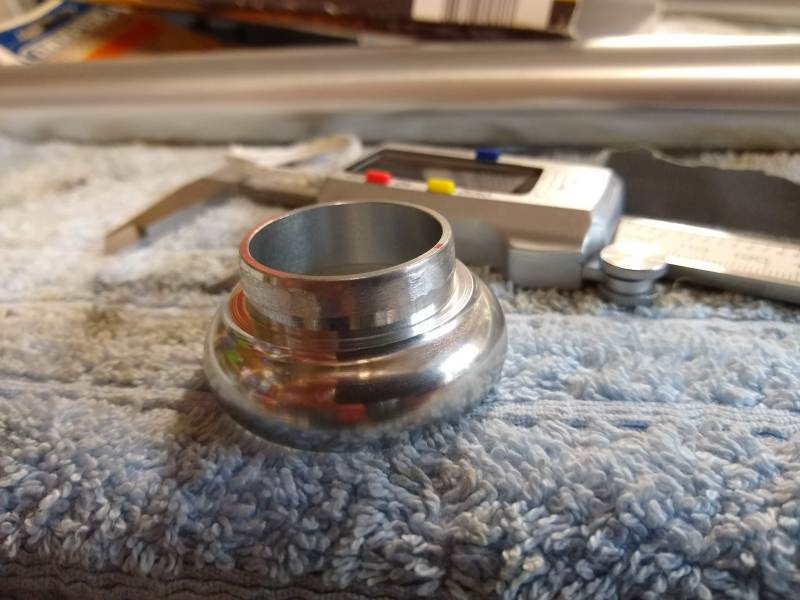
Having had a warning from a friend re the headset cracking a head tube lug, I really did some double and triple checking of dimensions and fitting. Apparently there are cases where standard headsets have been the cause of headlug cracks due to the dimension of the headsets being too tight for the lugs. Or due to the Alan's being designed for shallow inserts and most headsets having deep inserts. So I really checked and measured and checked again. My only previous experience of inserting a headset was when I built my Bamboo bike and I had to insert a steel headset into a steel headtube - the fit (which is supposed to be tight) was impossibly tight - I got the job done but only because I knew the steel would not break. Aluminium lugs with a reputation for cracking were another thing.
I determined that things were too tight, my headset inserts were about 5mm to long for the lugs, so the leading 5mm of the insert needed about 0.25mm "shaved off" the circumference. So I spent a few hours hand filing the inserts, measuring, and repeating until I got down to a closer fit. I calculated that if I went round and round many times, my progress would be even all the way round and I would retain a circular shape and not ovalise the insert. It seems I got things done reasonable ok as, along with my home made headset press (made for my Bamboo bike build) things went together as the should and rather easily. Although it will take a good cycle to prove this. I also filed the fork area where the crown race fits to clean the surface and ensure the race would fit without too much force (force and Alan, both bike and person, don't sit well together).
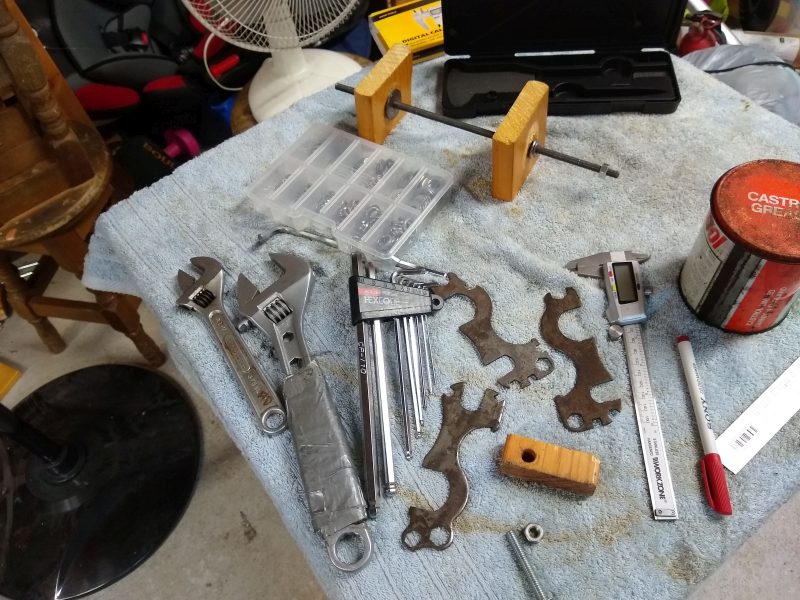
Headset - Filing and Fitting, and some of the tools.


Clean & Build Part 1 - Seat Post, Bottom Bracket, Decals, Stem, and Seat post again
Seat Post : I needed this to clamp the frame into the stand as I did not want to clamp directly onto the frame. What should have been something very simple turned into a messy task. The correct sized seat post (25.0mm) was rather tight and would not insert by much. The post had obviously been removed from a Vitus (same unusual dimension and with marks of the rear screw mechanism of Vitus seat post locking mechanism very apparent in the seat post itself). Key lots of cleaning of seat tube, filing of internal seat lug "rough edges/spots) and a bit of sanding of the seat post. Eventually it is inserting by about 12mm, and as the post is long, I think cutting 6MM off will allow it to fit the seat tube, and be correct height for me (leaving some spare for adjustments). Will not shorten the post until later.
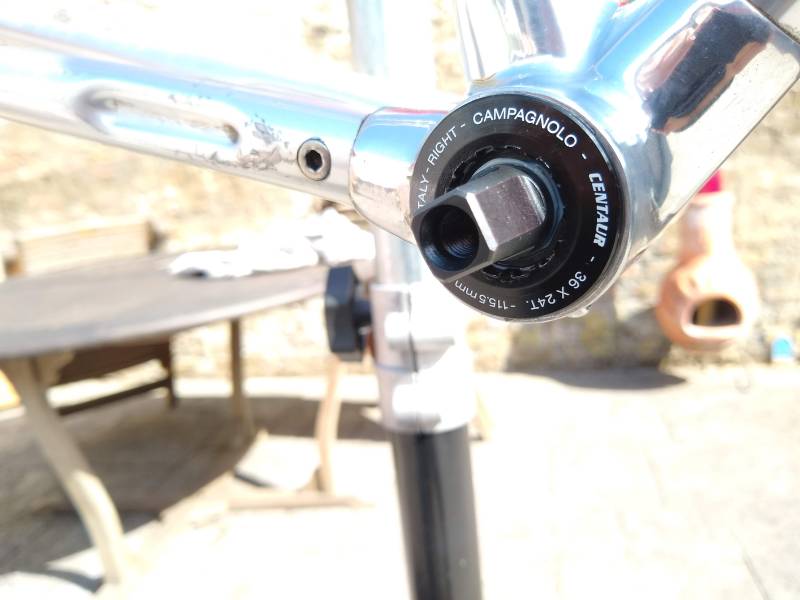
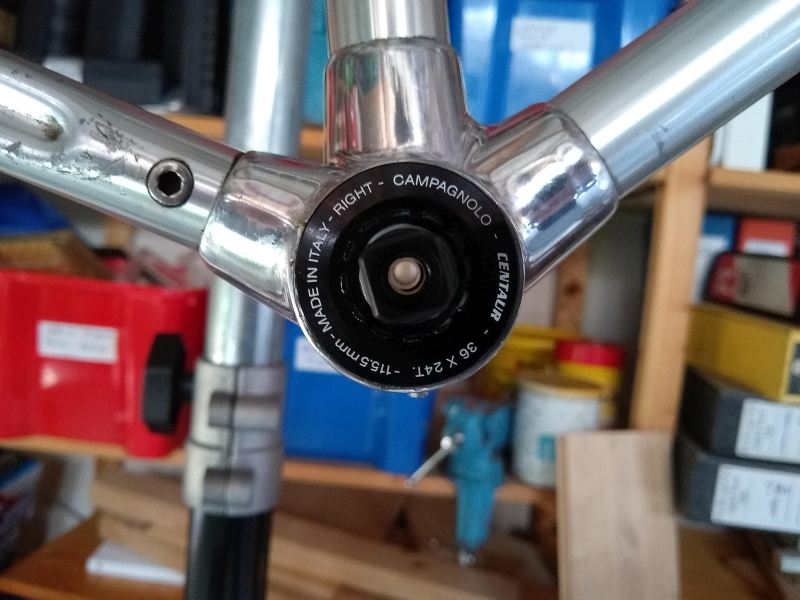
Bottom Bracket : Having a Campagnolo modern sealed BB is useful (bought since obtaining the frame) and also having the right tool to fit the BB is a delight. Cleaned the BB Shell internals a bit and inserted the BB as per package instructions and all is looking good. This made good use of my toolbox and rarely used large Torque Wrench and new (and rarely used) socket set with some large sockets - was pleased with having good and appropriate tools for the job.
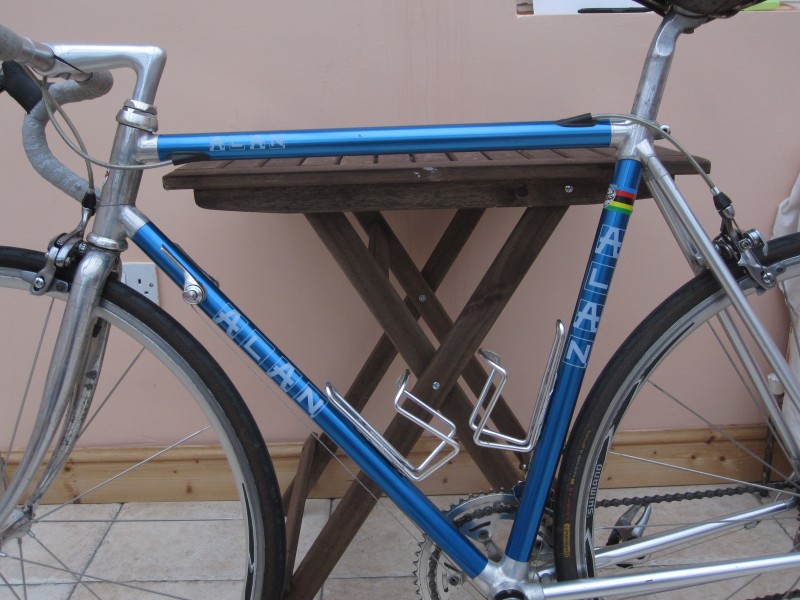
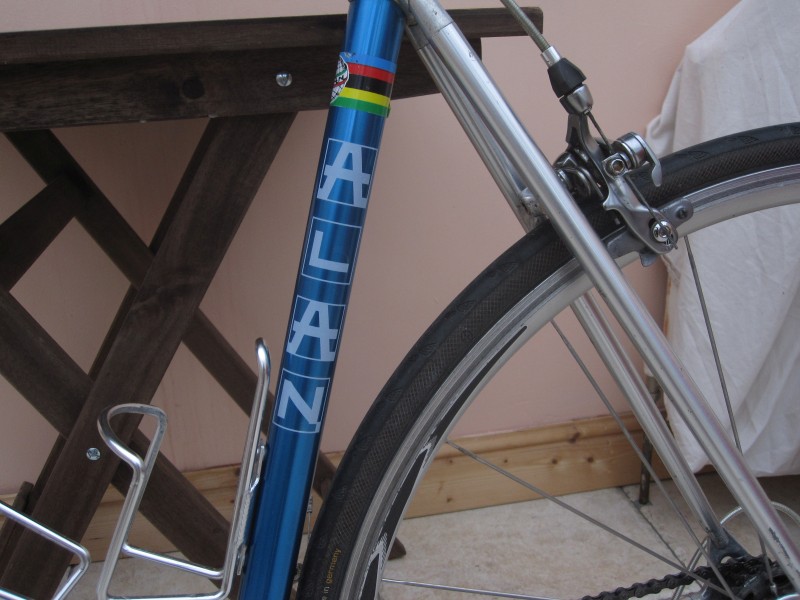
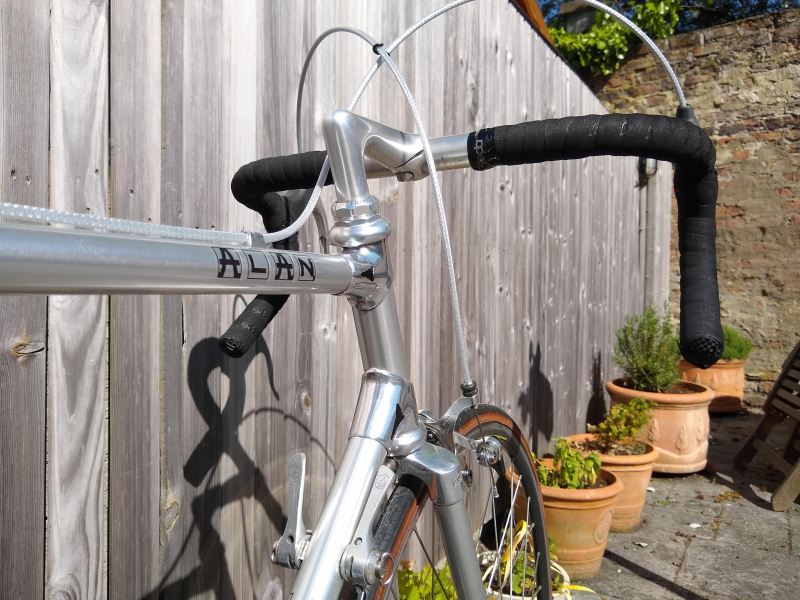
Frame Decals/Transfers : A deviation from my intended plan occurred when overnight I thought it would be better to fit the decals at this stage and then be in a position to apply a coat of polish to the complete frame/fork/lugs without having all components attached. So, I did. The transfers I had bought were easy to apply, especially as all the letters in "Alan" were connected and could be applied together (in a previous Alan bike transfer application, all the letters were individual which called for lots of careful alignment). A good outcome, and I think a smart idea. The following day, before commencing any other work, I took the opportunity to polish the frame before it got "cluttered" with parts which could make access difficult.
A quick stocktake of parts : Whoops! This highlighted that my intended Front Derailleur was a "Bolt on" FD, but the frameset did not have a mount for the FD and was designed for "Clamp on" FDs. I wanted to use the FD rather than an alternative as it was a link to my old Viking Triomphe and also the previous Alan I owned. So I needed a Clamp Adapter - ordered one from Ebay that evening - should be here in a week or so. The stock take was undertaken because of a suspicion of this problem, but also to try and identify if there were any other shortfalls in items....but it all looks good for everything else.
The Stem : I was reusing the stem (Cinelli) and Bars (also Cinelli) from my previous Alan on this new one. As a brief check, it seemed that the stem to fork steerer tube was a lot tighter fit than it should have been. So, after completing the decals/transfers I decided to investigate further. The stem would only insert into the steerer tube by about 3 cm, and then it stuck pretty hard. Cleaning and greasing made little difference. Neither part was bent or distorted and the internal of the steerer looked and felt ok. After much consideration I began to sand and file the stem but I was still having problems. I then noticed a scratched groove in the stem when I removed it after another failed attempt, and did some really close inspection of the inside of the steerer tube. About 6 mm from the top, on the inside there was a narrow raised strip with two other small lumps in line with this strip (all about 6 mm from top of tube). I hadn't noticed these before, probably because the grease was obscuring them. They looked to be inline with one of the threads cut in the outside of the steerer tube - maybe the steerer was cut down recently to fit this frame and had come off a bigger frame? I took a small round file and filed down all the protrusions and miraculously, the stem easily fitted into the steerer. Why did it take me so long to spot this - I had spent half the afternoon trying to solve this problem. I've decided that the next thing I'll do is the seat post - I'll get it to fit at my approximate height setting which will probably involve cutting and maybe polishing/sanding, but at least I'll get rid of another irritating problem and it should leave me with a clean build from there.
Seat Post (Part 2) : Moved this up the priority queue as I want to get all the tricky fitting issues out of the way before I begin the happy assembly bits. So, some very careful measuring of the seat post length when it got overtight in the seat tube, indicated that it was inserted 11-12 cm within the seat tube, and if positioned here it was 6 cm too long for my correct fitment (this included the planned saddle mounted atop the seat post. So I figured that 11 cm insertion was good enough, and I could cut 6 cm off the post. Did that, filed the cut area to apply bevelled edge (unlike the existing edge which also looked to be a cut down job) - and the post went in pretty good. Actually I'm not sure I really had to cut it, had I bevelled the existing base of the seat post (or pushed a bit harder, maybe) the longer post may have worked. A pity I was a bit late figuring that out.
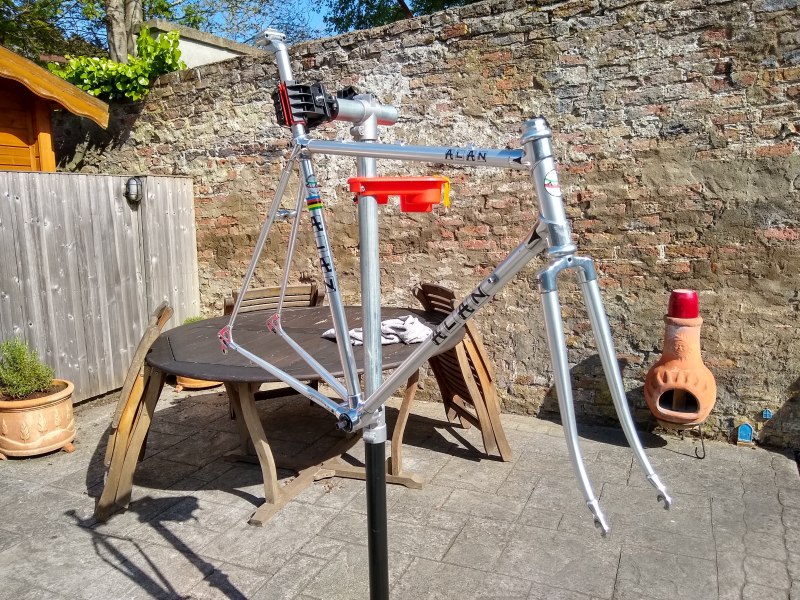
Stem and Seat Post - In Place :
Cleaned up and polished these parts (especially the visible bits). Applied non seizing grease to these parts and have them in place, subject to minor adjustments of the seat post after the saddle is installed. I cannot do this final adjustment until the bike is finished as the seat post is where I attach the bike stand clamp.
Seat Post, Bottom Bracket, Decals, Stem, and Seat post again.
Clean & Build Part 2 - Cranks, Gears, Brakes, Wheels, Saddle, Bar Tape, Cables & more
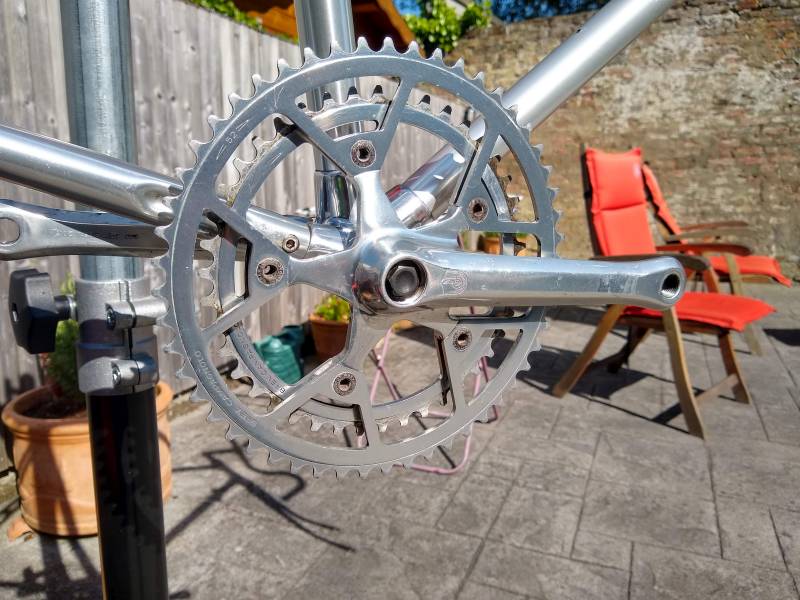
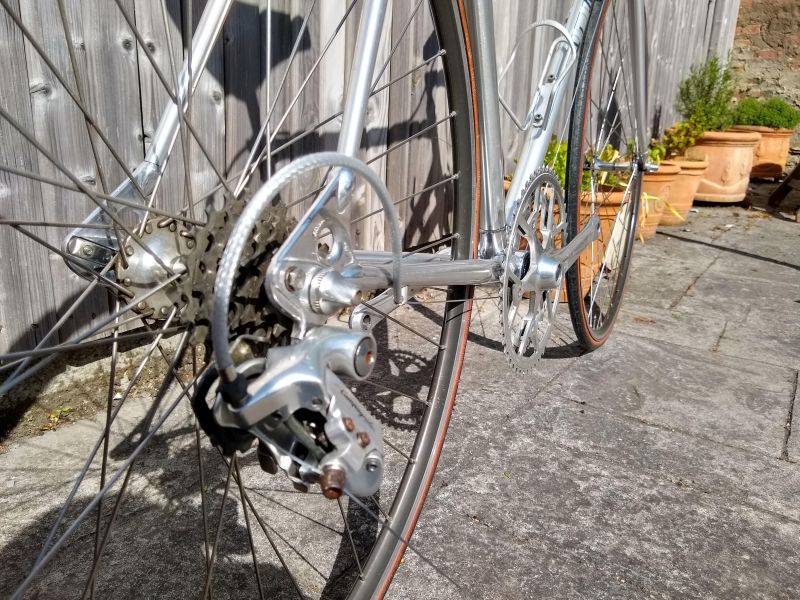
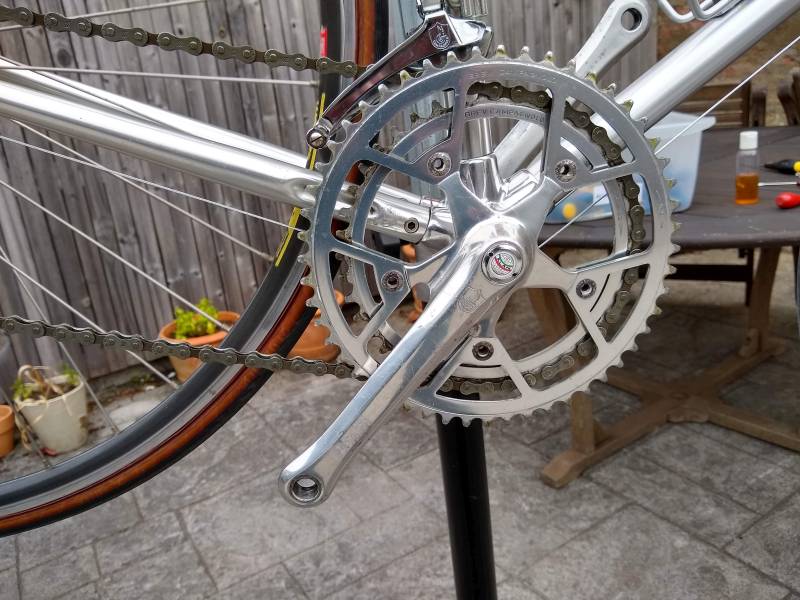
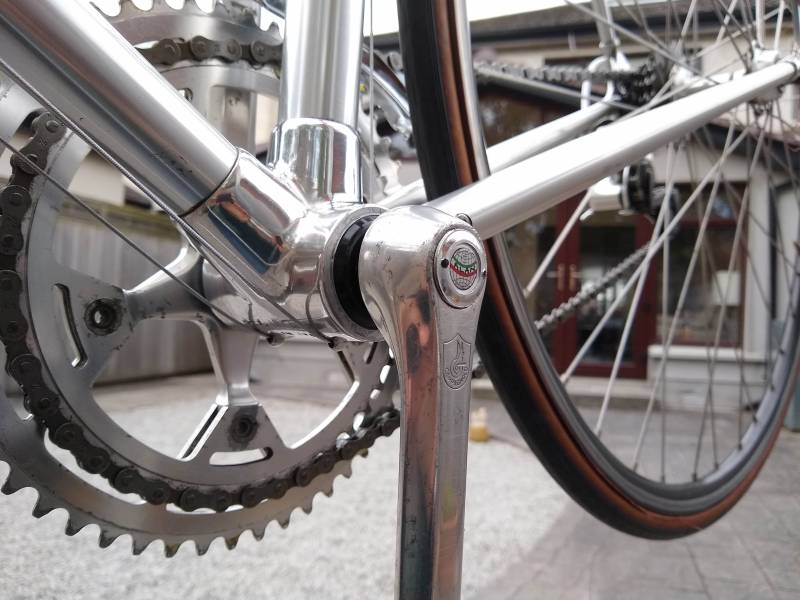
Crankset : This is Campagnolo Triomphe from my previous Alan and from the Viking Triomphe I owned before that. A lot of sentiment in this component and although Triomphe was a basic Campognolo groupset, the crankset is beautiful - the spider pattern is pretty unique. I used my usual technique to clean up the parts, T-Cut (a mild car paint cutting compound) followed by Car Wax. They came up pretty good although there were some scratches and salt(?) corrosion marks which would not come out and just indicate the long use I put those parts to. Before fitting I had to scramble around for BB spindle bolts, and unfortunately could only find ugly black ones. Thinking I'd have to make up something to hide the ugly bolts, I snooped Ebay and was lucky to find some "Alan" badged dust caps - so I ordered them. They're only hard plastic, silver coloured with the Alan logo, not vintage, but we'll see what they look like in real life - can't be worse than the ugly black bolt. Finished polishing the crankset and put it onto the frame.
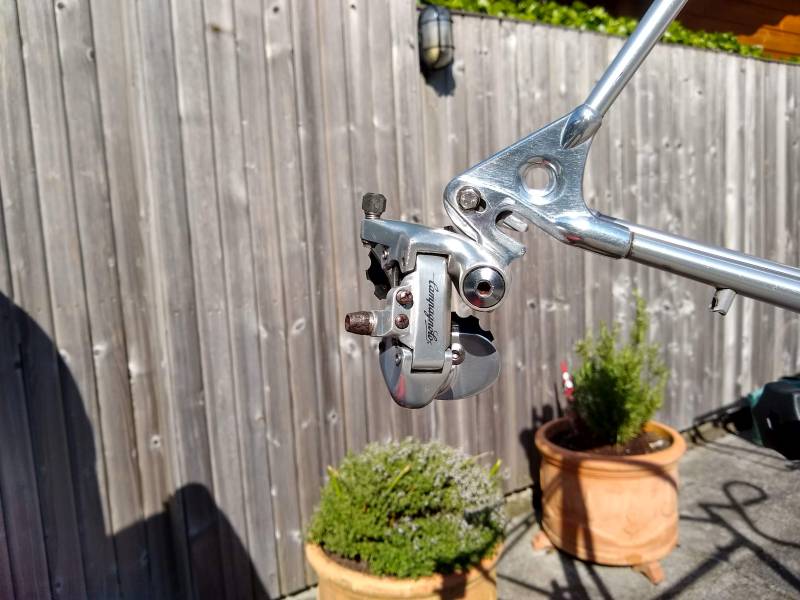
Gears - Levers, Front Mech, and Rear Mech : These had a long life on my previous Alan, with the levers and the front mech also coming from the Viking Triomphe. The rear mech was a 199x Campagnolo Chorus upgrade when I upgraded the bike from 6 to 7, or 7 to 8, speeds as I felt the original Triomphe mech would not handle the increase in gears. A quick clean up and polish and these were added to the frame (the Front Mech had to await the arrival of the clamp for mounting on the frame so that happened a few days later).
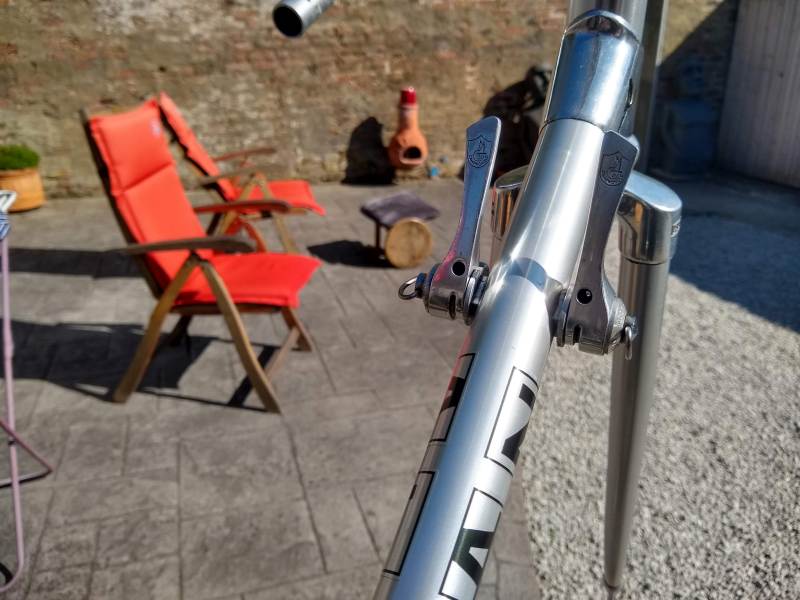
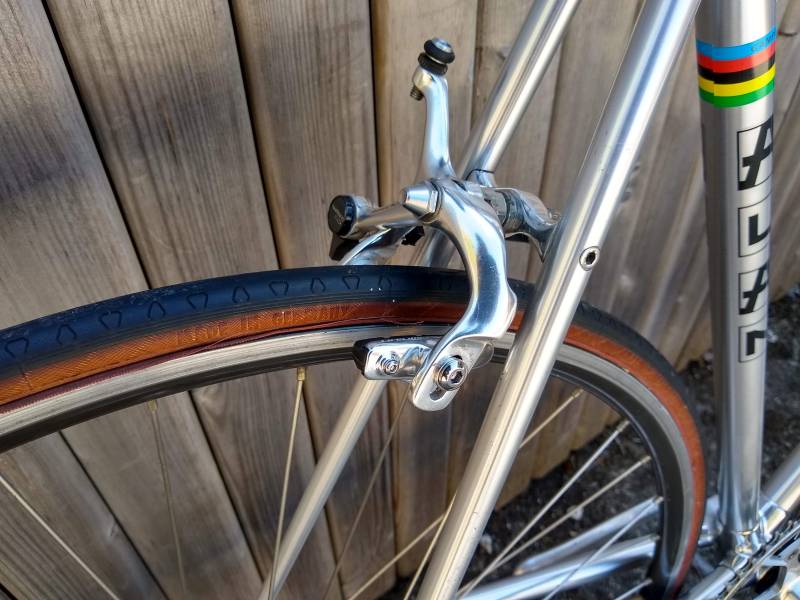
Brakes - Calipers and Levers : I bought these on Ebay, because I liked them and they turned up at the right time and were at a great price. First gen Shimano 105, clean and simple lines, dated 1986 (I really like a lot of the Shimano stuff from around this era). They are non aero (as they should be for this Alan) but they have the bonus of using Shimano's SLR technology (think they were the first to get it) - weak springs in both lever and caliper giving a lighter feel to the brakes.
Went to fit the calipers first, a bit of cleaning and a little lubrication, but....the locknut on the rear caliper would not loosen - cue lots of WD40 and an overnight delay. Front caliper seems ok, but it got some WD40 too. Interestingly, when snooping velobase.com, it seems this model only came with recessed nuts - mine has old fashioned locknuts (maybe a previous owner doctored them). Also, the Shimano fit brake blocks & holders (admittedly thoroughly modern and made by a 3rd party) don't fit the calipers. The mounting bolt is too wide for the slot in the caliper. I've had this problem before (think with similar era Shimano 600 brakes). Will need to file a tiny amount off the caliper slots, but as I only want to do it at the correct position for the brake block and wheel rim, I need to fit the wheels to check the position.
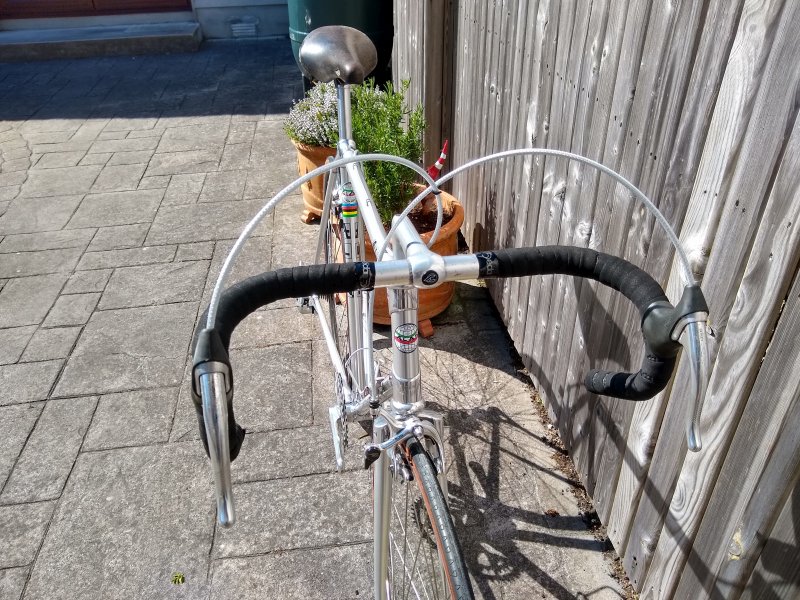
Fitted the levers to the bare bars to get an indication of positioning. Marked the bars with the location points for the clamp, and the plan is to tape the bars with the levers removed but the clamps in the desired place. This should make for cleaner tape lines. That's the plan anyway and will be part of another day's work.
While considering the delay and waiting for the WD40 to work, I decided to fit the Saddle and wheels. Saddle is Rolls by San Marco, and the wheels are Shimano 600 Hubs fitted to Wolber Rims - these hubs are brilliant (already have a pair on my Peugeot). The bike is really beginning to look like a bike.
Back to the calipers the next day, the WD40 had worked it's a miracle and the stuck locknut came off easily. But after cleaning and lubricating, the nuts (for both calipers) would not go on far enough to tighten to the bike frame. Started looking for washers in the bike bits bin, and came across a couple of MTB brake blocks with washers and nuts - these, including the nuts, fitted the brake calipers spindle/bolt. Decided to replace the nuts with these, also worked through some washers to fit, plus a couple of locking washers to make sure everything stayed tight. Mounted the calipers, without blocks, and hand held a block between the wheel rim and the caliper (squeezing the caliper by hand) to see the precise location of the block & mounting bolt in relation to the caliper slot. Marked with a marker. On the off chance that the front wheel/back wheel might have had different relationships between caliper and wheel rim, I checked the measurements for both front and back independently. Then I simply took a narrow circular hand file and widened the caliper slot very slightly at the appropriate spots. It was then easy to insert the blocks, install the calipers and adjust the block positions. Brakes are now all done and will now move onto bar tape and permanently installing the levers.
Bar Tape : Black Dedaccia Cork style tape. Decided to do top down taping of the bars. It the cleanest looking and more period correct (even though the tape is not). Marked, with marker the brake lever clamp positions on the bare bars (the levers had previously been carefully set up in the correct positions for me). Then, to be sure, I used sticky tape to keep clamps in the correct position and this enabled me to unscrew the levers from the clamps. I now cut and applied the tape down the bars and around the clamps, finishing and the ends of the drops and applying the bar end plugs. I simply screwed the brake levers back onto the clamps and I had a great looking tape without any messy bits around the brake levers. I'm very pleased with this outcome and the process I used.
Bottle Cage : Rather than spending time cabling the brakes, I just fitted the bottle cage to the frame and paused for another day.
Brake & Gear Cables : Email and Text from the courier that the clamp for front derailleur would be delivered between 1.00pm and 2.00pm spurred me into getting the cabling started today. Began with the brake cables, cutting the outer (steel braided - lovely) cable for brakes and setting up the brakes - very easy although being single pivot there is a balancing act to getting both sides of caliper to close and open equally. Front brake was a little problematic until I tightened the pointy nut at front of the brake a little, then all was well. I then cabled up the rear derailleur and used a bit of the braided brake outer cable for the loop to the derailleur itself. All neat and tidy. At this stage it was after 4.00pm and no sign of the courier - but with Covid-19 and lockdown and the surge in online ordering I think the couriers are swamped, so rather than getting upset, I just packed up for the day. I think I'll have to make up a shim for the clamp anyway and it's probably better to start the day with that sort of a problem rather than finish the day and rush it. Until tomorrow so.
Front Derailleur Clamp - Finally : The clamp arrives, no apologies from courier for the broken promise yesterday. So, check it for size (fit around the down tube) and it's perfect, no need for shims. Bolt the derailleur to the clamp very firmly and set about mounting the clamp to the down tube. While trying to get the correct clearance between the derailleur's outer chainplate and the big ring, I notice that the derailleur is stuck in the big ring position - it should be in the small ring position and kept there by it's spring tension. Something's not right and it turns out to be some corrosion/ingrained dirt in the pivots and between the pivot surfaces. Cue lots of WD40 and a bit of forced movement of the derailleur. After a few minutes, I decide that it will still be usable, but I need to give it some more WD40 and then follow up with some lubrication - that means I'll have to leave it overnight and lube it tomorrow.
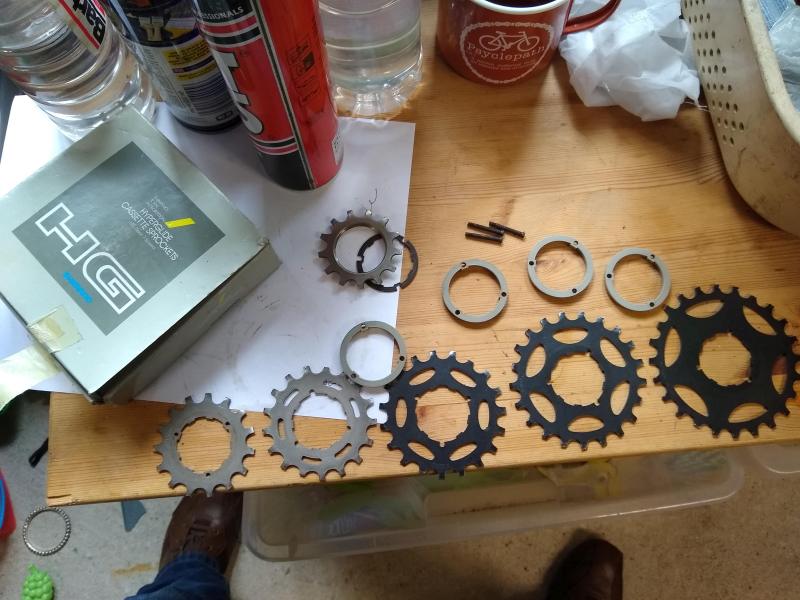
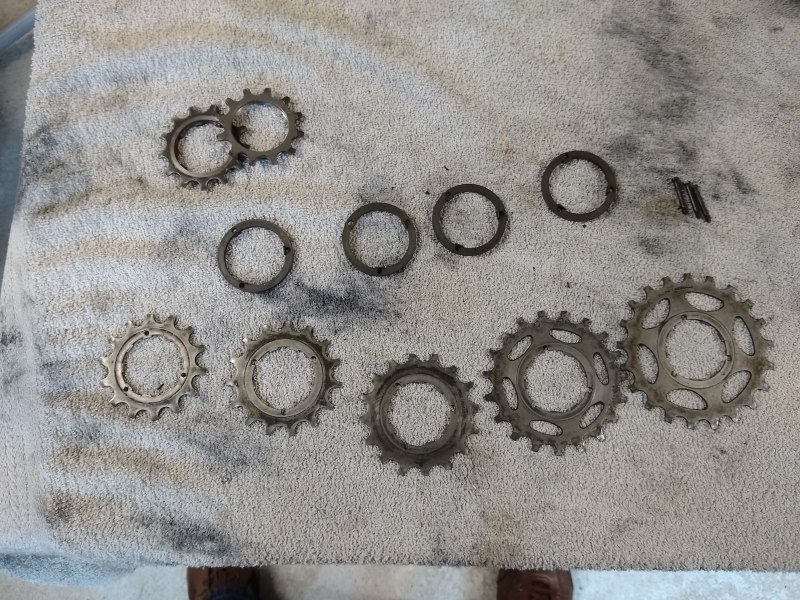
Cassette Detour : With a bit of time on my hands I had a brainwave - the cassette on the wheel is a 7 speed, UniGlide, and is 12-21. Now 21 is not going to get me up many hills with my 42 up front, but I do have a few other UG cassettes (all 6 speed) one on a bike already and one NOS and spare. And these have a 24 and 26 as their largest cog. Thoughts of switching to a 6 speed 13-26 are appealing, but ultimately dashed when I try to take the 7 speed off my chosen wheel - it won't budge and I'm afraid of too much force damaging the spokes/wheel. A bit of inspection suggests that the 7th cog (smallest) which doubles as a lockring in the UG system is glued on (glue in the threads). Perhaps a previous owner was fitting a 7-speed to a 6-speed hub and decided there were too few threads engaging and applied glue to make sure there were no problems. So, 42 x 21 it is - hills or no. Good job this bike was planned for coffee shop trips, showing off, and not for my mountain routes.
False Start : My WD40 treatment of the front derailleur worked a treat, so some TFT lubricant spray and everything was good for assembly. Easy to fit. Then added the chain, also an easy job. Adjusting the gears was an easy job as they are downtube and friction - always easy. Then I got excited and realised I could get a quick spin up and down the road, so grabbed a pair of clipless pedals, fitted them and ran out the front. Hopped on the bike and.... I had not tightened up the stem and very nearly fell off. That calmed me down a bit. Normally when I complete a build, I systematically go through all the fittings/bolts/nuts/allen bolts etc., and make sure everything is tight. It's my standard procedure. This one time I skipped it - because I was rushing to "get a go" and dinner was about to be served.....what a dumb thing to do. So I packed everything up, had my dinner and will do the systematic check tomorrow, and do it properly. Lesson learned and no harm done.
Cranks, Gears, Brakes, Wheels, Saddle, Bar Tape, Cables.
Final Checks and Testing
As a result of the previous aborted test, I went very carefully through my final check of all components/bolts etc, reviewing for tightness. Apart from the aforementioned stem, which I tightened, there was also the headset which required tightening too - I'd set it up while it was on the bike stand, now that it was on the ground it had to be readjusted. Other than that there was nothing necessary, although I did mess around with the front brake for a while just to get it working better. Then I took it out again for a test.
First Test - the 400 metre test : Up and down a flat road a few times, checking gears and brakes. All was good except for one thing - chain skipping on the rear cassette. Very carefully I found it skipped frequently and under very little load in the cogs with 17 & 16 teeth, and less frequently and only with a bit more load in the 15 tooth cog. These are cogs 3,4, & 5. Cogs 1,2, 6, & 7 seem fine. Most likely worn cogs - sort of proven by measurements taken from teeth points on the various cogs, and by comparing with another UG cassette which is in NOS condition. Given that the UG cassette has proven impossible to remove, making replacement a challenge, I need time to think about this and/or waiting until the bike shops are free to open in this coronavirus lockdown. Either way, not something that can be fixed today or tomorrow, and giving me some time to think about it further.
Meanwhile - A Bit of Bling : The dust caps on the cranks were missing (lost through the years I suppose) and proper replacements were going to be expensive - I did look. So I decided on a cheat, modern replacements emblazoned with the Alan logo. Cheap plastic jobs, but readily available on Ebay, A quick purchase and delivered very fast, these were added to hide the ugly exposed crank fixing bolts and are actually pretty good looking - I'll keep them.
Change of Cassette : You know what they say "Necessity is the mother of invention?" Well this is a close enough proof of that. I had a worn cassette, stuck on the wheel, so my Alan was not usable nor even properly testable. The bike shops were closed due to the pandemic lockdown, so I could not get a bike mechanic with tools & tricks to sort this out. Even though the bike shops were scheduled to open (and they did on the day I solved this problem), I was keeping unnecessary contacts down to a minimum and was not going to visit a bike shop. So, if the problem remained then it was going to be a problem for a long time. So I decided on a two pronged plan of attack. First, scrape out as much of the blocking dirt and/or threadlock that I could, and pump in lots of WD40 to the threaded part while trying to avoid important things like bearings etc, and second, try to free up the cassette with my two chain whips again. If the second step failed, then build some extension levers for the two chain whips out of some wooden planks I had (by rigging up some bolts to clamp the tools to the planks) - I did not have much confidence in these wooden levers, but it was better than doing nothing.
Lots of scraping dirt, followed by three applications of WD40, and an overnight break for soaking, and I approached the next stage with some trepidation. Positioned the two chain whips as per the standard approach - nothing. Still no budging of the lockring. A couple of more attempts using cloths as cushions for my hands and still nothing. Then while measuring up some angles in prep for making levers, I put the tools in a different location to each other. I had previously located each tool opposite to each other (e.g. at 3 o'clock and 9 o'clock) and used body weight to push down on both tools. Now I set them to 11 o'clock and 1 o'clock to see if the levers would interfere with each other (part of my design considerations for the construction of extension levers). When I rotated everything by 90 degrees and had both levers set one just before 3 o'clock and the other just after 3 o'clock - put my foot on the after 3 o'clock, my two hands on the before 3 o'clock, and while pulling hard I pushed down very hard with my foot. Bingo. The lockring cog came loose.
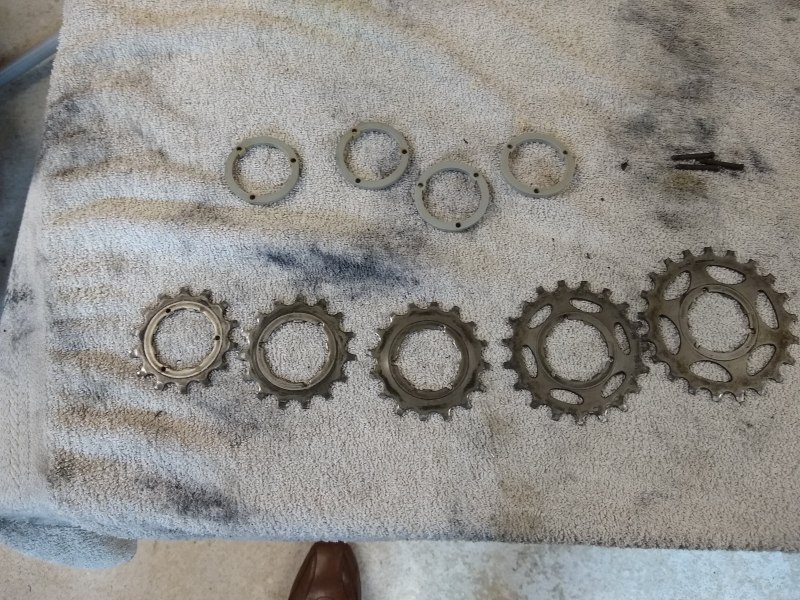
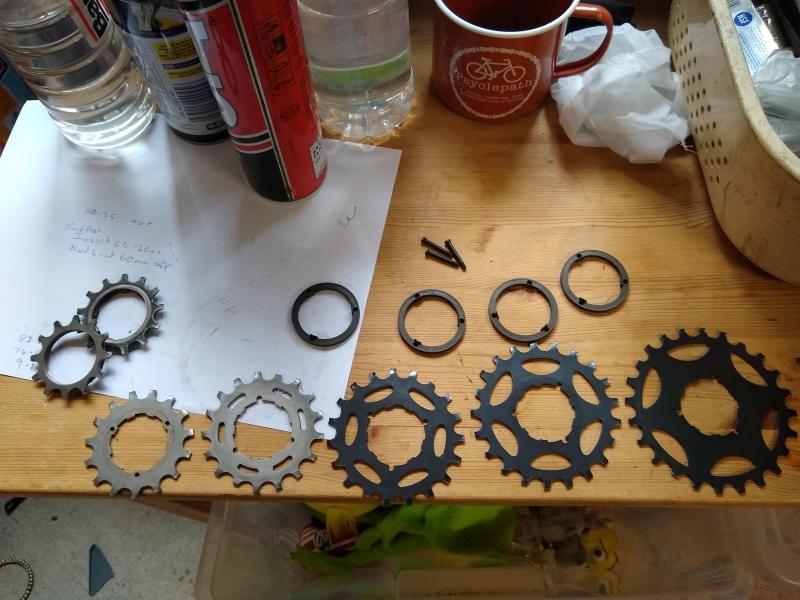
After that it was easy, I fortunately had bought a NOS 6 speed UG Cassette on a local articles for sale website a few years ago, thinking someday it would be useful. I had thought about using it but my hub was 7 speed. However, the good thing about UG cassettes is that the cog thickness is the same across all speeds, it is only the spacer thickness that varies. Both 6 speed and 7 speed cassettes have 5 speeds joined together (by screws) and the extra cog(s) have built in spacers. So, I assembled a 7 speed cassette with the larger 5 cogs of the 6 speed and the 4 spacers of the 7 speed, and used the smaller two cogs from the 7 speed to make up the 7 (these two smaller 7 speed cogs were good and did not skip on the initial short test. Put this setup back onto the Alan and on the bike stand all was well - needs to be tested on the road. Now I have a 12-24 on the back - a lot more forgiving than the 12-21 that was the original. As a by product, I reassembled the 6 speed cassette with the larger 5 cogs from the 7 speed and the four 6 speed spacers and the locking cog from the 6 speed. To make this usable, I used another handy feature of UG cassettes, the cogs are reversible (identical teeth profile going forward or backwards - unlike HG) and I reversed the three worn 7 speed cogs - the cassette should work....but I won't know until I try it and that will have to await a future bike project with a UG cassette problem, if I ever come across a problem like that again.
And the result? After a few hundred yards test, all is well. All gears are working smoothly and no chain skipping. It all feels as it should. Now it needs a longer and a little more hilly test. That will come in a few days when I get some good weather and don't need to do any serious training. Hopefully that will confirm everything and also my set up on the bike.
The first shake down ride : Took it out on a fine (and warm - unusual for Ireland) day for a flatish spin with a few hills. The bike was flawless except for : The rear shifter & the front derailleur inner stop setting - that's all. It was so good, I decided to take a hillier route home with a few short 8% climbs. The bike was really well balanced.
The inner FD stop setting was allowing the FD to stop too close to the frame and necessitated to much feathering/adjusting when spinning. This was easily adjusted afterwards.
The rear shifter was a bit more problematic. I have owned this component for a long time and over the years had to adjust it many times. I think the inner friction parts (the bits which make the lever stay in place) were worn. The lever was slipping slowly from it's set position and causing the bike to shift up a gear unexpectedly. This occurred most frequently (and almost immediately) when getting out of the saddle and putting a lot of pressure on the pedals in low gears. I think also that using the shifters which were designed for 6 speed on an 8 speed setup required a greater range of movement of the shifter than it was designed for. The solution was (after much trying and reviewing of other ideas) to add an extra washer (machined a bit to fit) behind the shifter boss mounting which provided for more gradual adjustments of the tightening screw, and also some threadlock on the tightening screw to ensure it did not loosen with shifter movement. Another test ride will be needed to prove this solution.
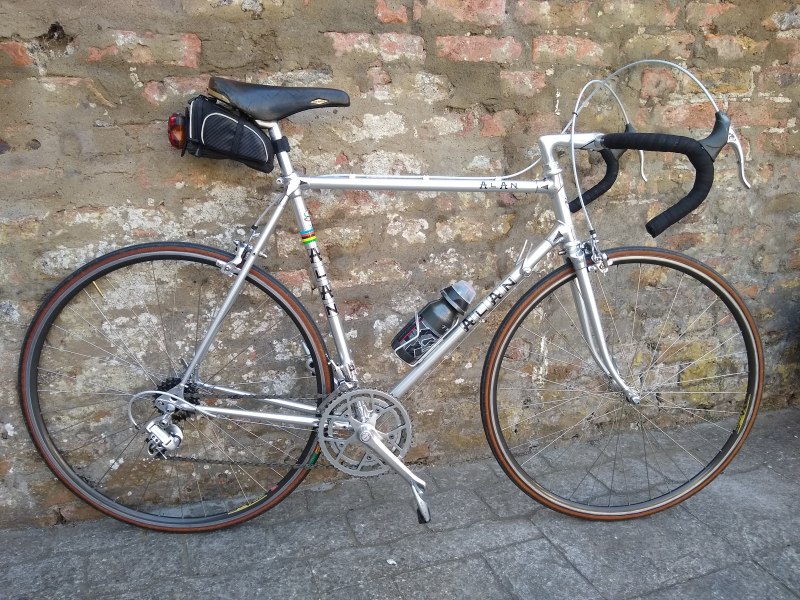
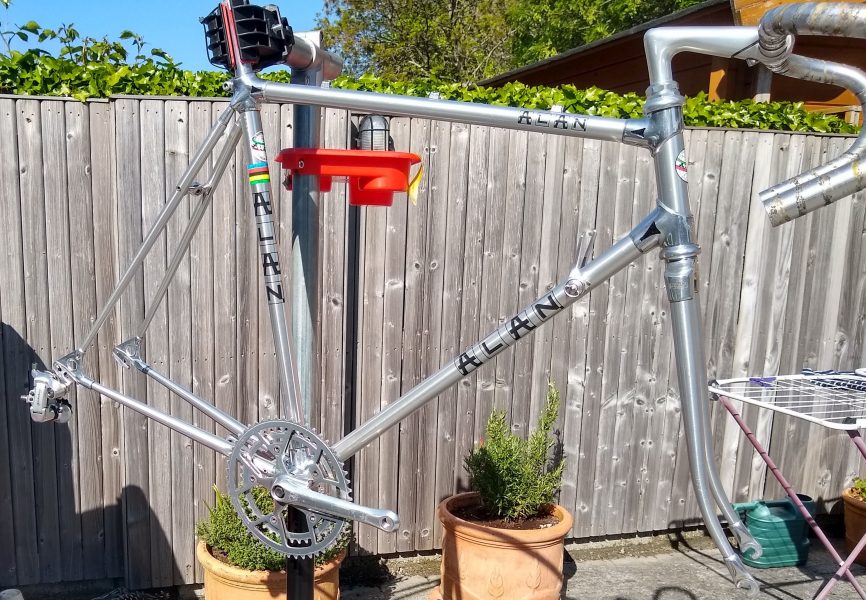
The completed project.


Completed the bike is specced as follows :
- Frameset : 1993 Giant Cadex ALR-1 Bonded Alloy
- Wheelset : Shimano (these I bought new in approx 2007 and used many years on my Alan bike)
- Groupset : The original would have been all Shimano 105 SC 1056 8 Speed, mine was a total mix as follows :
- - Headset : YST (as fitted when bought)
- - Brake Calipers : Shimano 105 5600 dated 2005 (these I bought new in approx 2007 and used many years on my Alan bike)
- - Rear Derailleur : Shimano Sport LX dated 1988 (came with a Colonago Super and swapped out)
- - Front Derailleur : Shimano 105 SC 1056 dated 1992 (probably original to the frameset)
- - Shifters : Suntour Cyclone (mid to late 80s) bought NOS on Ebay. These are minimalist, clean lines, light to use, and suit the bike perfectly - much better than the Campag ones I planned to use.
- Bars : SR Sakae Modolo Patent Anatomic Bend (as fitted when bought). These have beautiful clean lines - I really like them.
- Stem : Italmanubri Eclypse : Came off a 1992 SAB bike I now use as Winter Bike (not the most pretty but the objective was to keep price low)
- Seatpost : Kalloy (as fitted when bought)
- Saddle : Selle Italia (present from my son as he had no use for it)
Using the Bike
To be completed
Contact me by email : alan_cowzer@hotmail.com
Contact me through Facebook : My Peugeot CFX-10 Facebook Page
© 2018- 2026 Alan Cowzer