
Section 2. Frame Construction
Construction of the frame - bamboo tube prep, assembley, glue, cable ties, metal wire, hemp rope and epoxy resin.
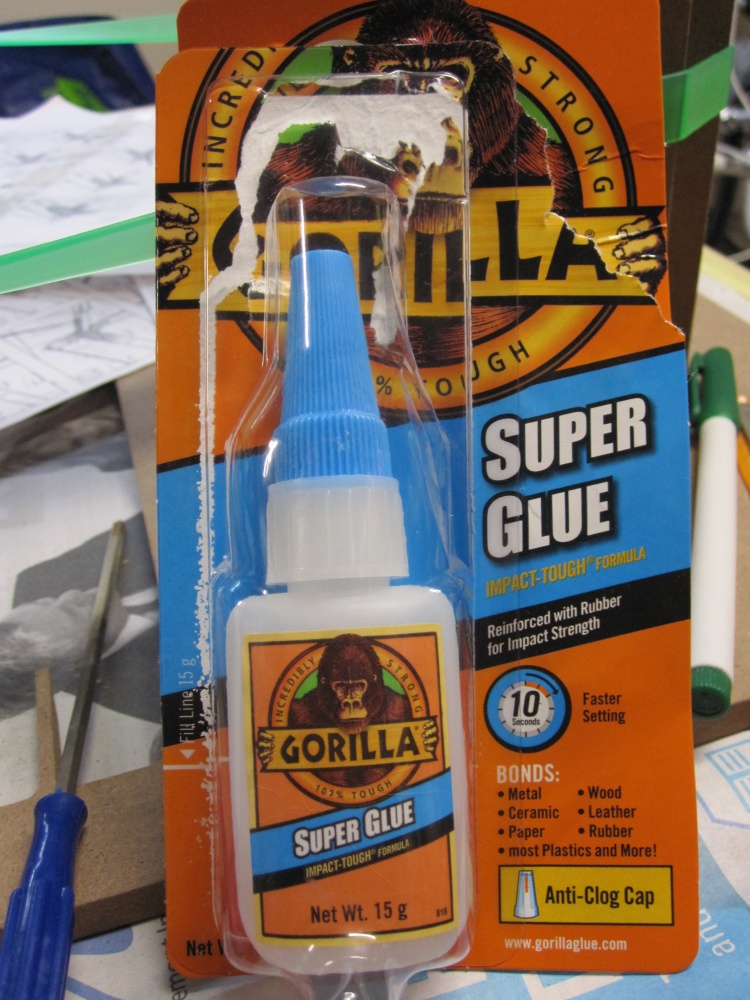
This was always going to be the tricky bit, in my opinion. Not helped by the fact that I would have to operate very quickly. The instruction manual states that once the tube ends are filed the tubes have the potential to crack (that word again), and that all work "must be completed within 3 days (7 at max)". However a subsequent message was sent out by Sunny stating that these timings were good for Singapore with high humidity and that he was recommending "completion within 24 hours" to be safe elsewhere in the world. That puts real pressure on. Furthermore, the manual recommends mixing the full quantity of epoxy resin and hardener, then soaking each section of rope (there are 6) individually in the epoxy for 2 minutes, and then commencing the tying with each rope. That means that it is 12 minutes minimum, after mixing the epoxy resin and hardener, before you begin with your first rope, and maybe a further hour or two before you finish with your last rope. When I bought the epoxy I discussed this with the shop (who have the experience) and they were of the opinion that the resin and hardener would have long cured before I got finished. They were recommending that I had about 20 - 30 minutes to finish with a rope after mixing the resin plus hardener. They suggested mixing smaller quantities and soaking/working one rope at a time. I went with their suggestion and decided to use a larger quantity of epoxy and hardener than recommended in the manual - this to allow for the inevitable wastage of working with smaller quantities. However the manual is contradictory as it gives a suggested volume requirement, and a suggested weight requirement for the epoxy on two different pages. When I calculated the volume vs weight it transpires that one quantity (volume) was approximately twice the other quantity (weight). Emailed Sunny and he said that the smaller quantity was needed - so I bought 1.5 times the smaller quantity. But all of this just added to the risk and as the time restriction was significant it left little opportunity for adjusting my process in mid flight. Add to this that I hate working with glue, now I was relying on two types : "quick setting glue" (which I understood to be "super glue") and epoxy resin/hardener. This was going to be a sweaty 24 hours - I told my wife that she should spend as much of the day as possible away from the house, lest she receive some collateral damage as my temper would inevitably fray a bit during the day.
So an early morning start
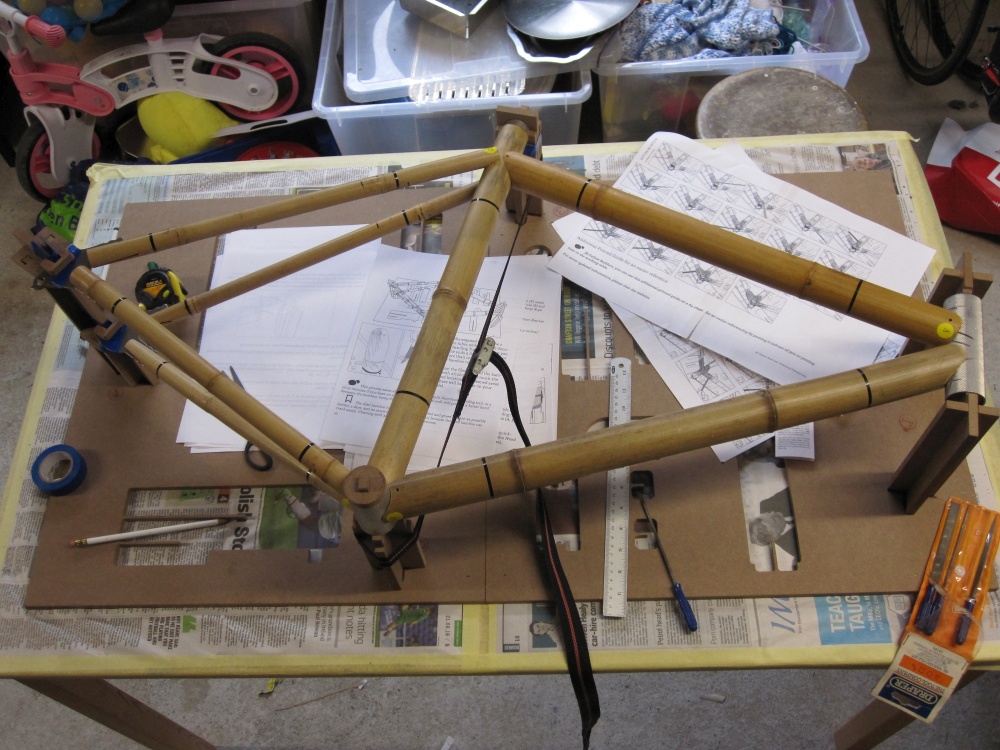
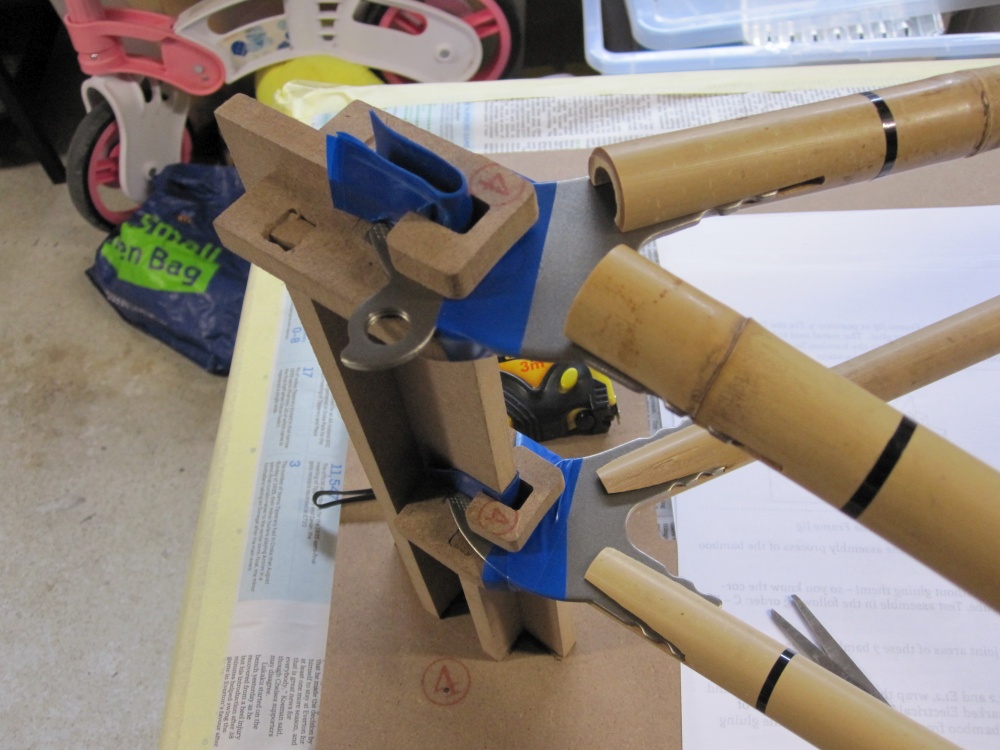
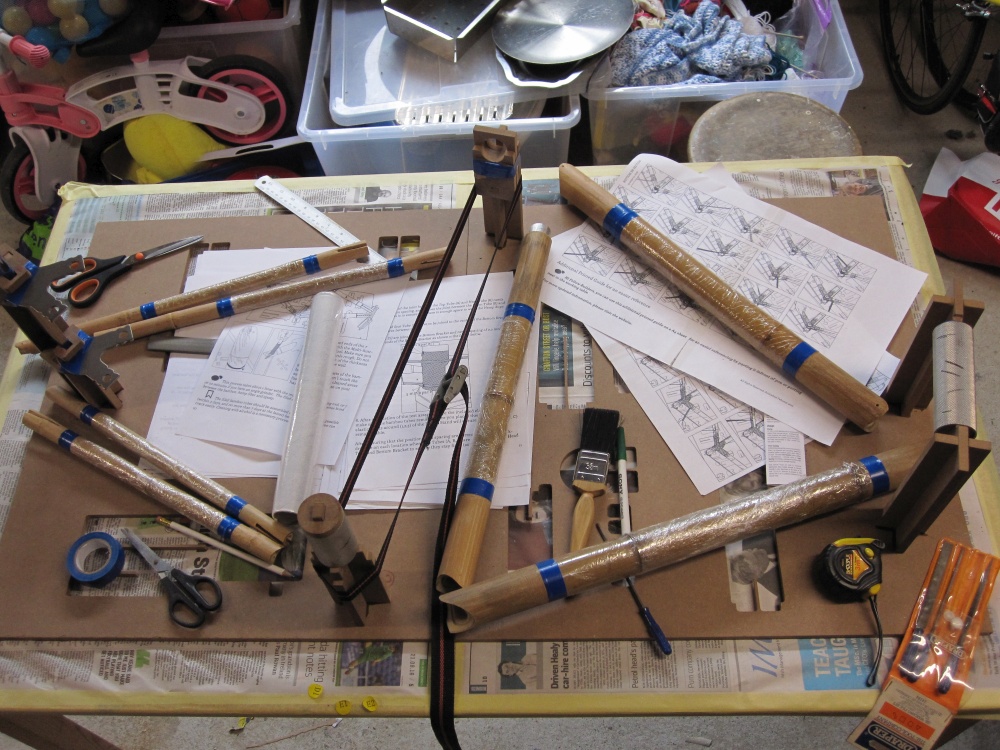
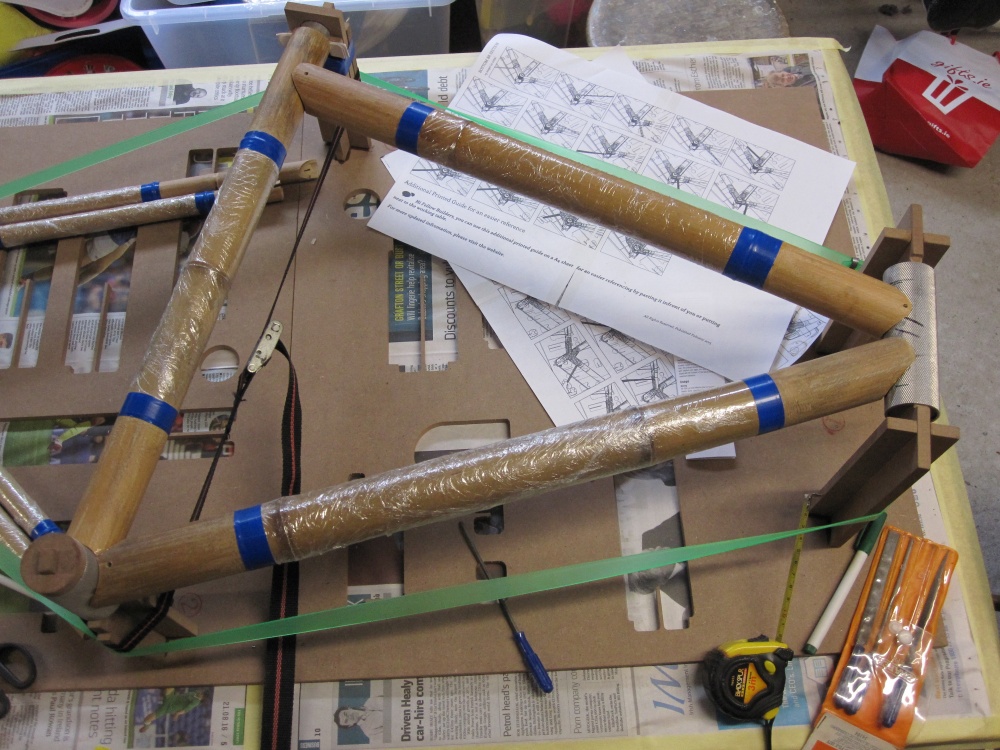
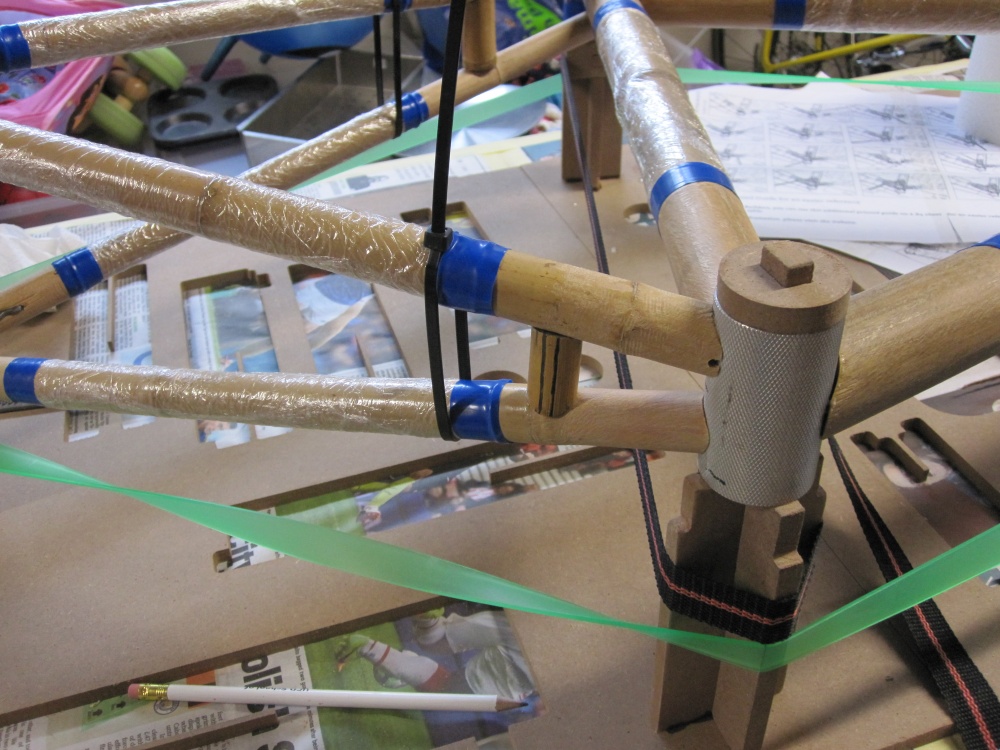
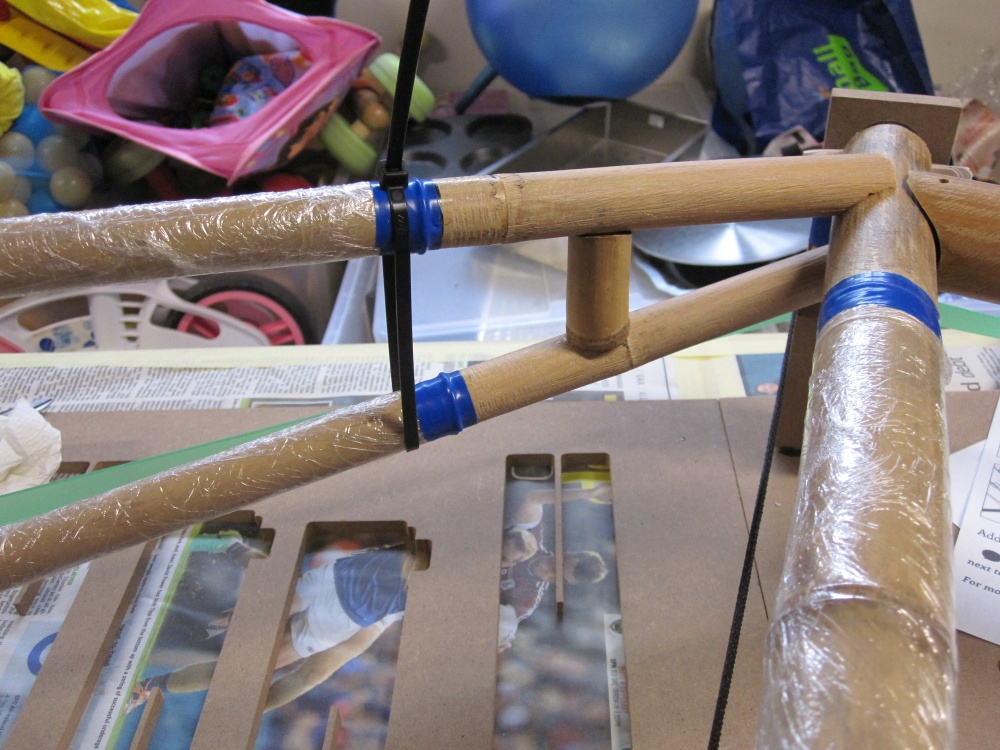
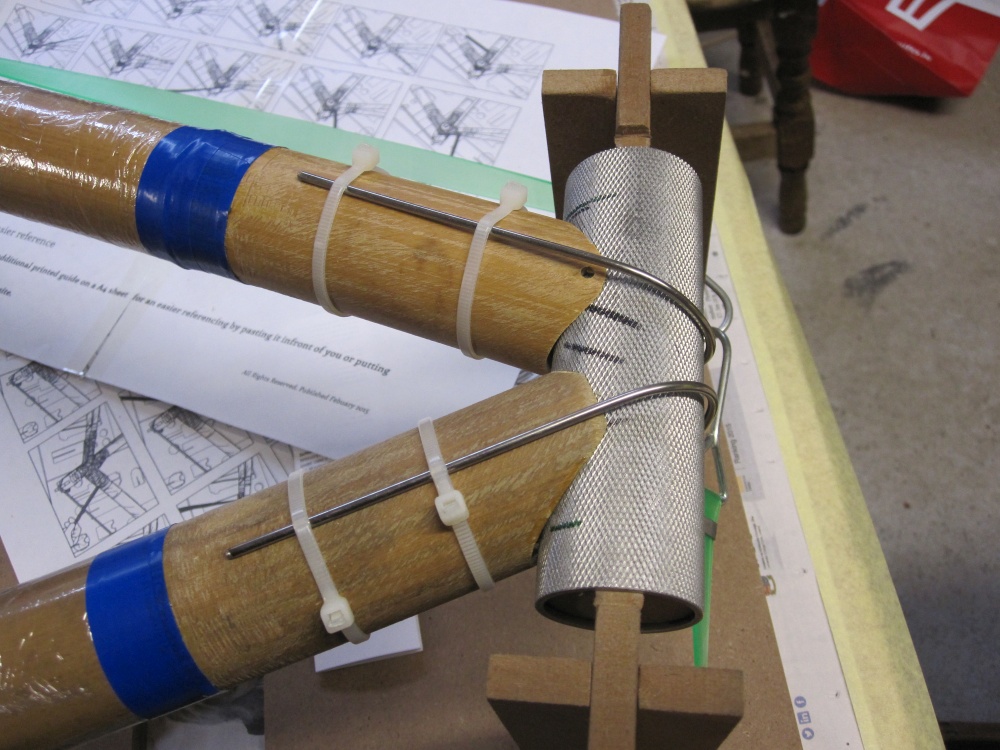
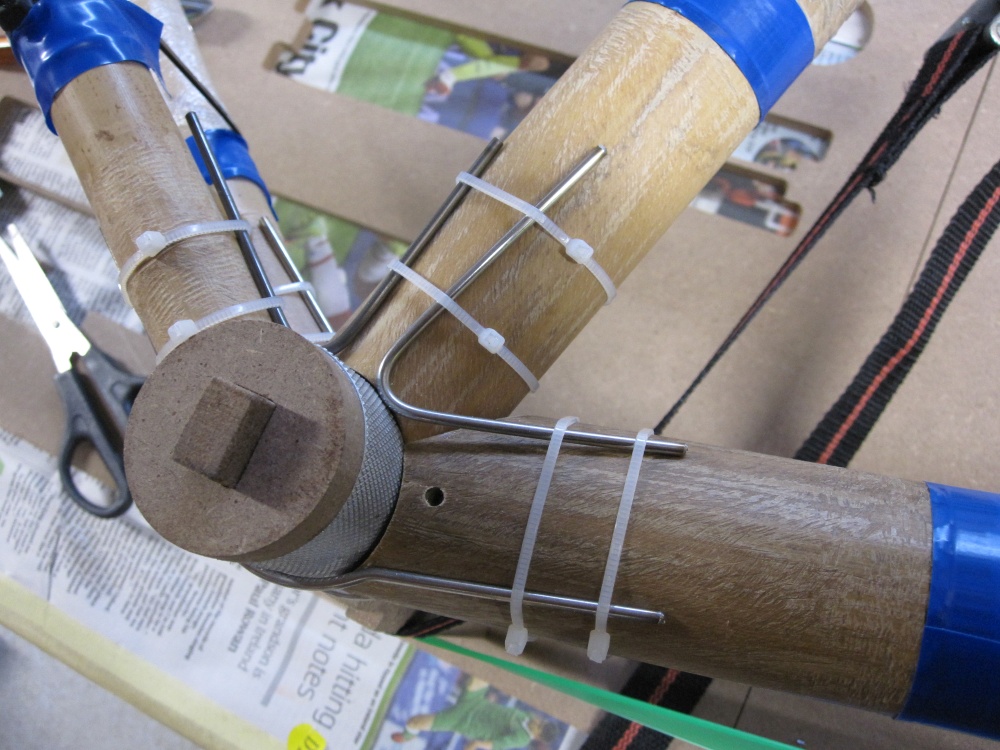
Initial frame fit and fixing with quick setting glue and reinforcing wires
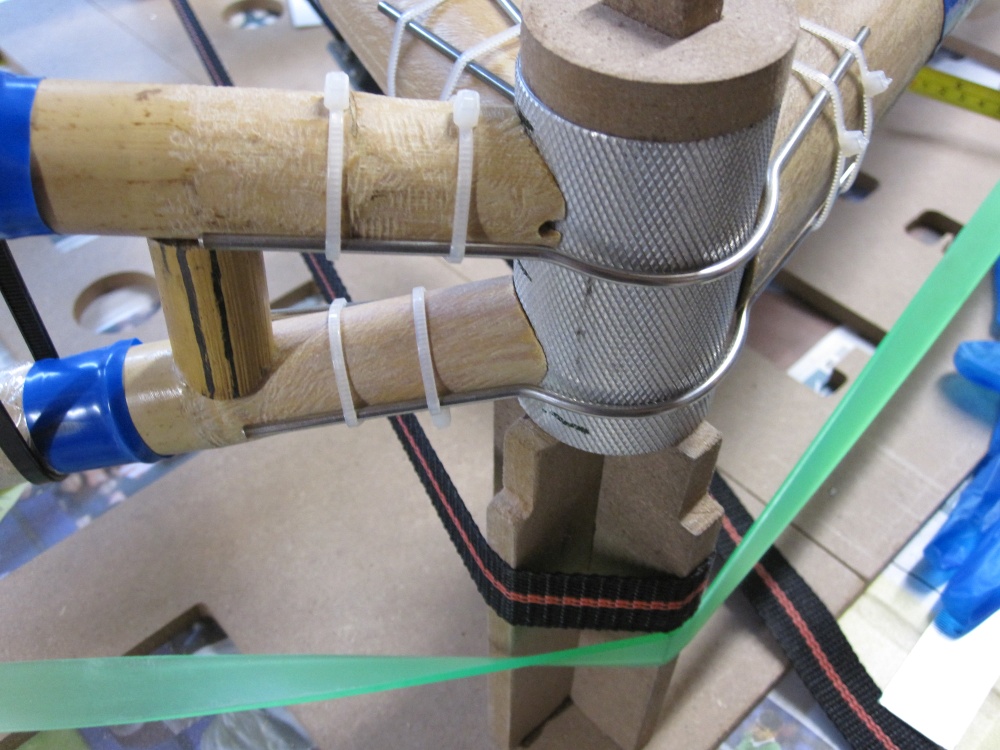
After a quick alignment check, I got to work roughening the tube ends to make the adhesion of the epoxy resin more efficient, also protecting the middle tube sections with tape and cling film as there was going to be a lot of sloppy work. I also recalculated the mark for roughening the top of the seatstays to allow me fit the seatstay/brake bridge lower to accomodate my planned short reach brakes - this was an error as the bridge was too short to fit into my new planned spot and I just had to fit it to where the original marks were (unfortunately I did not find this out until final assembly and I had already roughened up the bamboo, so I had to bind the hemp down to the new lower level anyway).
Fitting and initial gluing of the tubes was pretty straightforward, except for the aforementioned seatstay bridge and also the chainstays which were to be fitted between the adjusted dropouts and the BB (I had adjusted the droputs to make the fitting tighter) which was now a bit too tight, so I had to file the cuts in the chainstay/dropout end to fit. I think the glued in downtube prevented the jig from flexing a bit as it probably did when I did the test fitting (maybe that's why they were a bit loose - design? when I thought it was error?). Then I fitted the seatstay and chainstay bridges into the only position that they were correct lengths for (these two parts were not very well machined at their ends and seemed to be lopsided and not symetrical - a pity). And finally, the reinforcing wires for both Bottom Bracket Shell and Headtube were fitted and held in place by cable ties.
Photos : Initial frame fit and fixing with quick setting glue and reinforcing wires

Now for the epoxy resin and hemp rope
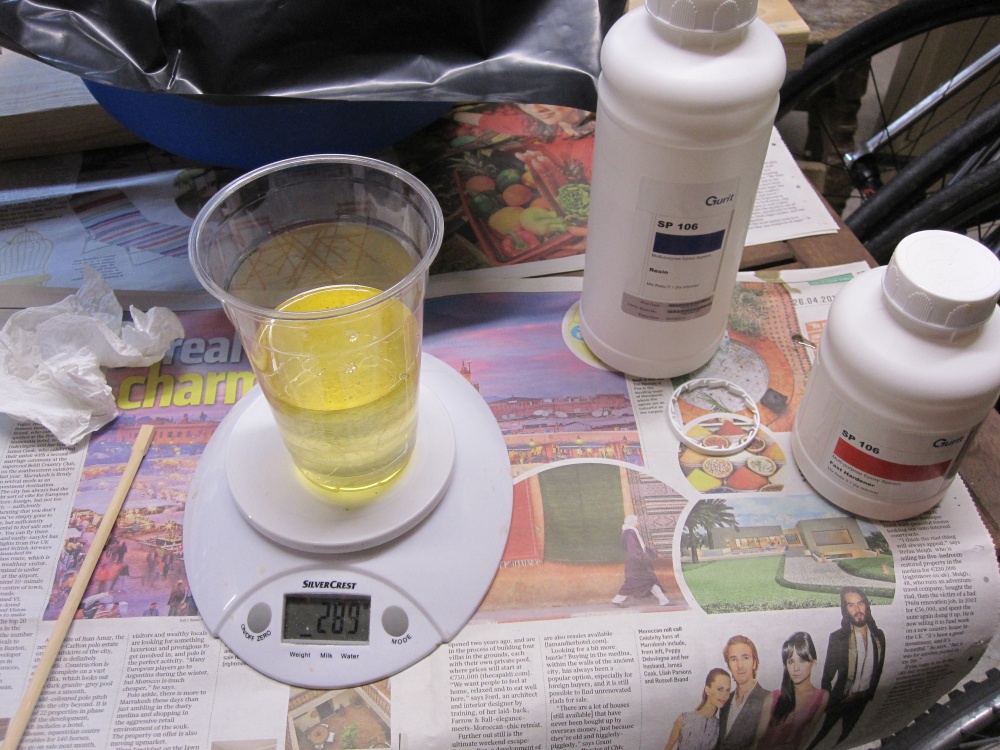
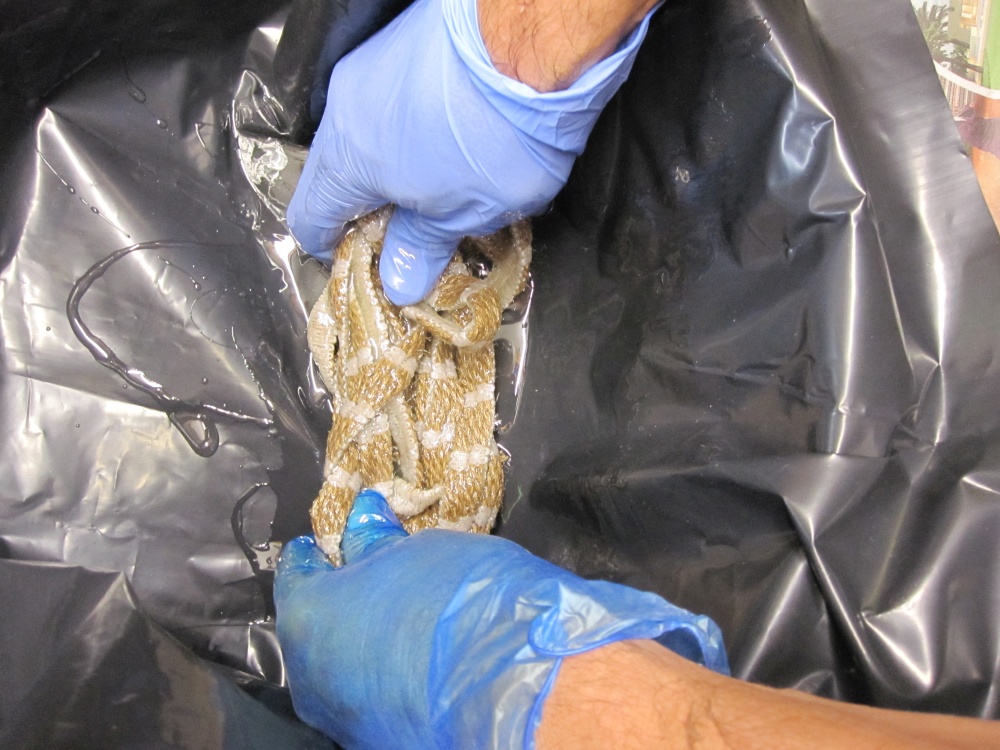
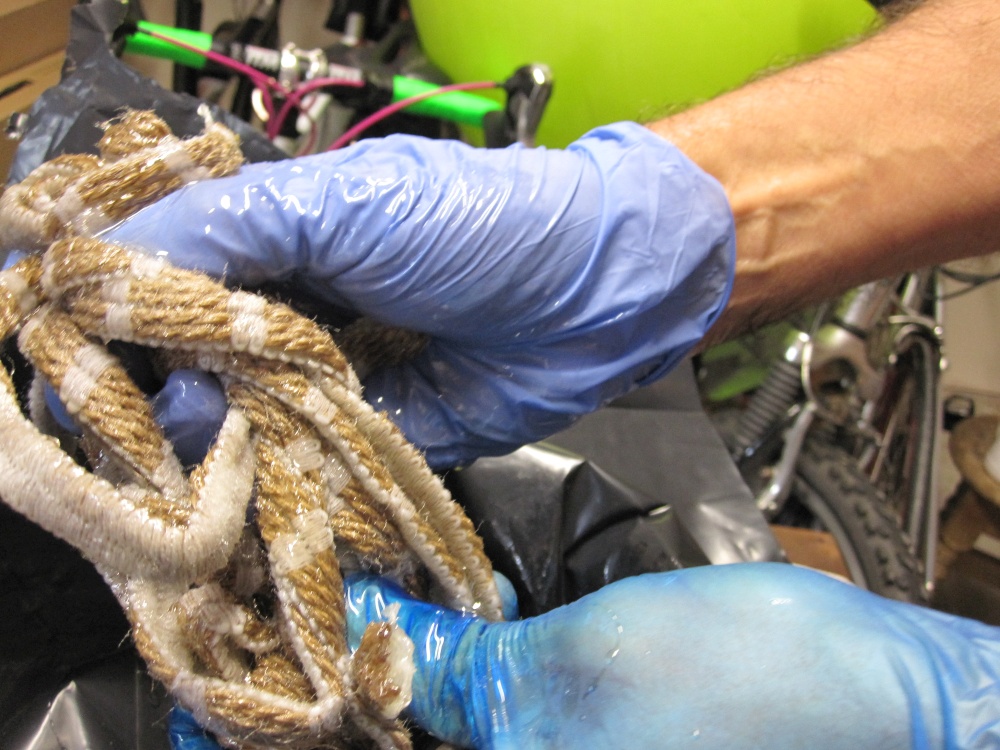
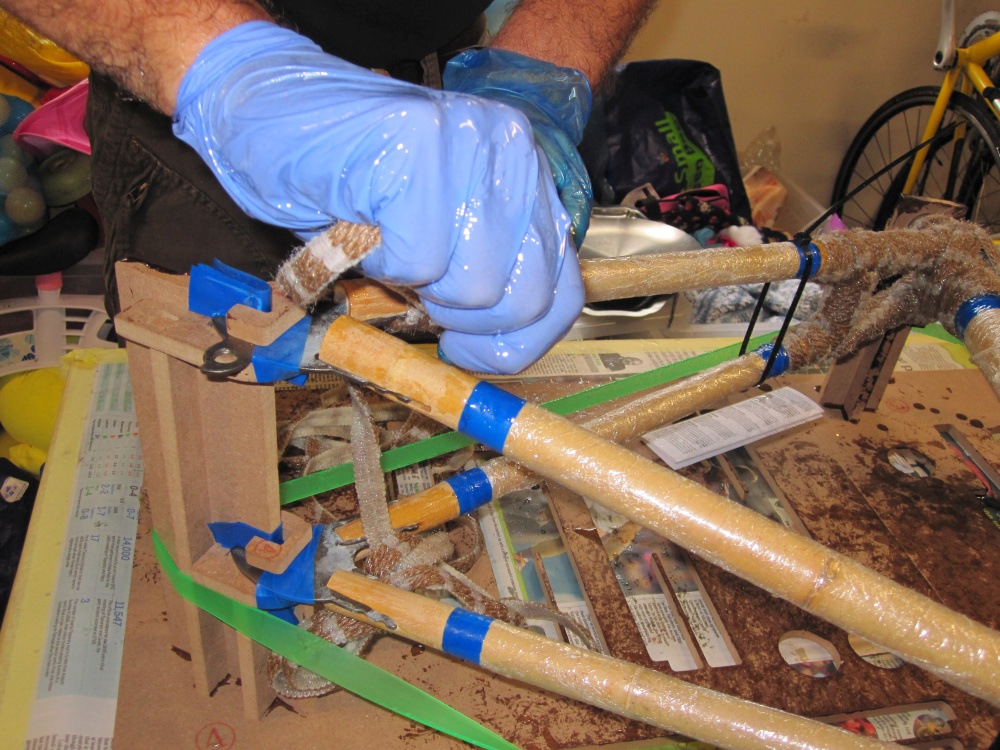
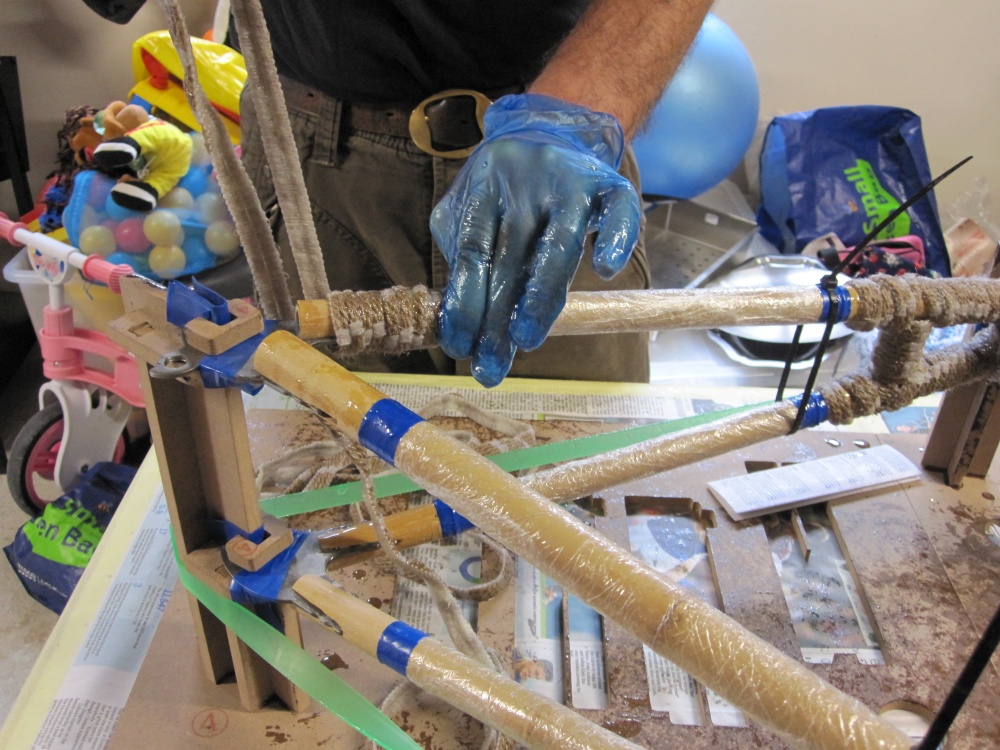
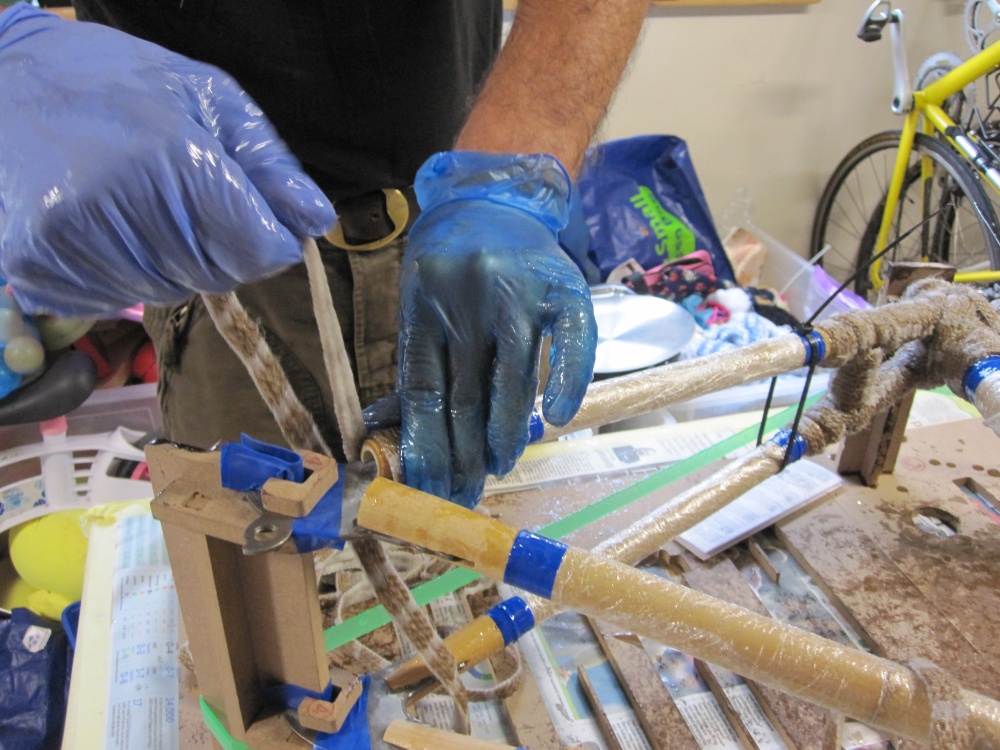
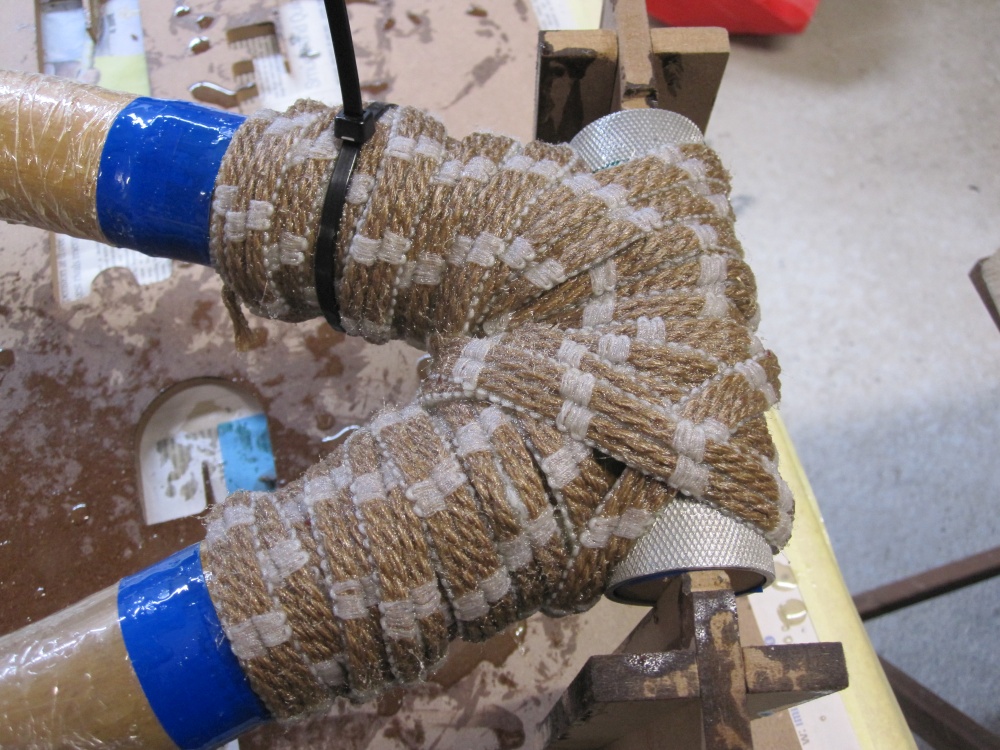
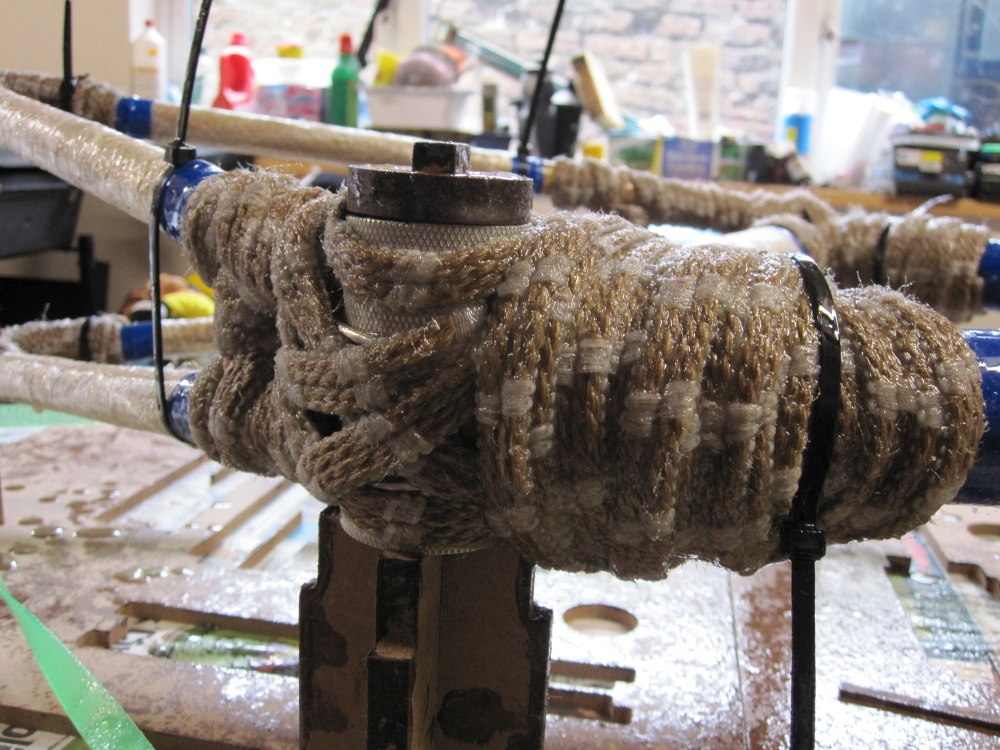
This was the part I feared the most, never having worked with epoxy resin before. I had determined to work with one rope at a time, and had mathematically worked out the appropriate share of epoxy for each rope based on it's length (ensureing there would be a few drops remaining to allow for containers not emptying fully). So, basically my process for each rope was ; measure out hardener and resin by weight (using a digital kitchen scales) into a disposable cup, mix well, pour into a plastic sheet lined basin, soak the rope, wrap the frame joint, and then dispose of the disposable cup, plastic sheet basin liner plus gloves, unused mixed resin, and then repeat the sequence with next section of rope.
This whole process worked very well. As a first timer with epoxy resin, I was surprised how hot the mix got (it is a chemical reaction and I was expecting some heat). I spread the remaining mix thinly in the basin while I wrapped the joint, but on the one ocassion that I left it unspread (in a deeper pool) it actually generated enough heat to melt the plastic sheet - frightening really. It also was very difficult to work cleanly, I wore old gear but made the mistake of using short sleeves. I was scraping epoxy off my (hairy) arms for days afterwards and ended up with considerably less hairs on my arms as a result (real men use epoxy instead of wax, or so I'm told). Part of the difficulty was having to work fast as the mixed epoxy soaked rope did harden very fast and time was very much of the essence. But things went better than expected.
Mixing the hardener and resin, soaking the hemp rope, and wrapping the frame joints
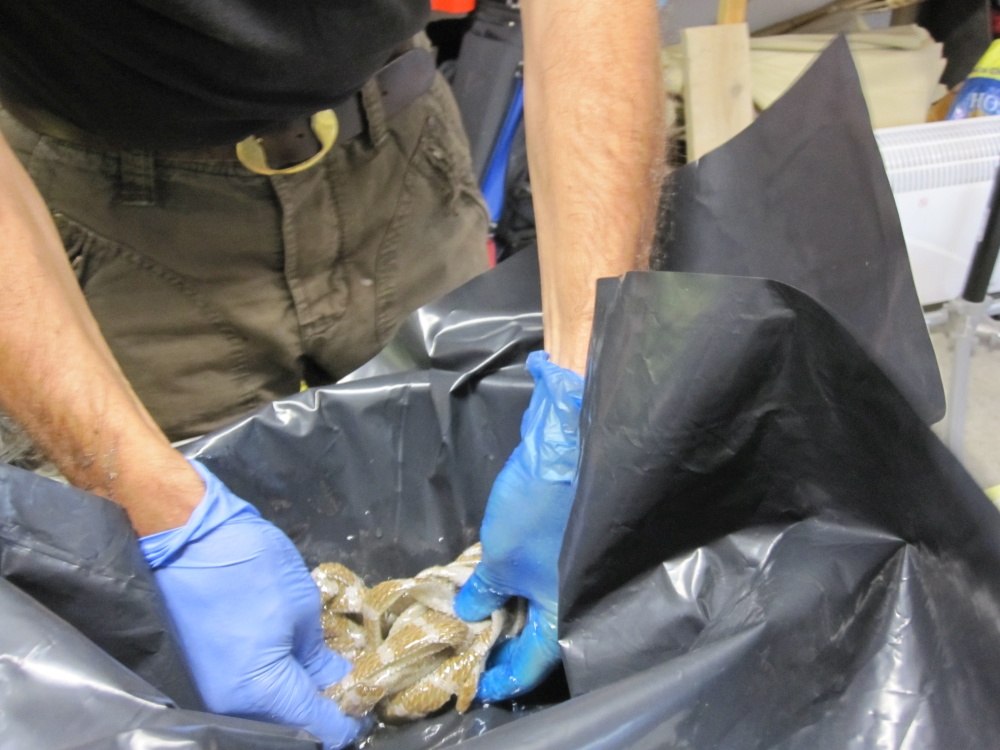
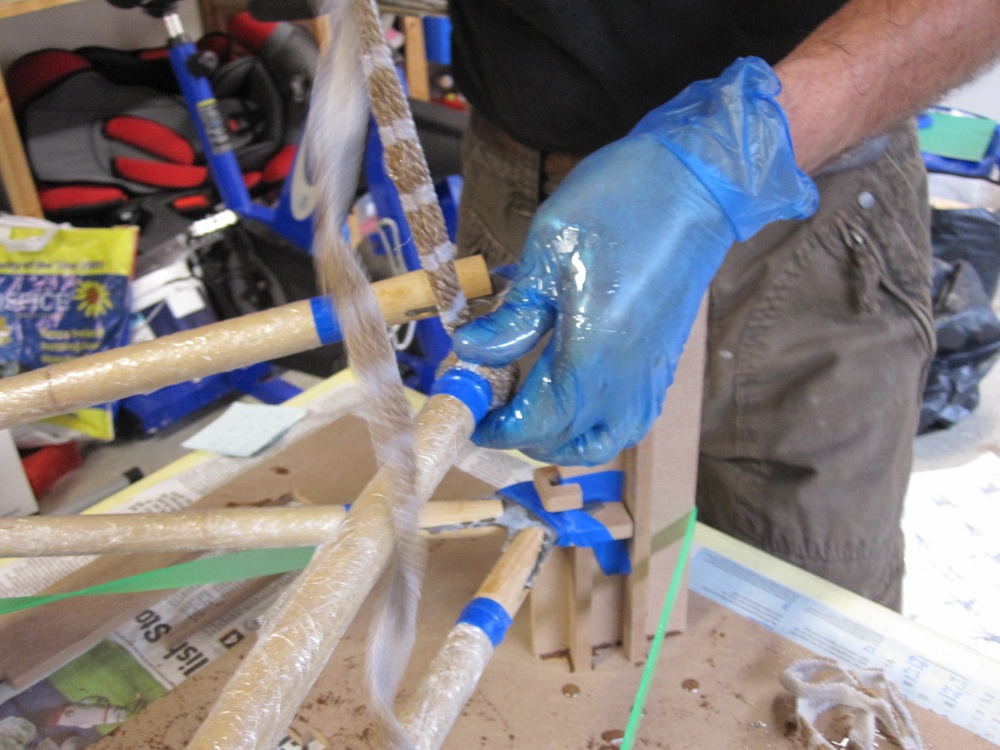
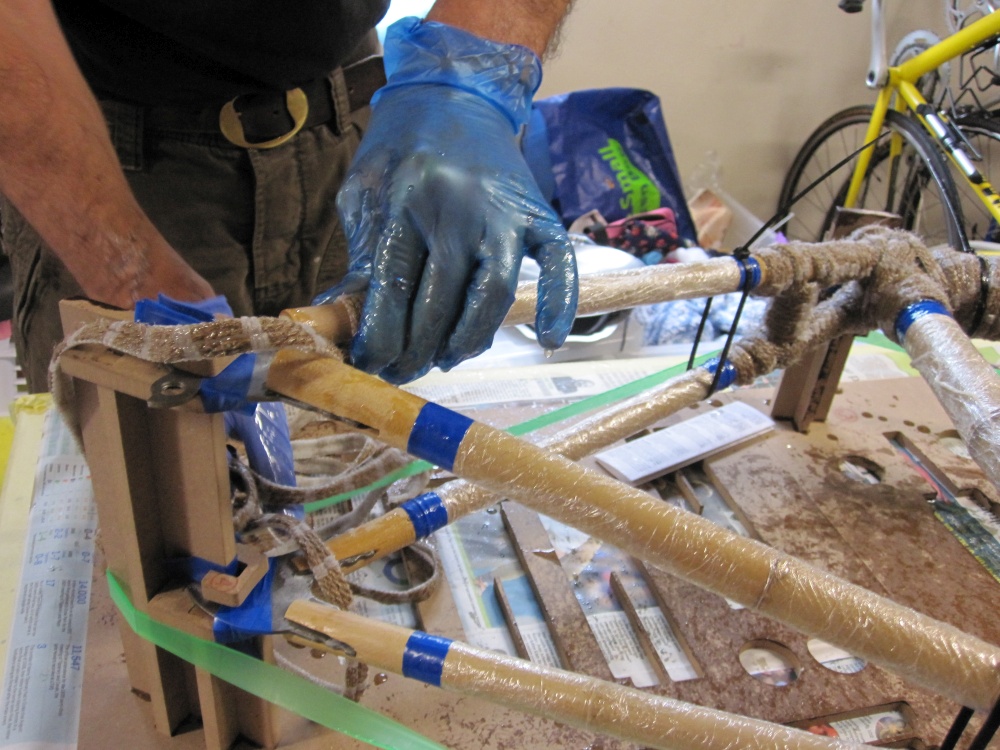
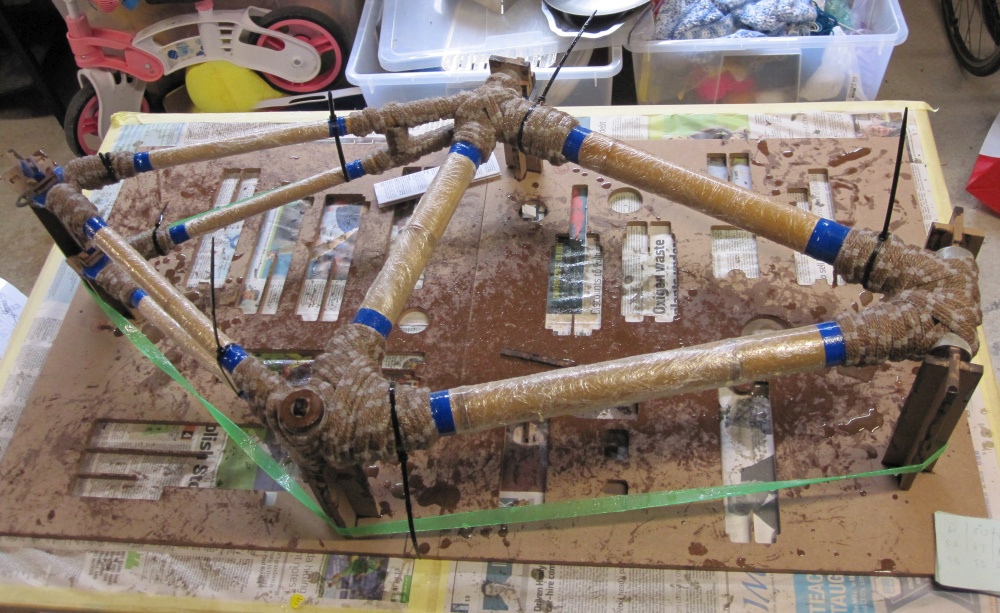
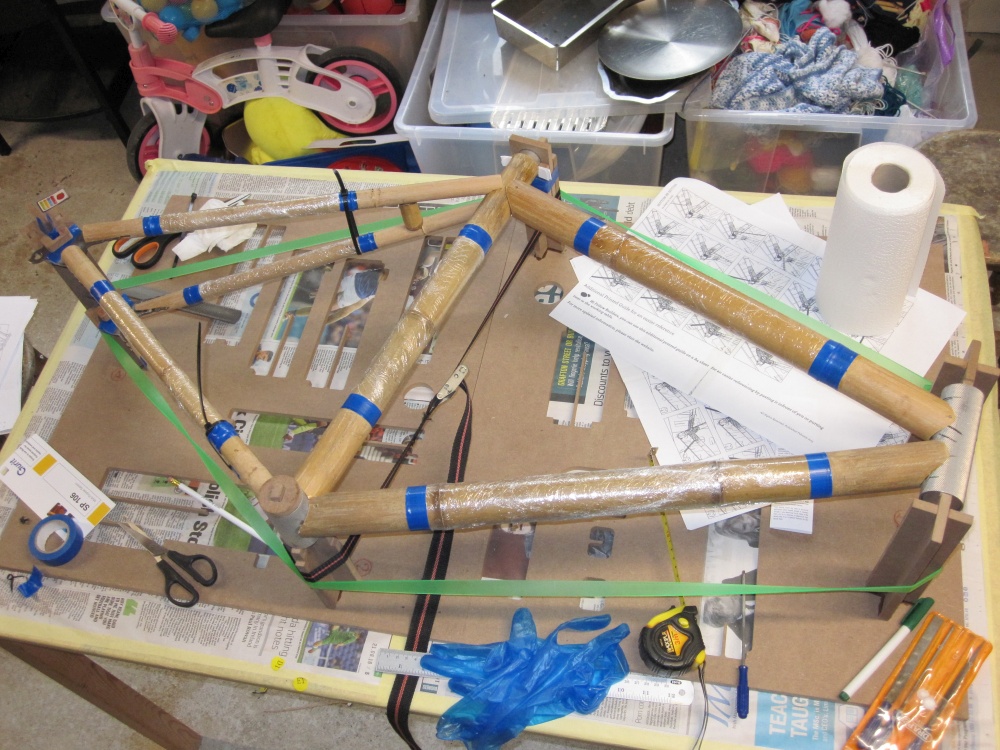
A view of the frame and joints still wet and with rope cable tied to prevent loosening


Contact me by email : alan_cowzer@hotmail.com
Contact me through Facebook : My Peugeot CFX-10 Facebook Page
© 2018- 2026 Alan Cowzer