
Section 1. Bamboobee - the idea and kit

How do you end up with a bike made from bamboo? Not only that, but how do you end up with a bike made from bamboo, and where you actually made the frame yourself too?
In my case, it started when Neil, my son, emailed me with a link to a Kickstarter page with a comment "you might be interested in this". Yeah right! Kickstarter is a crowd funding site and the page in question was looking for funds to invest in building and selling BIY (Build It Yourself) bamboo bike frames. Provided enough people backed the project, for $200 you could get a kit and the kits would provide you with the materials to build your own frame. That was in July 2014 and the kits were to be ready in early 2015. My wife thought it was a good idea too and suggested that she would buy me a kit for Christmas. So I opted in. In the event the kit arrived in June 2015 just as I was heading away for a summer holiday. I checked the kit, sealed it back up, and put it away. When I came back I decided that the weather was too nice to spend indoors building and went cycling instead. Then as winter came (and went) I decided the weather was too cold to spend in the shed building and I also had some other bike work to do. In truth I was probably a bit scared of building the frame crooked, I could see all the pitfalls and I had never worked with epoxy resin before. So, I procrastinated - I am very, very, good at that. Then in August 2016 (over a year after the kit arrived) I decided to get on with it, even though the weather was good. I had a rather long running knee injury at the time and couldn't train, so I might as well have a crack at the bike (and hopefully "crack" was not the outcome).
The starting position
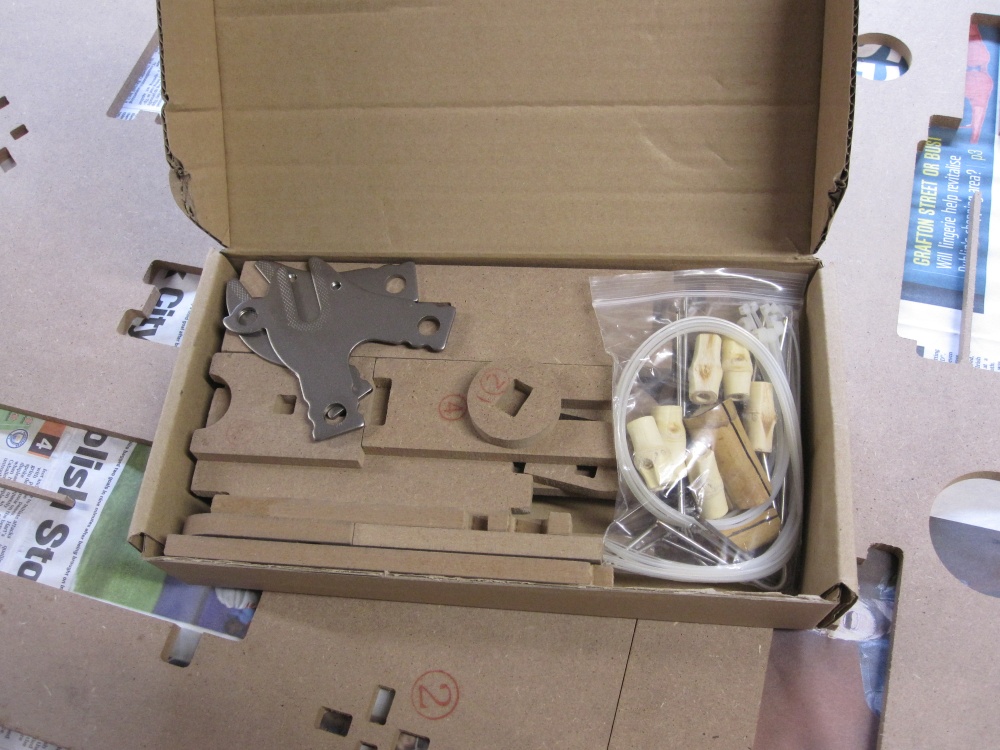
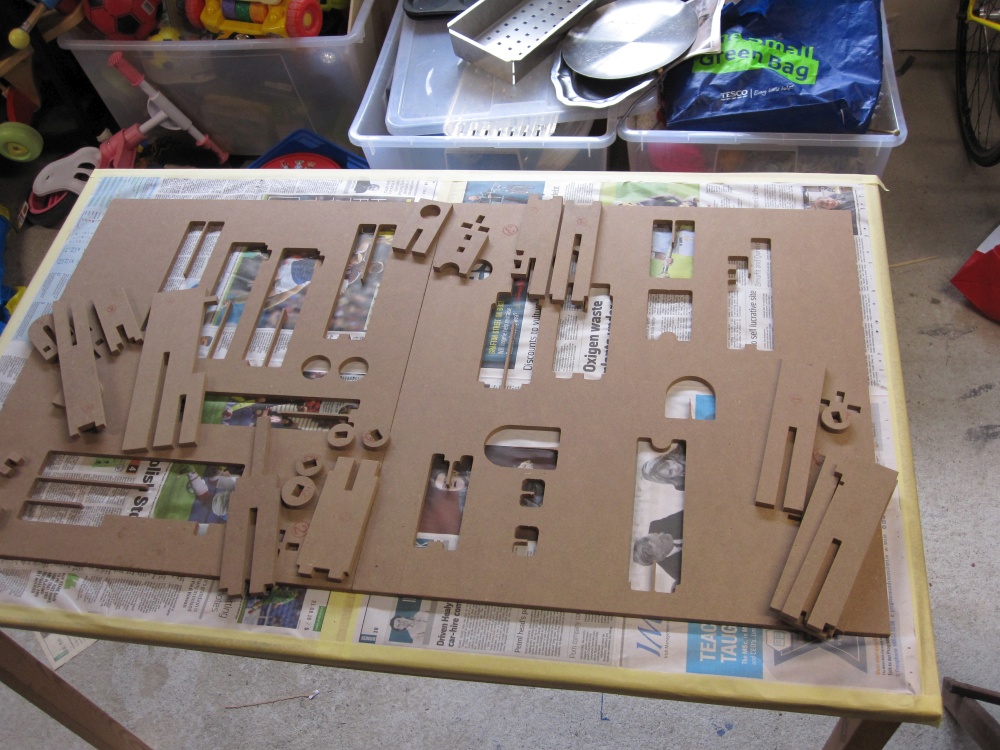
I had the frame kit, which was just that. A kit with 3 main tubes, 2 seat stays, 2 chainstays, 2 short bridges for connecting each set of stays (all the aforementioned parts were bamboo). In addition there were metal parts : head tube, bottom bracket shell, and a pair of dropouts for the rear wheel. There was a frame jig for assembling and building the frame, some stuff for joining all the frame parts together (reinforcing wires, cable ties, and hemp rope) but no glue or epoxy resin (I would have to figure out what I needed and buy that myself). There was also an instruction manual (which I had mislaid but an email to the kit provider saw me receiving one as a softcopy by return). Of particular mention, there was no fork - I would have to provide my own (apparently bamboo is not a good material for front wheel forks) but I did have one lying around as it happened - salvaged from a bike the aforementioned son, Neil, had written off many years ago, and which hopefully was not already cracked (that word again).
I had loads of bike components after my big purchase of lots of bikes at Christmas/New Year 2015/2016 and the subsequent rebuilding of these - see the section "One Mad Christmas and Crazy New Year" in the "Vintage" dropdown for the details. In fact I had most of the major components so I'll list the ones I didn't have below.
I didn't have the glue and the epoxy resin/hardener. I worked out that the "quick setting glue" referred to in the manual was super glue (only because the manual suggested a brand and it's chemical formula, found through google, was similiar to super glue in this part of the world). I sourced the epoxy resin/hardener locally, but sold by weight and the manual specified both volume and weight required. When I did an approximation of the volume that I had it was well below the suggested volume in the manual. Again a quick email to the kit provider provided me with an unconvincing answer that I already had enough, so I went back to my source and doubled my quantity. My local source had suggested that the manual's suggestion that you mix all the epoxy resin/hardener once and soak all the hemp rope before working with it, was impractical as the resin would harden long before I got around to working with all the ropes. They estimated about 20 minutes working time, whereas I reckoned I needed at least two hours. The more sensible approach would be to mix small quantities of resin/hardener and work one rope at a time - but this would increase the wastage of resin/hardener - so I erred on the side of greater quantities.
I didn't have some components (or some in the correct sizes). The major ones being, seat post, bottom bracket, headset, also front derailler with correct size clamp for the seat tube (but by buying a clamp I could juggle derailleurs around a few bikes to get what I needed). however, I had just about everything else - but I went for some nice cables and handlebar tape as well (a bit of bling).
However, I decided to proceed cautiously. I didn't buy glue/epoxy until I checked the bamboo tubes for cracks (after all they had been stored for over a year). Once that was ok, I bought the epoxy resin (rather expensive). I waited until my frame build was a success before I bought the missing components and again, once that was checked, I went ahead and purchased.
And with all the above in place, in August 2016 I really got going, as follows....
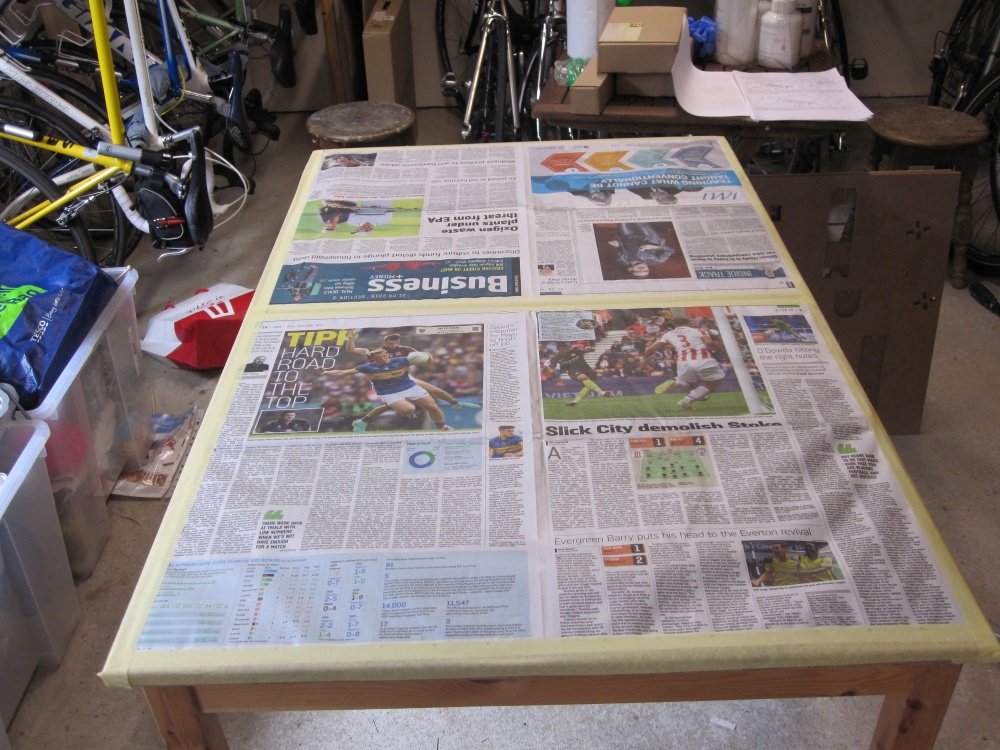
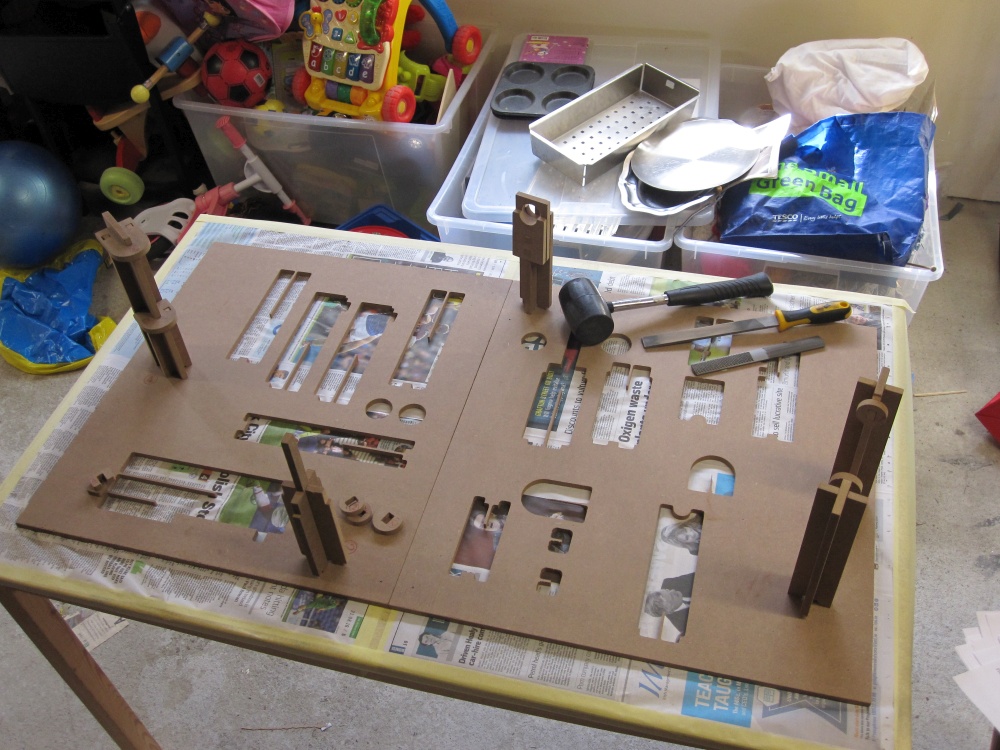
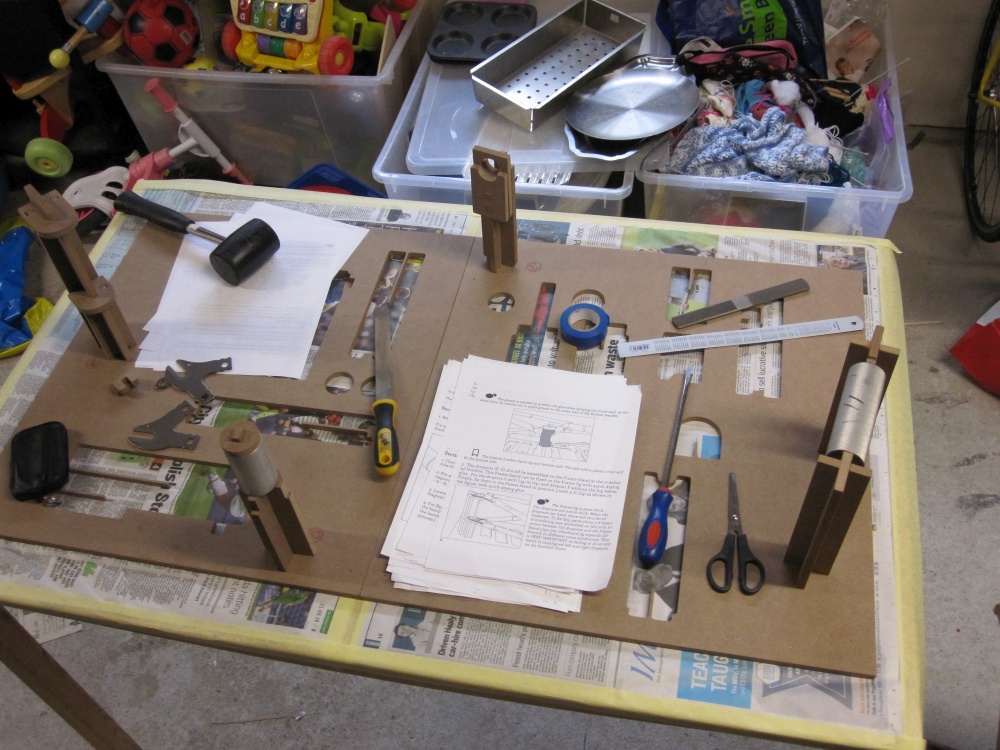
Setting up my Worktable and Jig
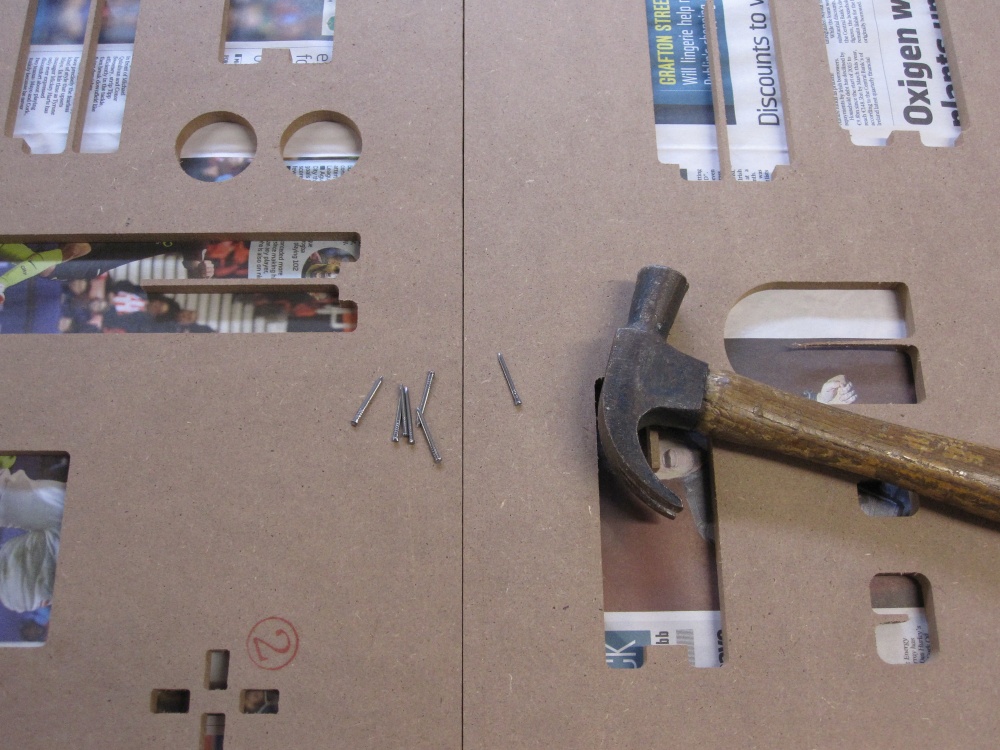
Decided to protect the table with newspaper, and nail the jig to the table as a more secure solution. No real issues with assembling the jig other than
- The Manual mixed up the illustration for the Seattube/Toptube and Bottom Bracket frame stands.
- Some of the Frame Stands needed a bit of filing/sanding
- Head Tube stands, when in position, seem to be for a head tube of about 1 cm longer than the one supplied.
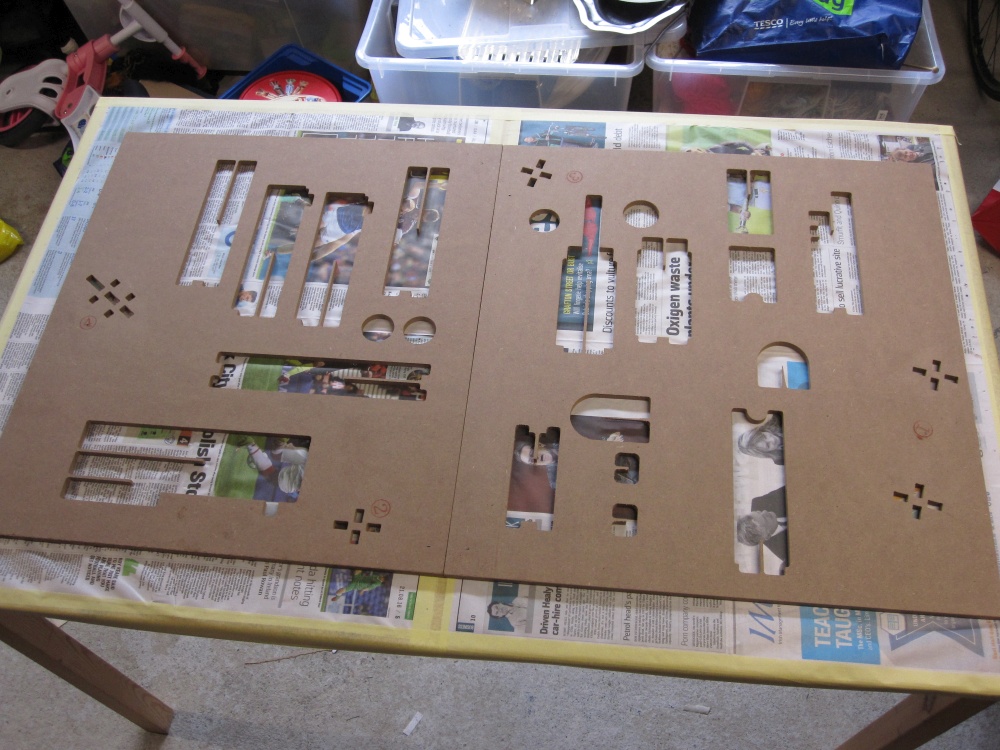
Photos of the worktable and jig with frame stands
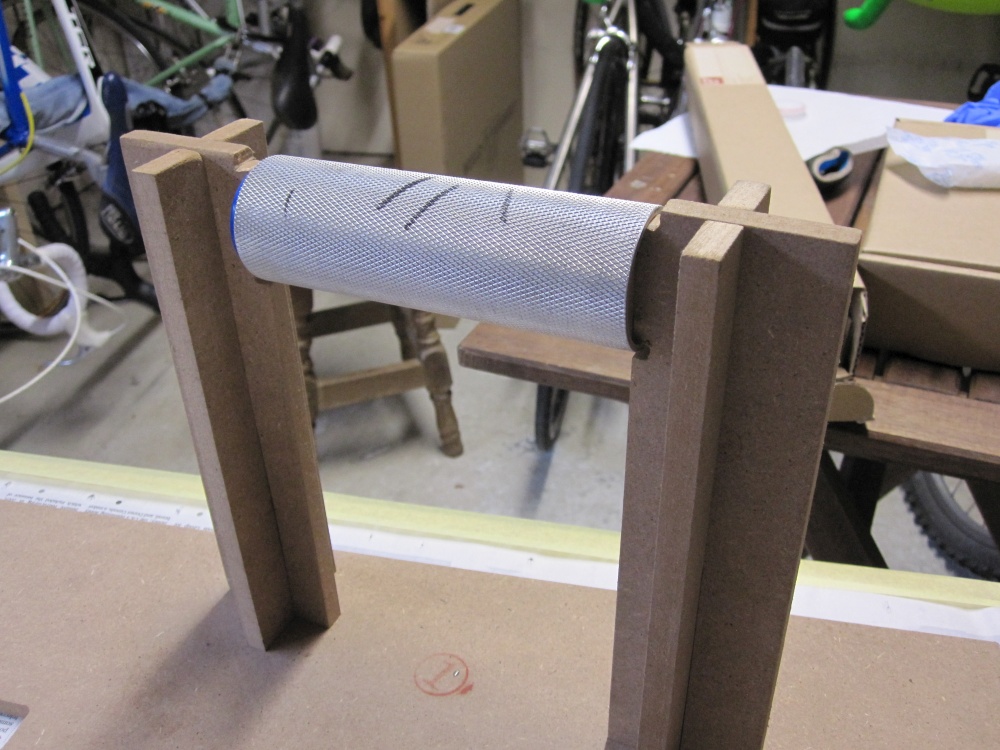
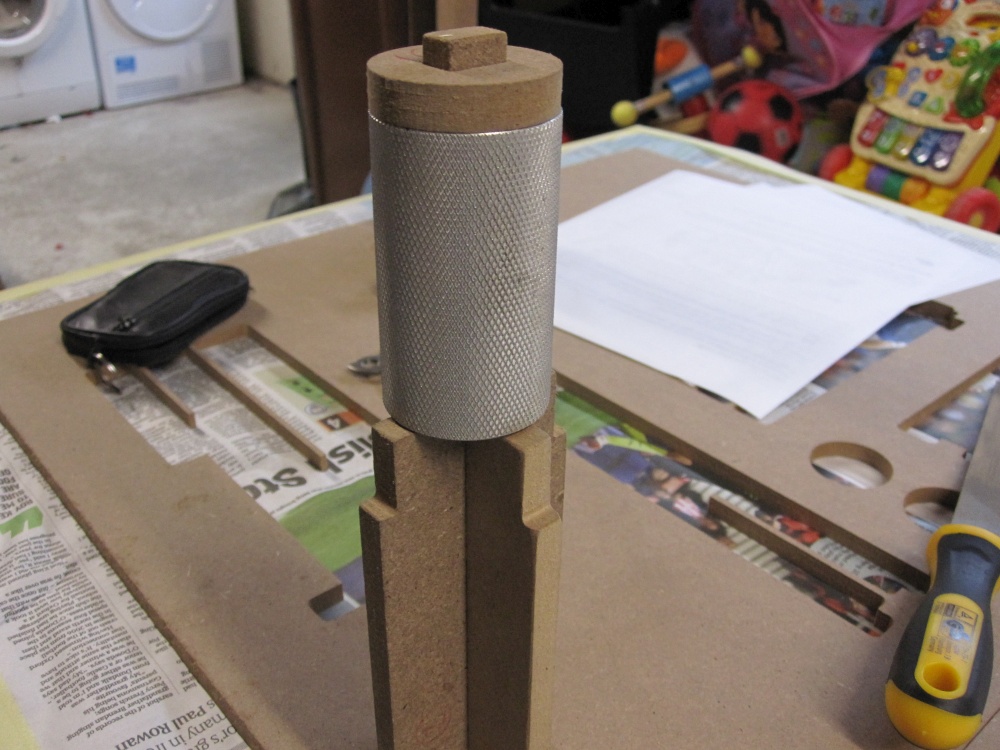
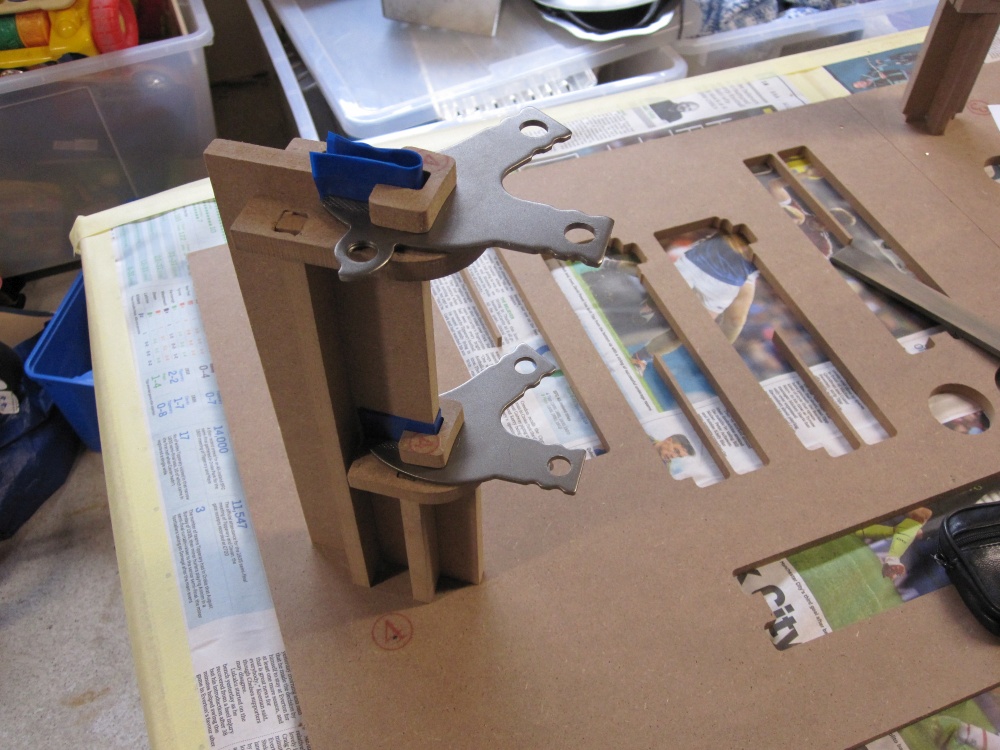
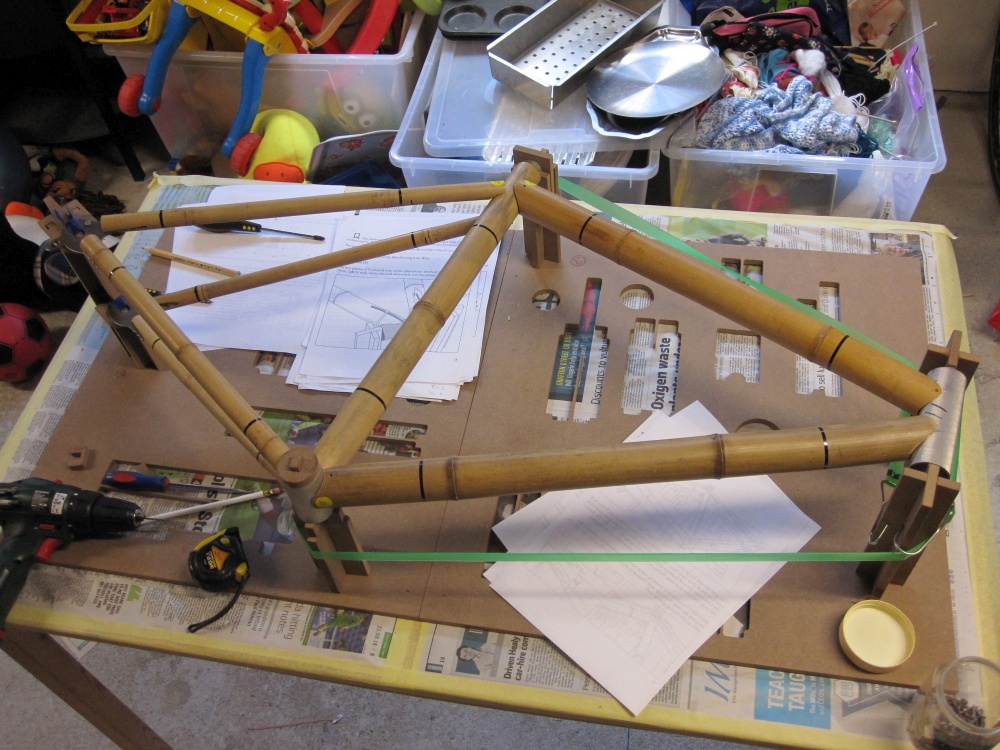
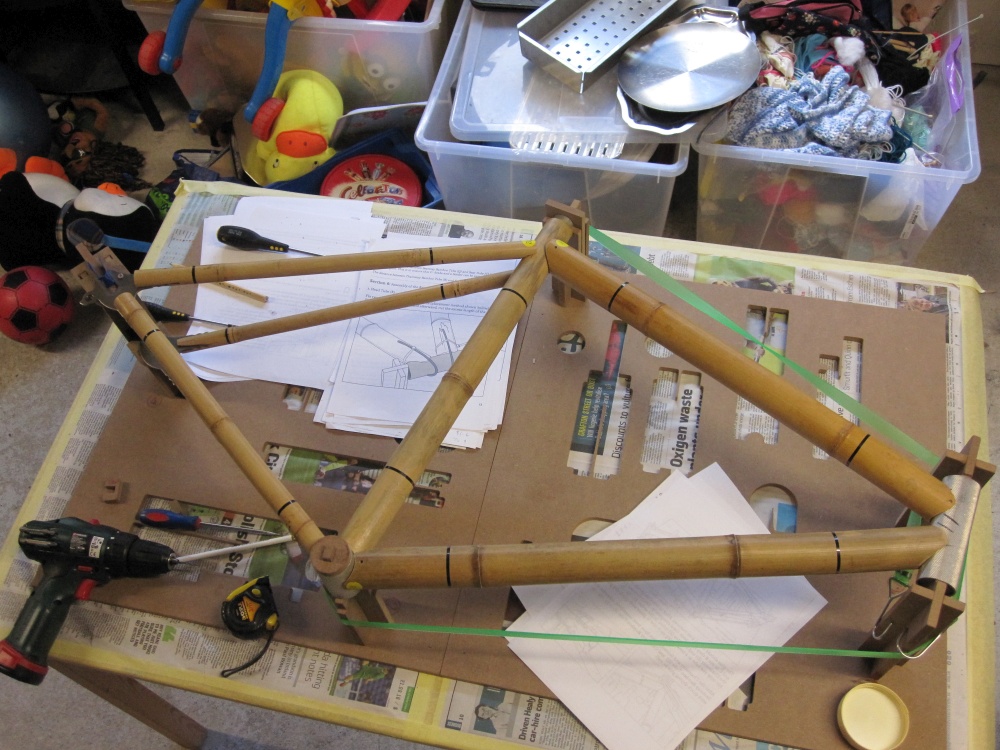
Fitting the metal parts to the jig and some initial test fitting of the bamboo tubes
This was a preliminary process to fitting and sticking everything together and also an opportunity to check alignment and make any adjustments.
- Head tube a bit short, decided to wedge it into the notch on the bottom end of the tube, as it appeared to be that way in the instructional videos. At least it now doesn't move about and it will lower the front end of the top tube by about a centimetre (I prefer old fashioned horizontal top tubes and this will move this bike nearer that shape)
- Bottom bracket fitted well onto the stand, but when I checked the centre line of the frame (centre point of dropouts, headtube, and BB, measured in height from jig surface) the BB was too high. This was caused by a poor fiting stand, even with my filing of the base it was still wrong. I decided to file the upper surface of the jig stand where the BB came into contact with it. Repeated measuring of the centre line height and filing led to an accurate fitting.
- Dropouts fitted the jig very well, but after test fitting the bamboo tubes, it looked like the chain stays were a bit short. So I moved (pulled) the dropouts towards the BB by a few mm and used screws and tape to hold them in place. Some careful measuring, with a length of string, to ensure each dropout was same distance from the BB. I was not unhappy about moving the dropouts a bit closer to the BB as this brings the rear wheel a bit closer to the seat tube and all of my other bikes have much closer clearance than this bike, and it is the way I like them.
Photos of the jig with metal parts fitted and some testing of the tubes

Contact me by email : alan_cowzer@hotmail.com
Contact me through Facebook : My Peugeot CFX-10 Facebook Page
© 2018- 2026 Alan Cowzer