
Bianchi Campione d'Italia
For Nikki.
One of four bikes bought as a bundle deal - effectively four bikes for the price of three (one was right size for my daughter Nikki, one was an italian Colnago which I fancied for myself, one was an italian bike with a nice groupset which I could fit onto the Colnago and then use the frame as a new winter bike and allowing me to sell my current "too good for winter" winter bike, and a final bike which was an unusual aero 1982 bike which I thought would be an interesting restoration project. For the full story of buying these 4 bikes, plus two others, all in the space of a few mad weeks - see "One Mad Christmas and Crazy New Year" in the "Vintage" dropdown menu
This was bought as it looked small enough for Nikki. It had down tube friction shifters, so I knew I would have to replace all parts with a modern style groupset as Nikki does not do "old style". So the plan was to essentially end up with a modern bike but steel frame.
The starting position
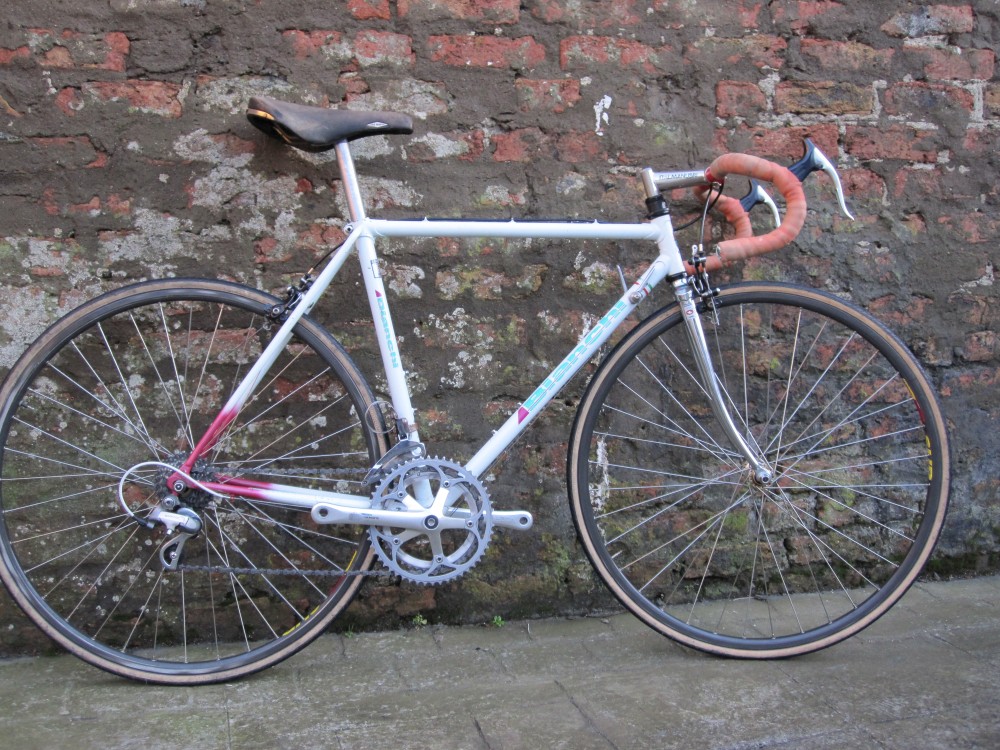
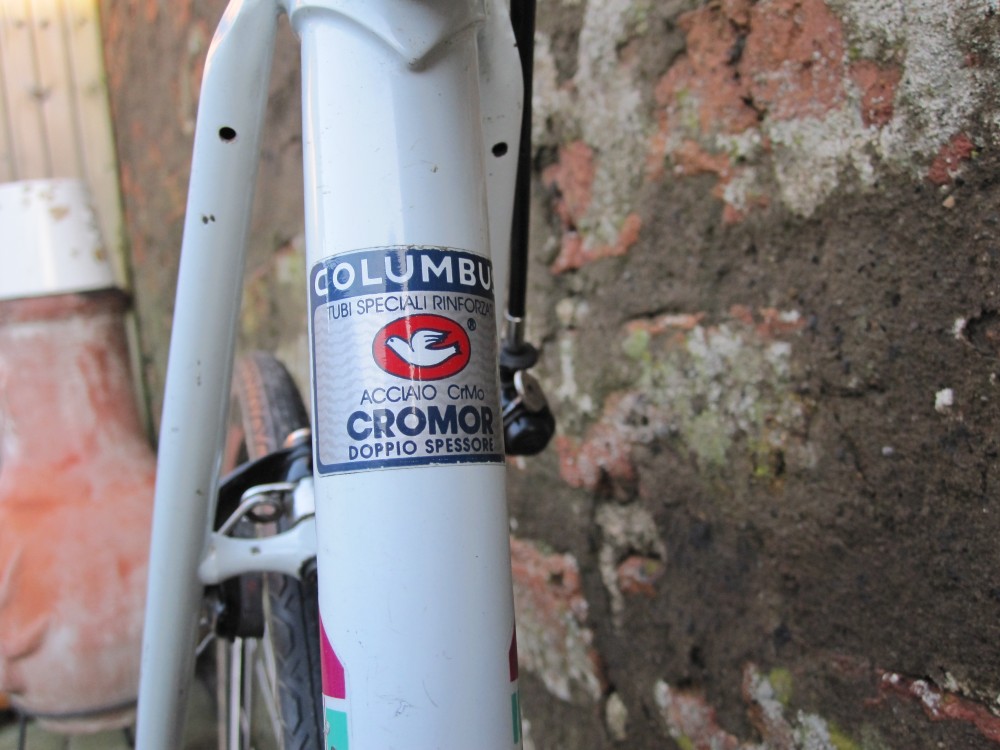
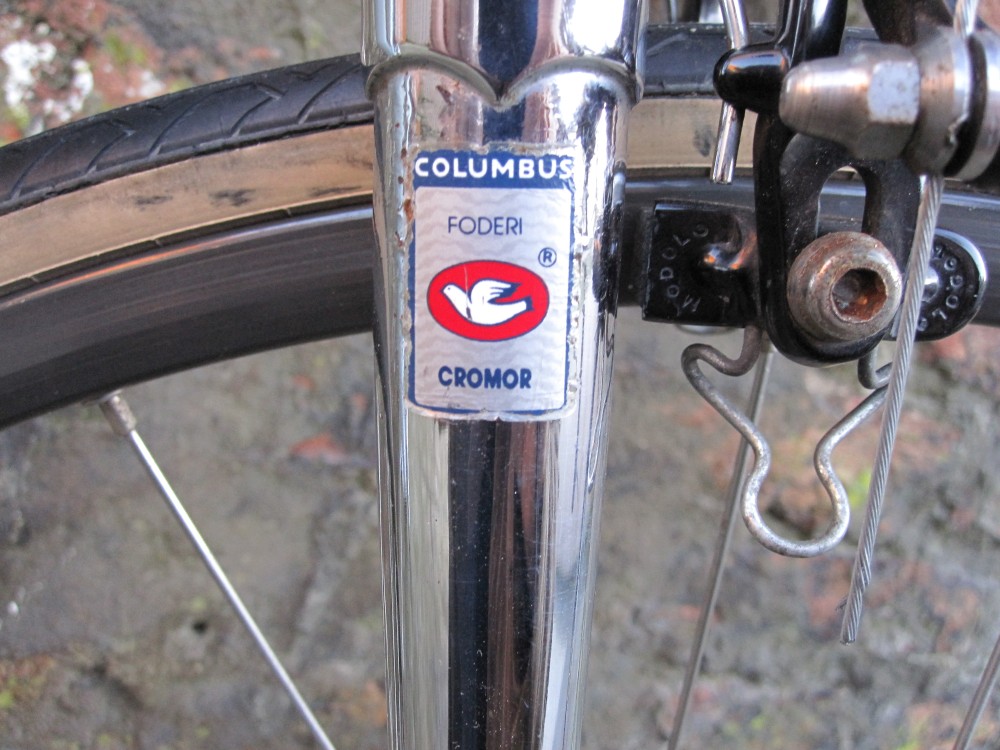
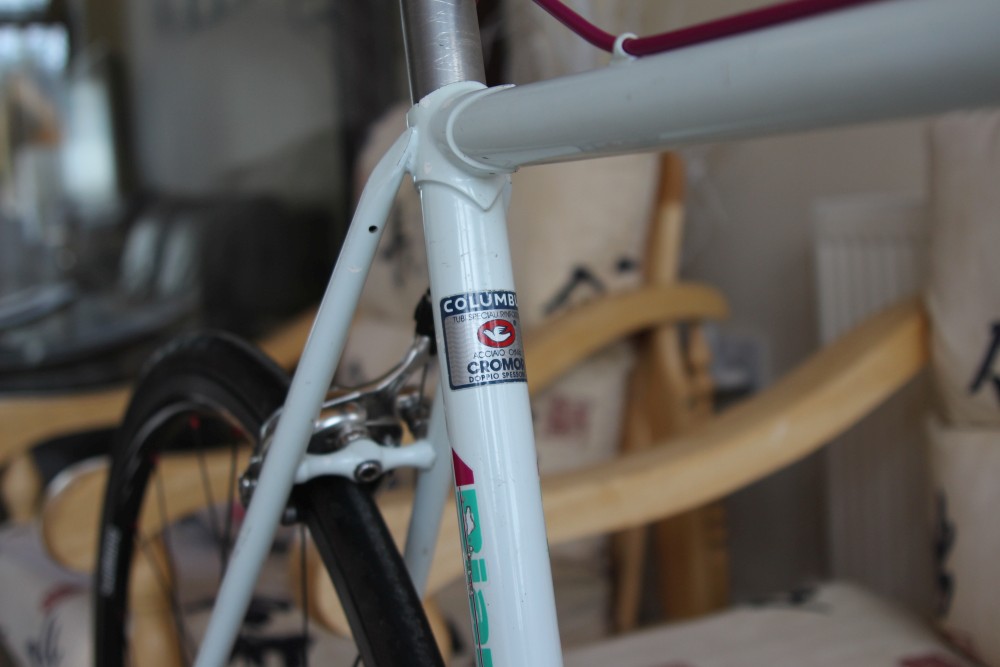
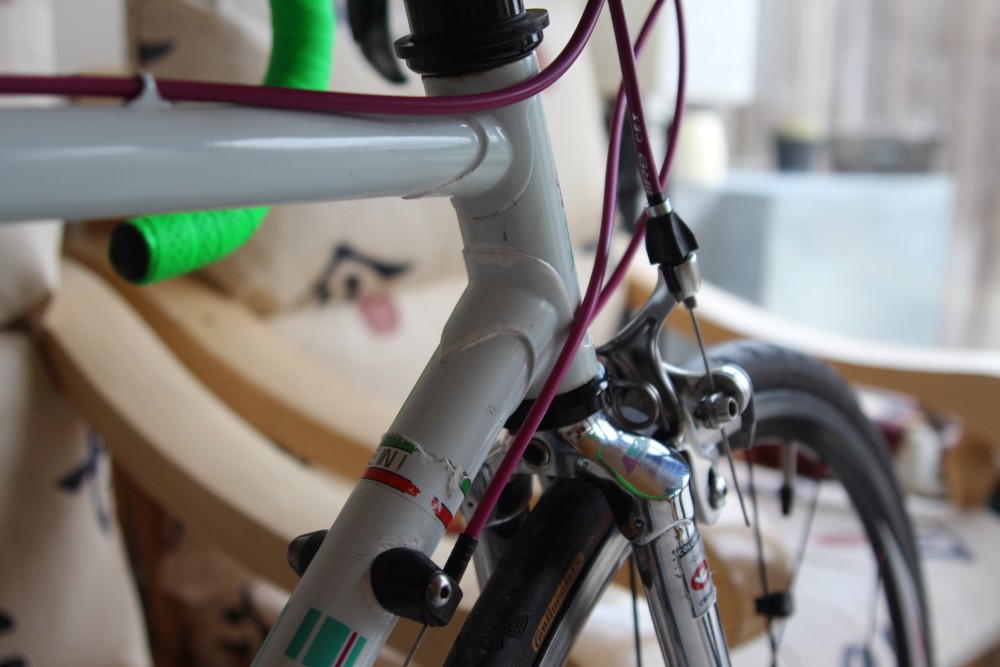
Frame & Forks : Columbus Cromor - Bianchi Campione d'Italia from approx 1989.
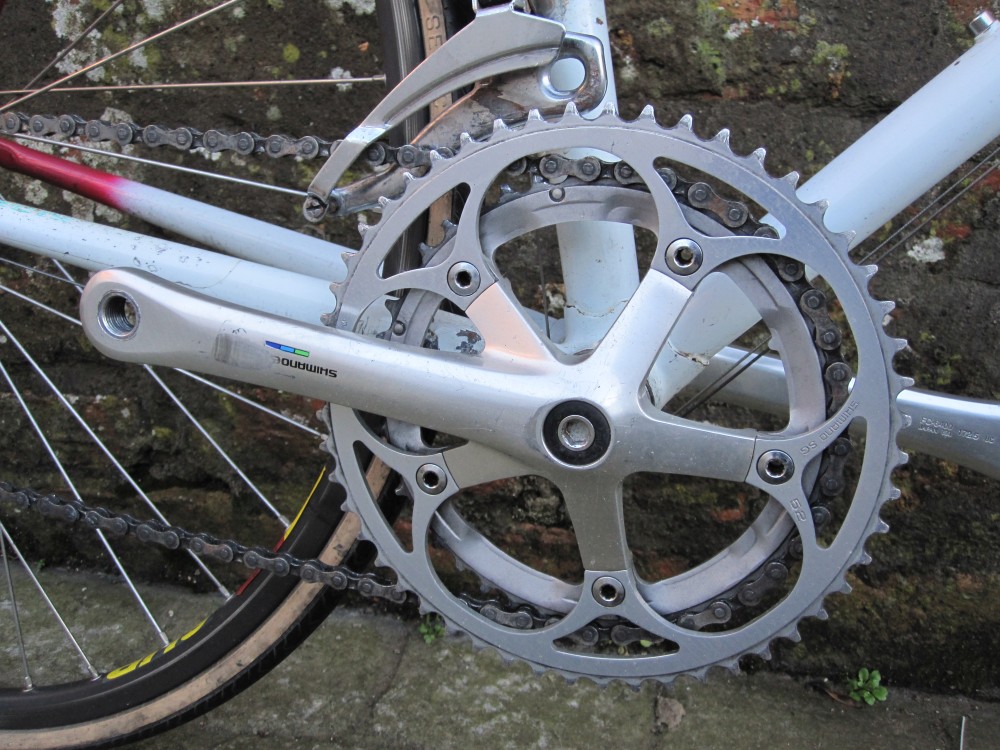
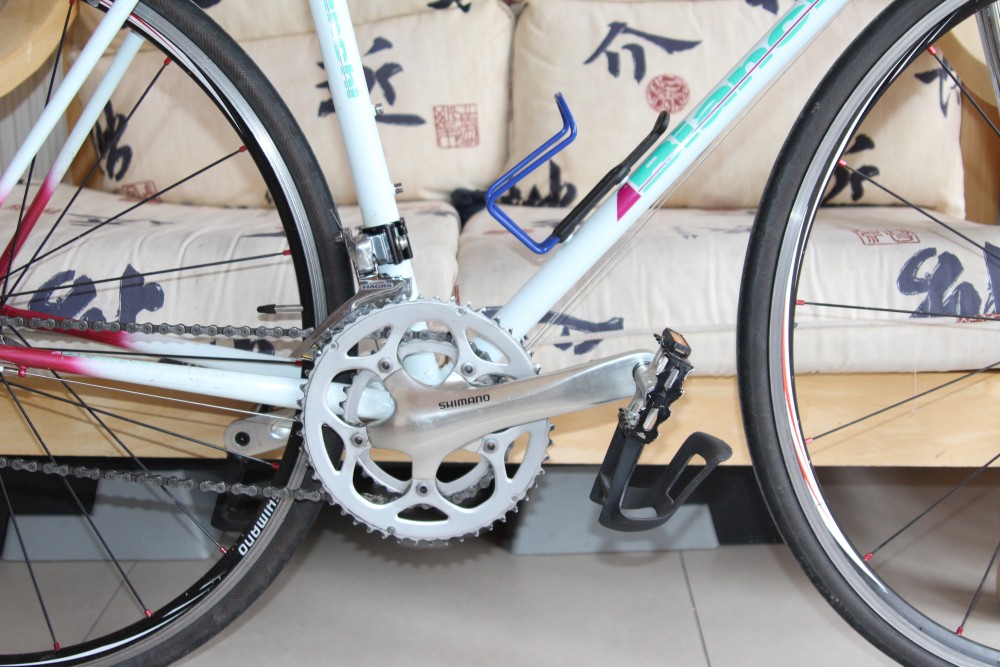
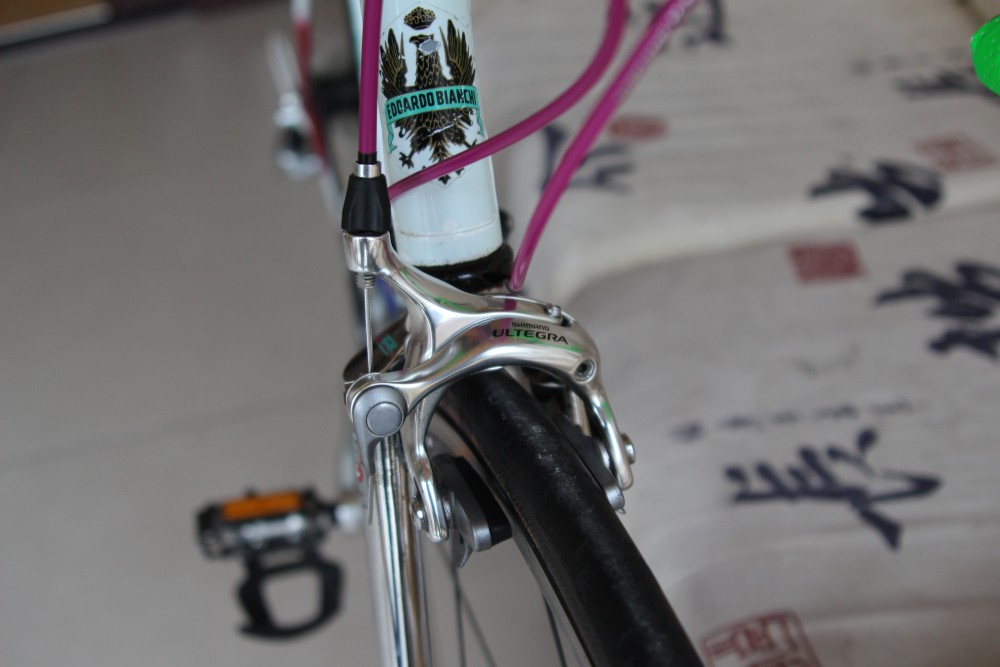
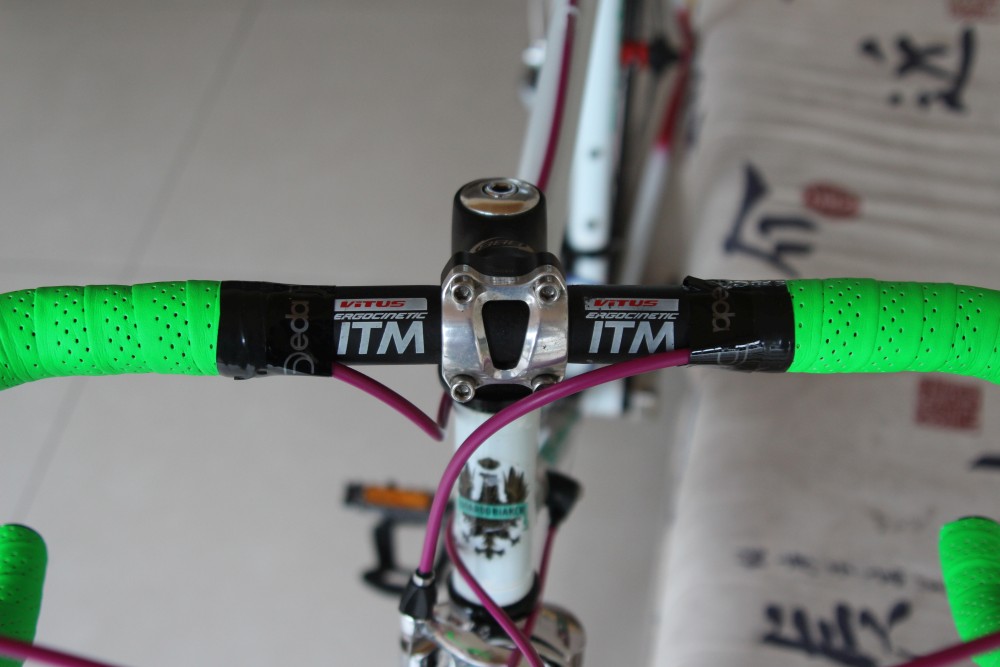
Components were a mish mash of Shimano Derailleurs, Campagnolo Shifters, Modolo Speedy Brake Calipers and noname levers (maybe Modolo). Wheels were Shimano hubs - maybe Exage, 7 speed HG Cassette, chain was worn, but not enough to wear the cassette, bars and (ugly) stem were ITM.
But the crankset was a very nice Shimano 600 Tri Colore set with sealed BB (italian threads).
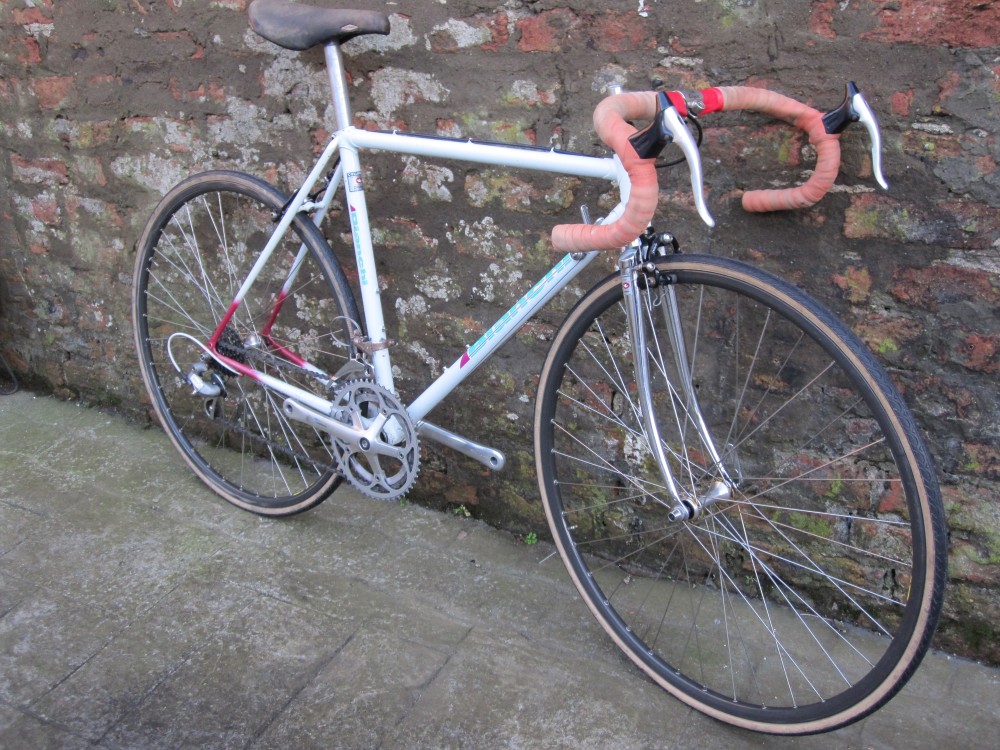
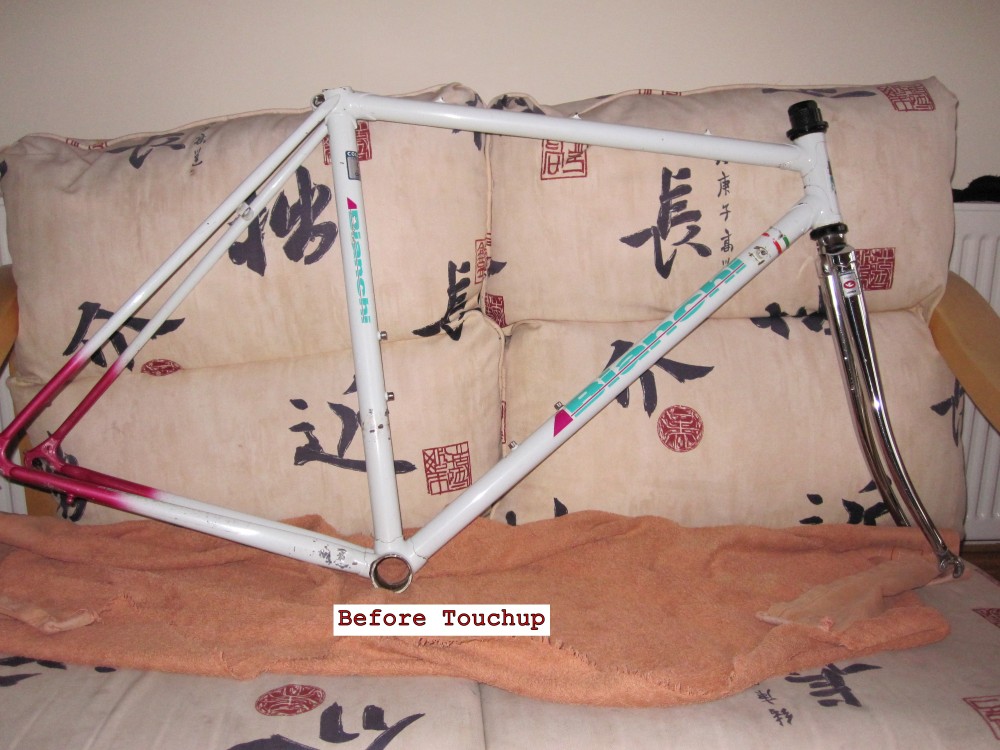
The bike as delivered - just quickly assembled for the photos
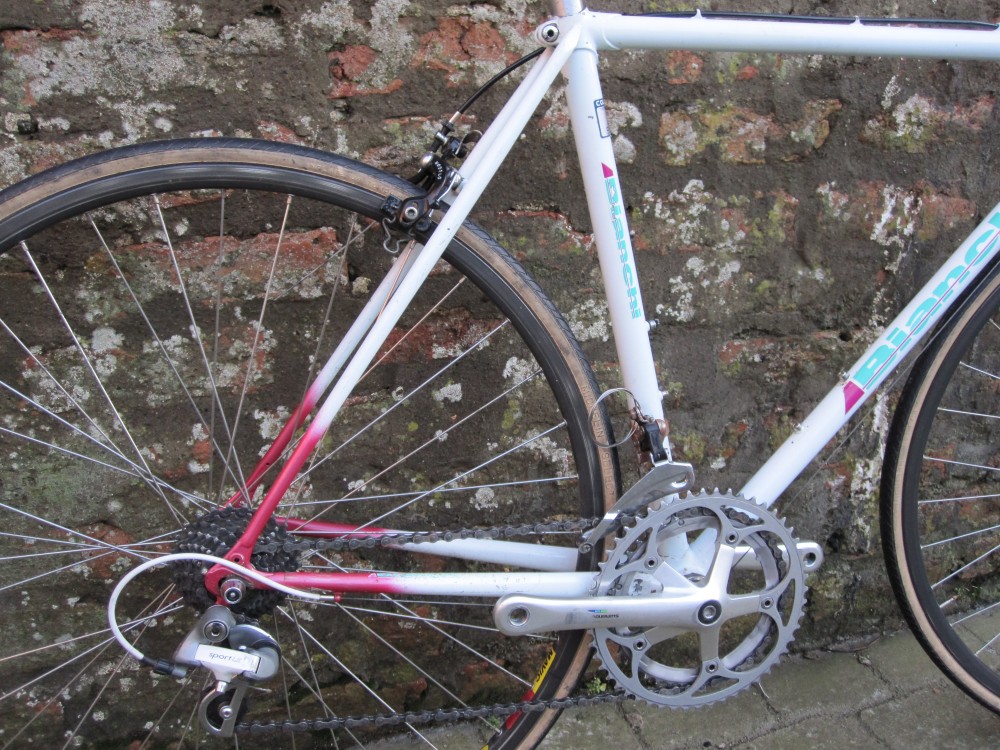
Condition
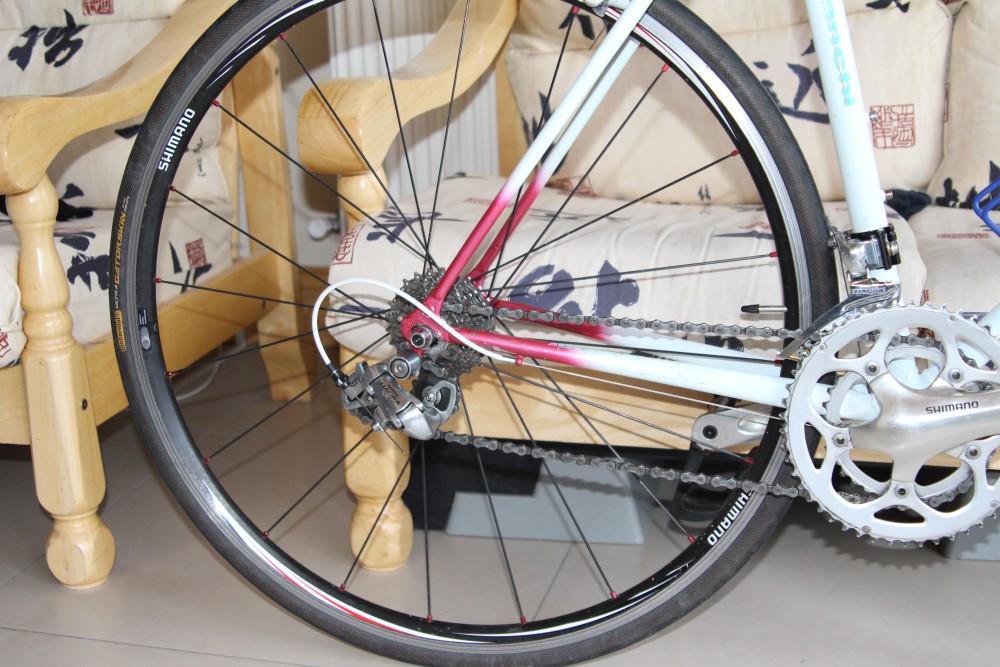
As it was, the frame and parts all needed a bit of a clean up. The chrome on the forks was good, the paint in certain spots on the frame was chipped, worn, and a little surface rust. The rear dropout spacing would have originally been 126mm, to fit a 6/7 speed rear wheel. This had been increased to 130mm, but done badly or accidentally as the frame was out of true. It looks like the drive side chain stay had provided all the expansion from 126 to 130.
The process
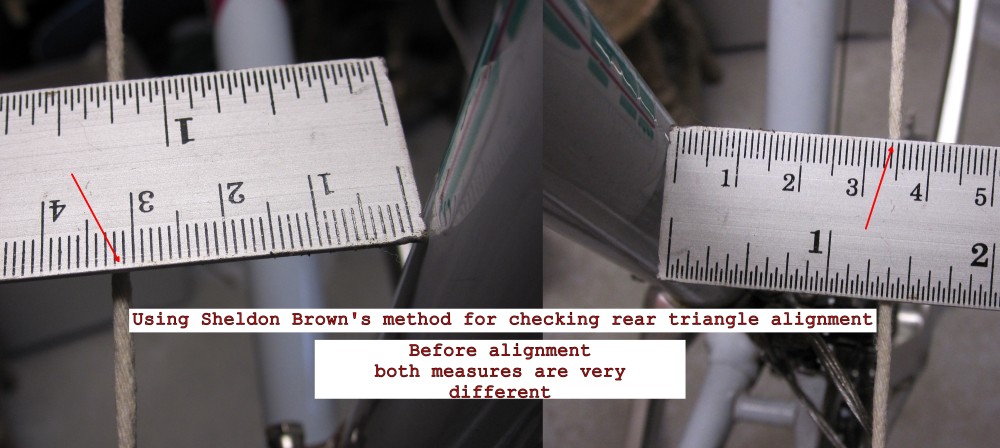
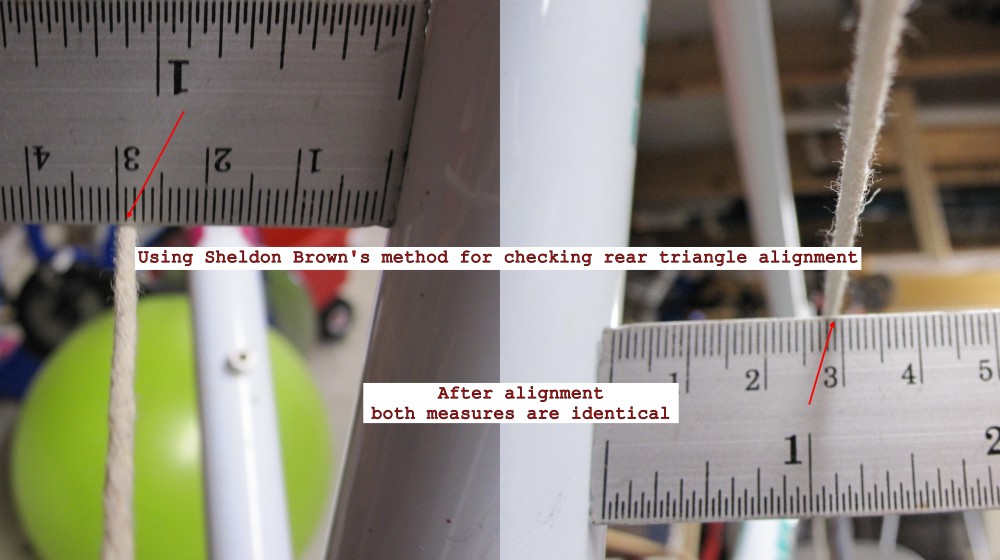
First, retrue the frame and coldset the rear dropout space to 130mm - to fit a 9 speed axle. I did this using Sheldon Browns method (with a stool and a large wooden plank - brute force moving the chainstays using bodyweight and the plank as a lever). Moved the driveside chainstay inwards a bit, then moved the non-driveside chainstay out a bit. I didn't really enjoy this part of the process, there was always a feeling that something could go terribly wrong. But it worked.
Repeatedly taking measurements all the way - push on the plank, take a measure to see the result, and repeat the process. Measures are done simply by tying string from one rear dropout, forward around the head/steerer tube and back down the other side of the bike to the other rear dropout - measurements are taken where the string passes by both sides of the seat tube. If the dropouts are true, then the string will be equidistant from the seat tube on both sides - simple but very effective.
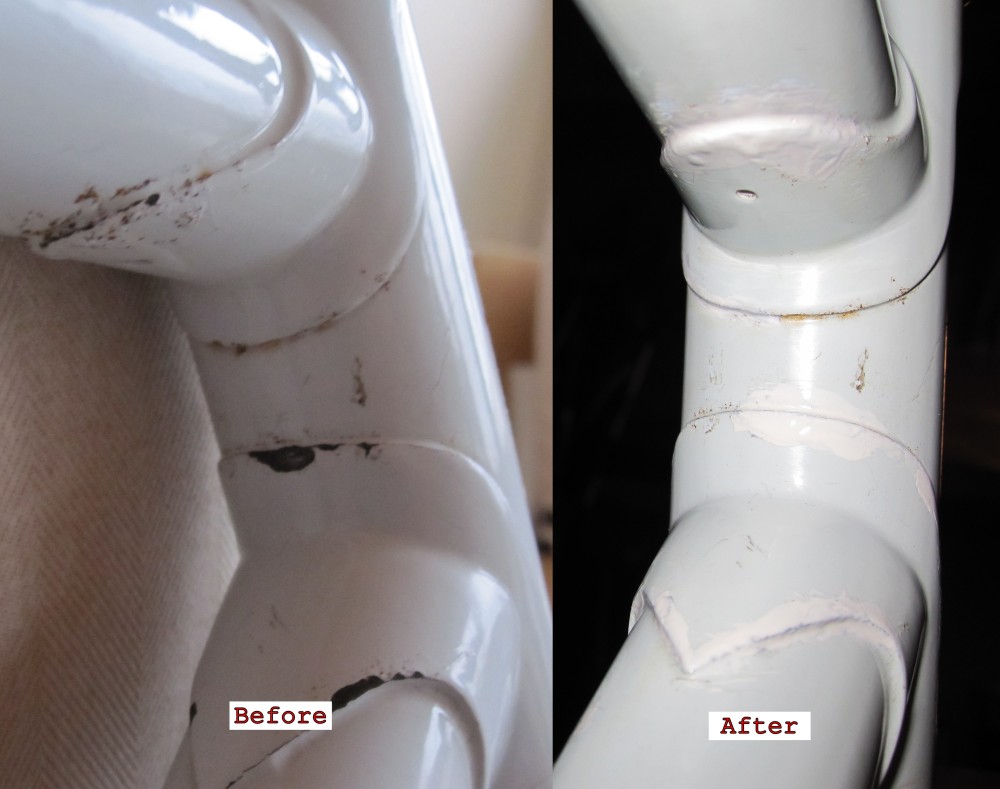
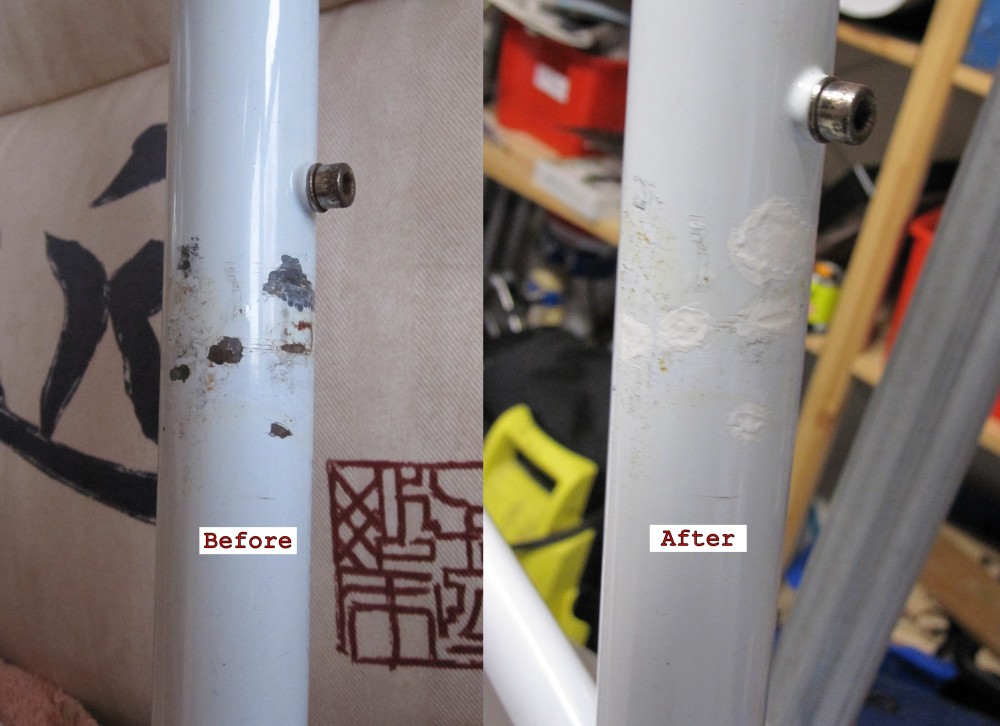
Some before and after photos of alignment measures
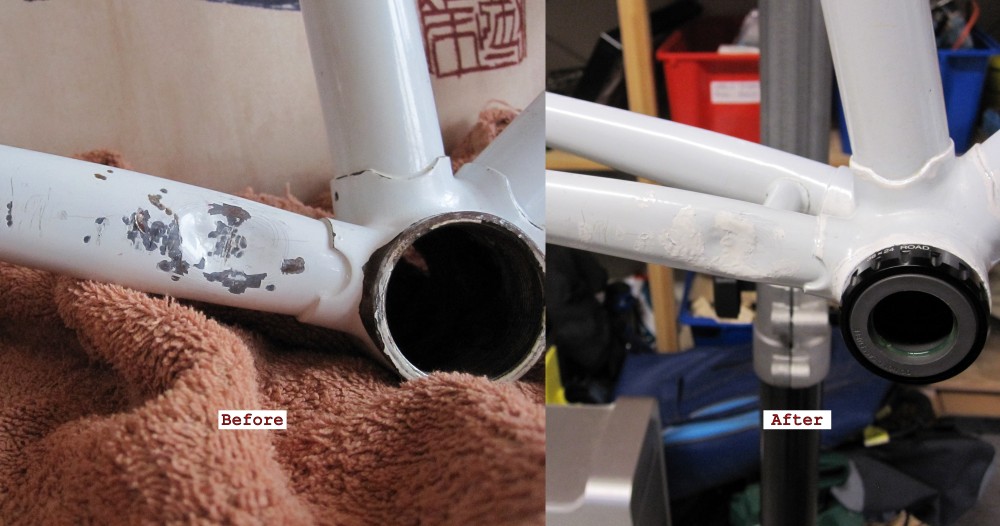
Then I touched up all the chipped/rusted paint. This was quite easy as all the real bad bits were in the white paint. A bit of sanding, one coat Hammerite Kurust (phosphoric acid treatment), two coats zinc based primer, and two coats Humbrol Enamel Model Paint, all to only the chipped/rusted paint spots. Result was quite ok.
Some paintwork before and after shots - full frame and closeups

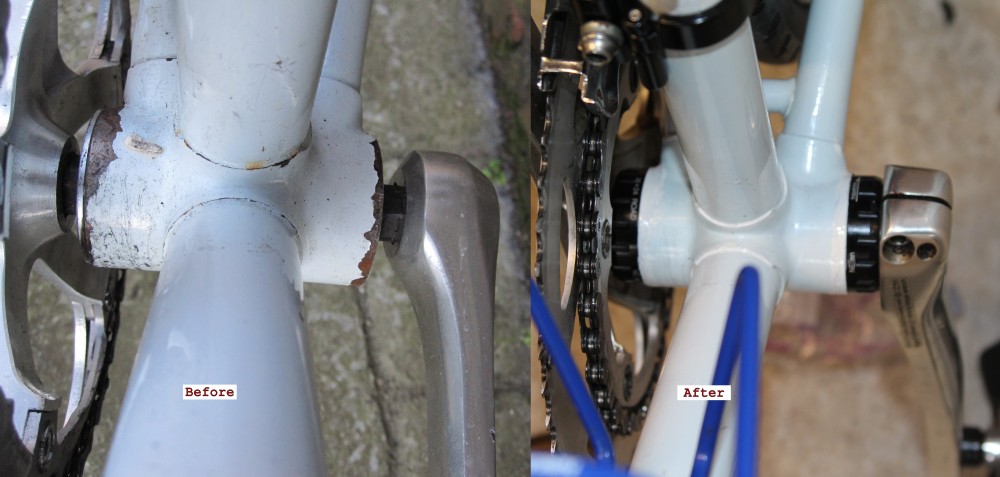
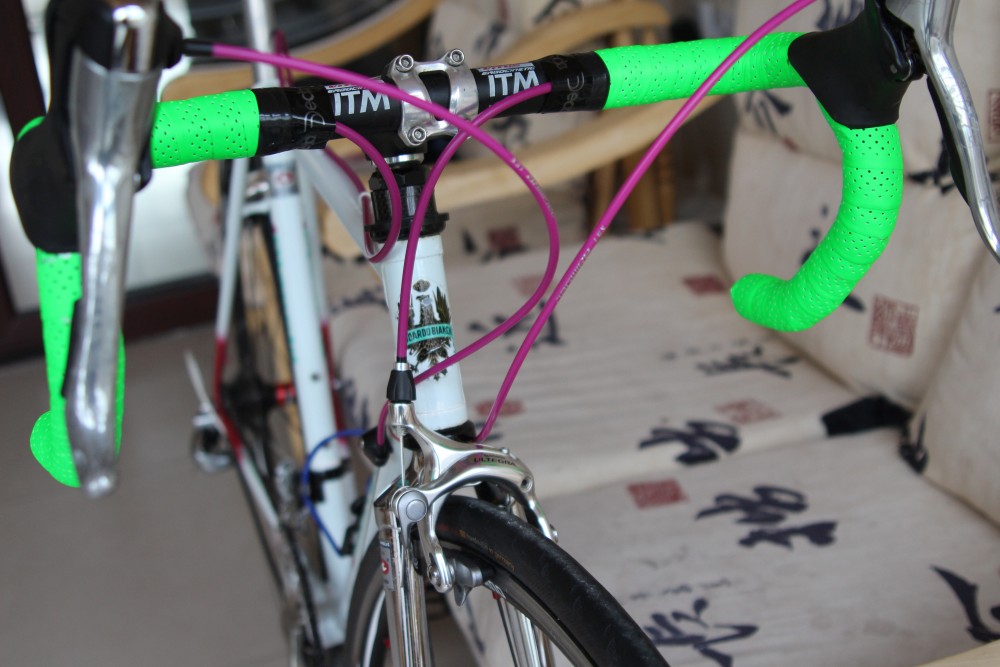
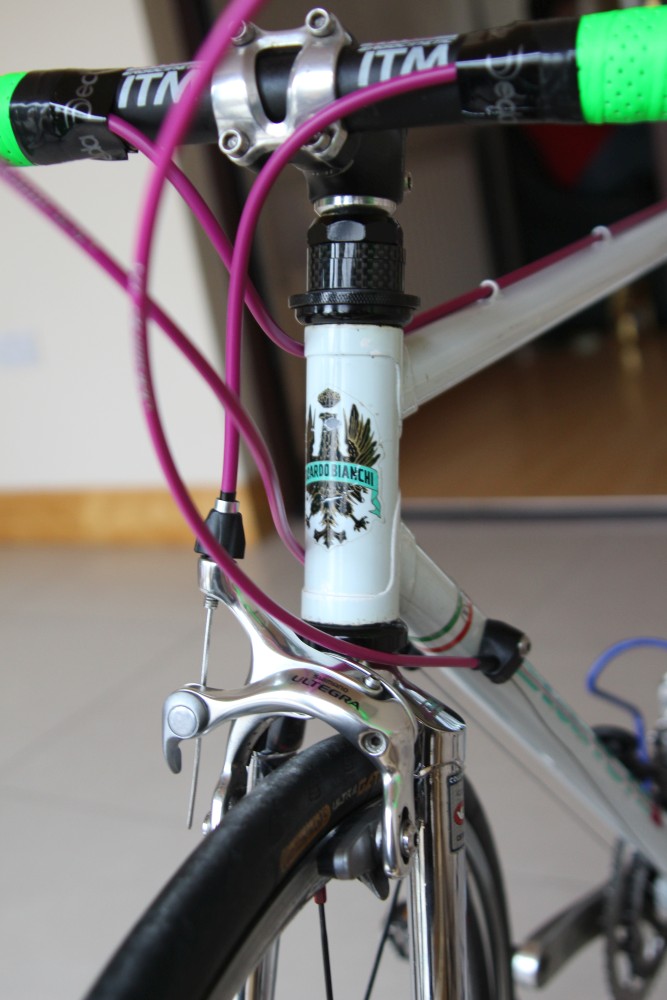
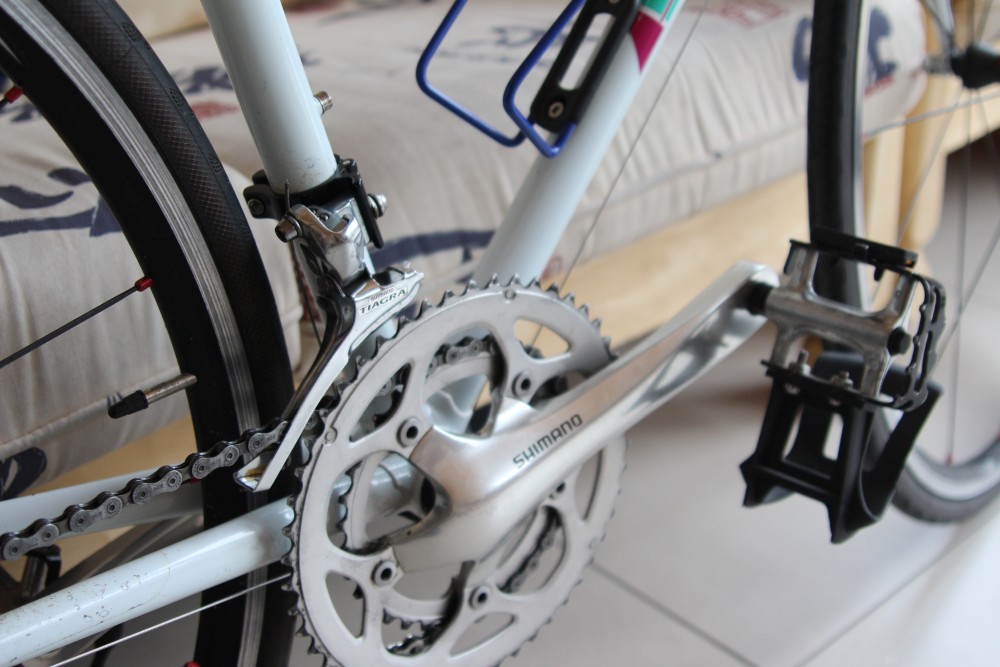
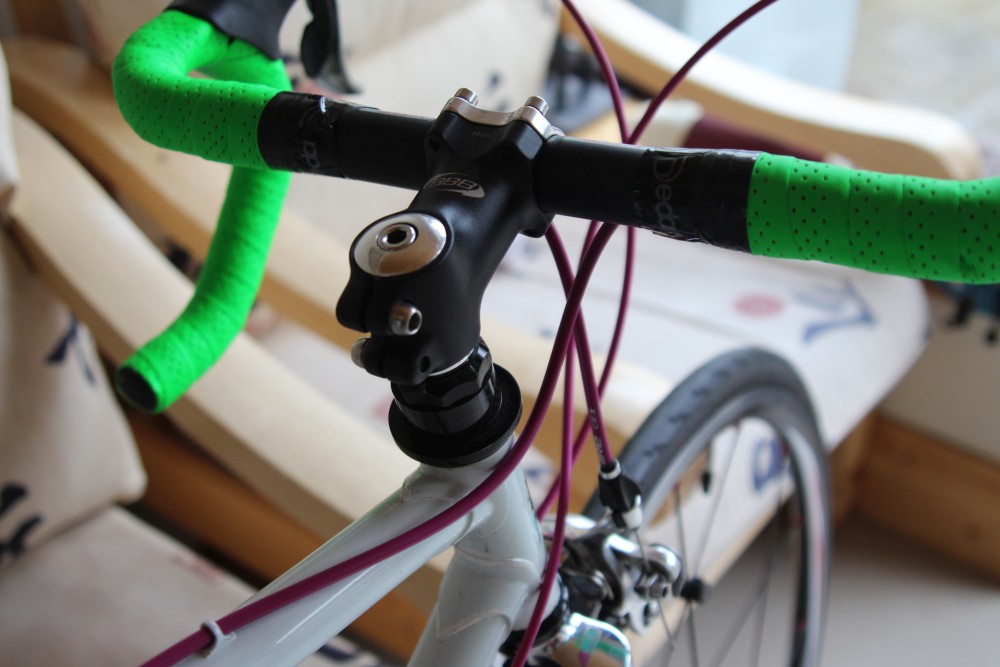
And finally, rebuild the bike with modern parts. As luck would have it, I had just bought back a bike from my son which I had sold him earlier that had a Shimano Tiagra 9 speed groupset, and I reckoned it would be perfect for the Bianchi. Also, I wanted to keep the bike length as short as possible and had a 60mm modern stem (fitted to a quill adaptor) on another bike so I stole these for the Bianchi. Using a modern stem would allow me to easily change the stem for another length (without removing bar tape and brake levers) should it become necessary to get proper fit for my daughter. Also, the 60mm stem and quill adaptor were on an old Vitus and looked out of place - this would allow me to replace them with a period correct quill stem and make the Vitus "look good".
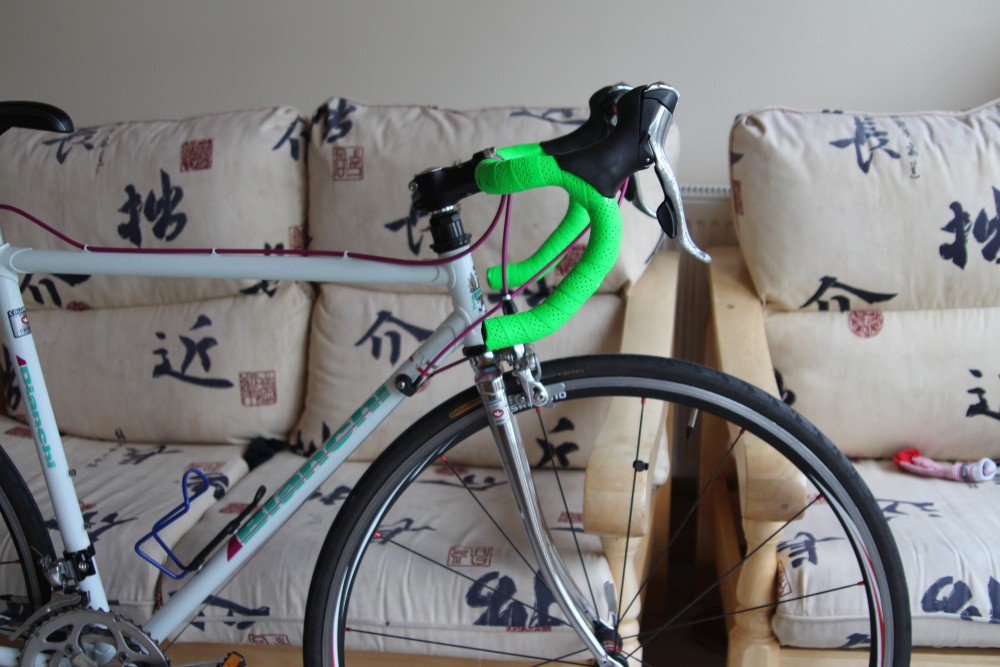
With the above assumptions, I set about installing a new italian threaded Shimano Holllowtech Bottom Bracket (had to buy this) and then the quill stem adaptor and 60mm stem. Now I was ready to start moving bits (Tiagra groupset, wheels, bars) from the donor bike to the Bianchi and fitting new cables, and cable housing (mauve) and new bar tape (flourescent green - my daughters idea!). The only mis-calculation in all of the above was the front derailleur clamp size. I had two Tiagra FDs, one was band on with a 34.9mm clamp, one was a braze on that I had fitted a 31.8 clamp (this was on the donor bike), but I needed a 28.6. The 28.6 clamps are expensive via eBay when shipping is included, and none of the online stores seemed to stock it so I considered making a shim for one of the other clamps. As it turns out my local bike shop had one in the workshop for a very reasonable price. So the switchover of parts went like a dream.
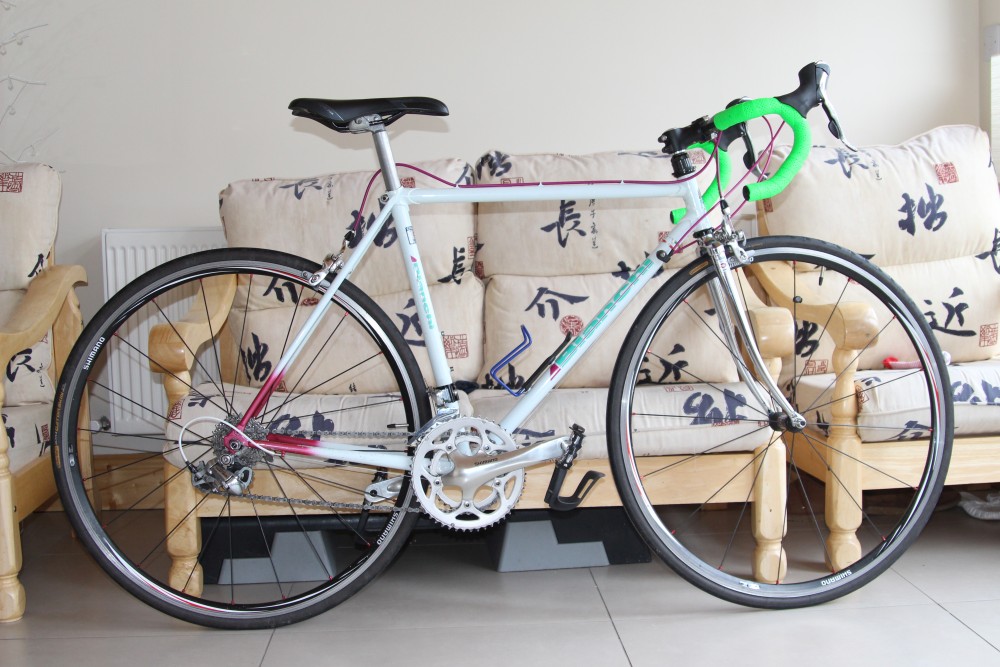
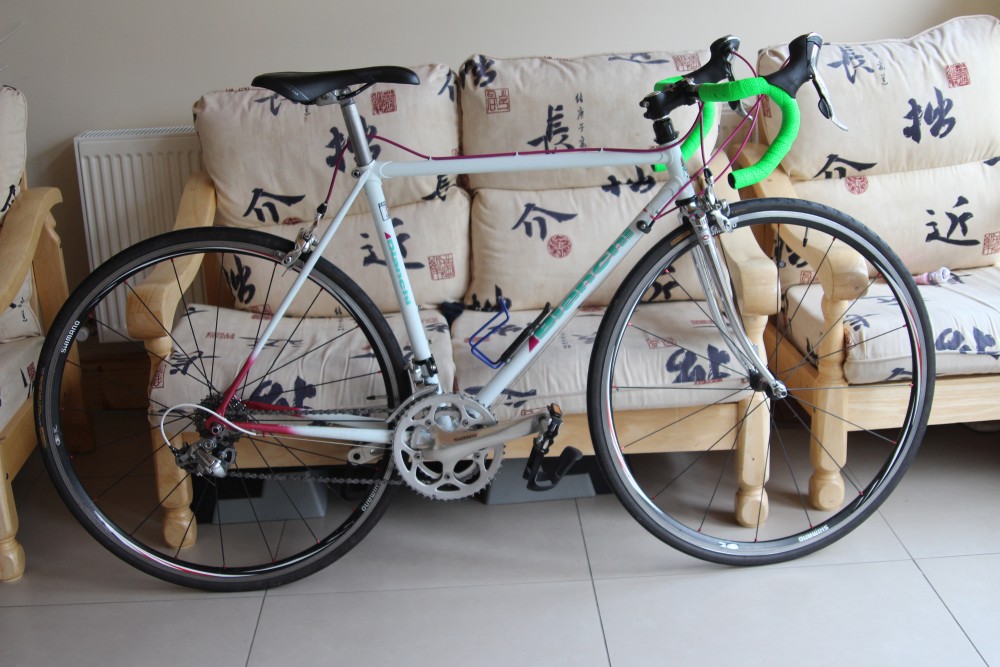
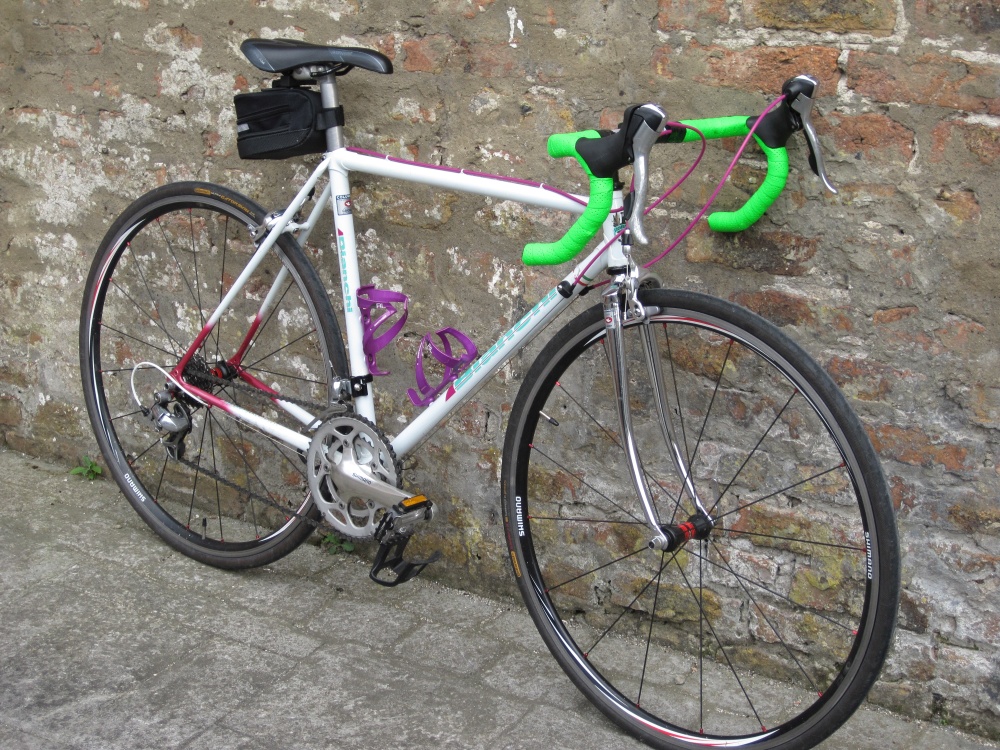
And the result
A modern bike with an old frame. I think they call them retro bikes. It weighs 10.3 kilos with pedals included, which is comparable with a modern "starter" road bike. It is probably giving about 1.0 to 1.5 kilos to an EUR1000+ modern aluminium/carbon road bike. Unless you are are weight weenie fanatic, that weight difference is immaterial to me. It looks great too - even with the flo-glo bar tape.
This is how the bike looked when completedLast photo shows bike complete with purple bottle cages

Contact me by email : alan_cowzer@hotmail.com
Contact me through Facebook : My Peugeot CFX-10 Facebook Page
© 2018- 2026 Alan Cowzer