Section 6. Component Assembly
This was the plan to assemble the remainder of the bike - and the actuals are reported under each element of the plan
1. Fix the shifters
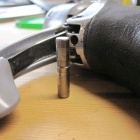
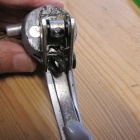
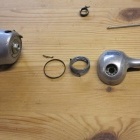
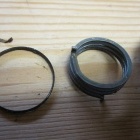
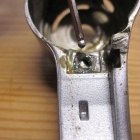
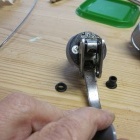
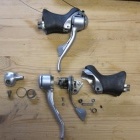
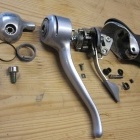
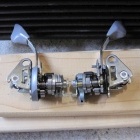
This involved dismantling the shifter levers, cleaning out the old grease, and regreasing/reassembling them. I had this brilliant Photo Guide and it worked like a charm. However, when I went to do the next item, I briefly checked out the repaired/cleaned brake/gear levers and found the the small lever on the righthand unit was not operating properly. It's the lever that releases cable tension and lets the RD move the chain onto the next smaller sprocket. I knew that this meant the small spring assisted pinion lever was not dropping into a groove as designed. The small spring on this part had seemed a bit bent when cleaning out the gears. There was nothing for it but to strip it all down again and have another go. This time I put some effort into fixing a slight unwanted bend in the spring so that it would sit better in the designated groove. This seemed to work and when reassembled, everything worked much better. Although on subsequent tests, it seems a little slow to engage. I will proceed with it as is anyway.
Fix the shifters - some of these photos were taken as a record so I would know how to reassemble the shifters
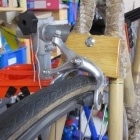
2. Construct and varnish the Rear Brake Bridge. Buy bolt/nut to fit Rear Brake Bridge. Fit to frame
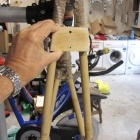
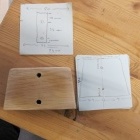
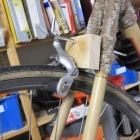
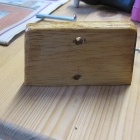
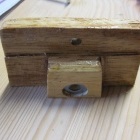
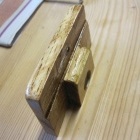
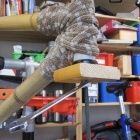
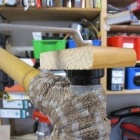
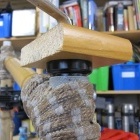
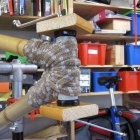
This was easy and straightforward, especially as I had decided to make it from wood and I am comfortable working with wood. So, I took a piece of hardword from a some furniture I was throwing out. I had been told it was "rubber wood" from rubber trees which have outlived their productive life (recycling again). Took some measurements of , seat stays and brake bridge position and new desired position for the Shimano Exage brake (so that the brake blocks will line up with the wheel rim). From this I produced a rudimentary drawing and cut the wood to shape and drilled holes to mount the wood and also to position the brake. Drilled a matching hole in the brake bridge. Some sanding to smooth out the edges and then lined everything up and was happy with the fit. However, the block of wood at 15mm thick looked a bit too overbearing and ugly, so with a tenon saw, I reduced it's with to 6mm whilst retaining a centre portion at 15mm, which would fit in between the seat stays and prevent any lateral movement of the bridge/dropper. Varnished the lot, and bolted it to the frame. Looks great and won't know how functional until I road test it.
3. Fit Crown Race to Fork. Remove Epoxy from Head Tube and fit Headset Races to Headtube. Fit Headset, Fork, Stem and Handlebars to Frame.
I got off to a good start on this job (not). OK, I got rid of the epoxy that leaked into the headtube easily, with a blade the hardened epoxy just lifted off lke a layer of paper. But I then had to fit the crown race onto the fork steerer tube. This is an inference fit, i.e. the internal diameter of the crown race is exactly the same diameter as the part of the steerer tube it is meant to fit on. Tolerances here are critical (both components are supposed to be machined at the same time). In any case, without the special tools, this job was going nowhere - things were just too tight. Even using the tricks I found on the internet, I just couldn't get things started. So I cheated. I had seen this cheat on the internet. As my bearings were "semi-integrated" and ran within a race that sat on the crown race (not sealed bearings as such but operated like they were) I cut the crown race right through it's cicrumference (with a hacksaw) and the cut allows it to expand when being fitted over the steerer tube. The bearing race was a slant fit over the crown race and this forced the crown race to remain tight even with the cut. So, a difficult task worked around and problem solved.
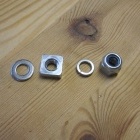
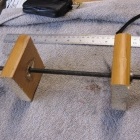
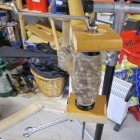
After that, I put the headset cups (top and bottom) which are a press fit (inference fit again) into the headtube, into the freezer overnight to shrink (hopefully) so they will fit easily in the morning. We'll see. Not a chance - they were still too tight, so I decided to make my own headset cup press tool. A threaded bar, two pieces of wood and some bolts and a couple of washers. There are plenty of examples on the internet and I just followed some examples as per youtube. The process worked great, a little tricky keeping the first cup aligned but I already had it off pat for the second cup. Once they were done, fitting the bearings and fork was very easy and then the stem, steerer tube spacers and handlebars were a cinch.
Once finished, I realised how wise I was to avoid any serious headset work in all my long years of messing with bikes. It was a tricky process and easy to mess up and possibly damage the headset, fork, or headtube itself. But a word of advice, if buying a headset, look for one which comes with a split crown race. Makes life a lot easier. Also, make a headset cup press tool rather than messing with a hammer, or buy one if you are going to do a lot of headset installations.
4. Source spacers, move rear wheel towards non-driveside of axle, and fit both wheels to frame. Pump tyres. Check wheels and file frame clearance as necessary.
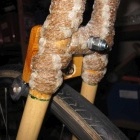
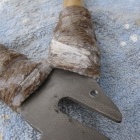
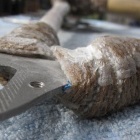
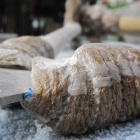
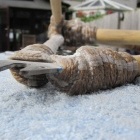
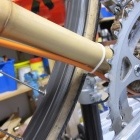
I did some preliminary work on this by temporarily fitting the crank and a wheel with some washers performing as spacers. This identified the (lack of) clearance between the chainstay/seatstay and the outermost sprocket of the cassette. The hemp rope binding on the dropout was too thick in places (mainly on the seatstay/dropout binding. This was resolved with some light sanding. However, the next stage of the exercise was to run a chain across the chainset and the rear cassette (in particular the outer two sprockets of the cassette) and here the real problems could be seen. There was very significant contact between the chain and the chainstay binding when on both outer sprockets. This required drastic sanding of the binding, cutting steps in the binding to allow the chain run smoothly on the two sprockets and also allowing the chain to move onto the smallest (outermost) sprocket.
The chosen back wheel had a rough hub, so while going through the exercise of aligning the wheel on the axle I swapped out the badly worn cone on the non drive side and greased up the hub. (Actually I had to swap out the whole axle as it appears that my two similar wheels have different threaded axles 10x26tpi and 10x1mm - so instead of swapping one cone, I had to swap complete axle assemblies). But while doing all that, I also spaced the axle so that the wheel was centred and the length of axle protruding beyond the lock nuts was short enough to allow for the unusually thin dropouts of the bamboo bike. A little sanding of the hemp rope around the chainstay bridge and all was well.
The front wheel was almost a mirror copy of the back wheel. The chosen wheel (matching the chosen back wheel) was a bit rough and as it happens had one very bad cone, so I swapped out the full axle assembly from the alternate wheel and regreased and reassembled. Everything is good.
As a followup to the wheel issue, I now have two spare wheels of a good vintage but both have the bad cones from the wheels I have fitted to the bamboo bike. But I think I have a cheap solution to rectify. Rear wheel - I have a cheap rear axle (bought for a bike carrier build project and unused) that has cones which appear to be correct size and threading. Front wheel - I have just now ordered a cheap front axle assembly from ebay which also looks to have the right cones. So, with luck, I'll rebuild and regrease the spare wheels and I'll have a good set for some future vintage build.
5. Fit crankset to frame.
This was really easy, as I have done this task many times before. Was delighted that my (gu)estimated Bottom Bracket Spindle Length turned out to be perfect as the inner chainring has about 2mm spare from rubbing against the frame. Couldn't have planned that better.
6. Fit Seatpost Clamp, Seatpost, and Saddle.
Seatpost has arrived (from China - cost 12euro, as against minimum local cost of about 50euro as it was an unusual diameter). Will need to be shortened, as I expected. That is the first job - will use an electric jig-saw rather than a hacksaw to speed it up. The chosen saddle, unbranded brown suede, is coming off my (as yet unrestored) 1982 Jan Janssen aero bike as I have a blue suede Supercorsa saddle which will suit that bike much better. Then the bike will look more complete but I'll need the seat clamp before the seatpost and saddle are properly fixed.
7. Fit front and rear brake calipers.
Extremely easy, although the front caliper locknut only "grabbed" the bolt by a few threads (they are the concealed nut type). I may need to consider a longer concealed nut.
8. Fit Front and rear derailleurs.
Rear Derailleur (RD) was easy. Front Derailleur (FD) caused some problems. I had removed the FD from my Sab bike (where I had put the Exage FD to good use) by buying a proper Sora FD for the Sab (it now matched the Sab groupset). As the Exage FD was of the "braze on" type, I had previously ordered a "band on" adapter so that I could fit it to the bamboo seat tube. This is where I ran into clearance issues. The FD was fouling the hemp rope binding at the bottom of the seat tube, and it looked like I would need to file a lot off the hemp rope to make things fit - at a structural risk to the whole joint of Seat Tube, Down Tube, and both Chainstays. All a bit puzzling as I had checked clearances using a Tiagra FD while making the frame and reckoned I'd be ok or close to it. So, change of plan, use the Tiagra FD but as it's clamp was stiffer, I needed to buy a longer bolt to enable the clamp to hold the FD on. This fudge should work as the Tiagra FD looks to have the same "cable pull" leverage as the Exage, and it is 9-speed which is only one "step up" in chain widths from 7-speed Exage (6,7, & 8 speed chains all being same width). (The clamp sizes for both FDs were 34.9 which is the max available, but the bamboo seat tube was marginally larger than this so the clamps were a bit strained to accomodate - the Tiagra one, being stiffer struggled a bit more with being strained)
9. Fit both Brake/Gear Levers.
Done. And very simple and straightforward. Except I had to replace them later as they worked very inconsistently.
10. Fit all Cable Guides (2 x Rear Brake, 2 x FD, 2 x RD). Solve FD Cable Stop and RD chainstay Cable Guides.
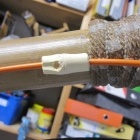
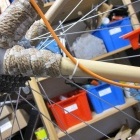
Flat spots on the Down and Top Tubes created via a blade and cutting off a strip from the surface of the bamboo. Cable guides glued, with super glue, to these flat spots and left overnight (secured in place with cable ties). Hope it is permanent by morning. Will reinforce with strategically placed, neutral colour, cable ties. Not sure about FD cable stop solution (need to make sure that the outer cable does not move when exposed inner cable pulls on FD) will be required - so I am tempted to initially bend outer around BB shell and cable tie in position between chainstays and see if this works. Will use cable ties as RD Chainstay Cable Guides and this should be ok.
11. Fit Brake and Gear Cables.
I started with the gear cables. The outer gear cabling of the bamboo bike is a little unusual. In a normal bike there are cable stops at the top of the down tube and the outers end here. There is another cable stop on the rear chainstay and there is a short bit of outer from here to the RD, for the remaining parts the inner cables are exposed. On my bamboo bike, cable stops are a problem, there are none. So the RD outer runs all the way from the lever to the RD, and the FD (for which the bike is not really designed, will need a "creative" solution, because the FD does not permit an outer cable to run all the way to it.
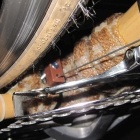
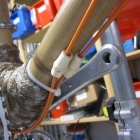
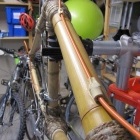
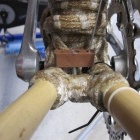
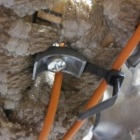
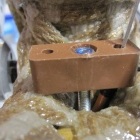
The cable guides glued on yesterday, worked. Although I did put a cable tie around the cables near the BB to take any strain off the glued on guides. Worked out the outer cable lengths by fitting them to the bike and then hacksawing them in situ. Inserted the rear derailleur inner cable and connected up the RD - I added a couple of cable ties along the chainstay to function as cable guides (seemed to be the simplest solution). The RD shifts nicely although there is no chain fitted as yet. With the FD outer, I left it free hanging just below the FD iteslf, hoping that the tight bend around the BB shell would prevent it from moving, however when I connected up the inner and tried changing gears, the outer simply slid along the BB shell and the FD didn't move. Time for my creative solution (you'll need to look at the photos). Basically it's a piece of plastic (an old jointing block) right behind the bottom of the seat tube, on top of the chainstays, but secured by a bolt to the underneath of the chainstays, with the outer cable threaded through a hole in the plastic that has a narrow end. This is a home made cable stop. And it appears to work. With everything connected up, the FD moves as required.
Onto the brake cables, these were much more standard and just as normal bikes. Interestingly I glued one of the rear brake cable guides, on the top of the top tube, but much too close to the hemp rope binding of the top tube/seat tube joint. This meant that the cable when pushed through the guide was blocked by the thicker rope binding, so I had to take out the drill and files and create a groove in the binding to allow the brake cable to "bend gracefully" as it exited the cable guide. Surprisingly, this was quite easy. After that, everything was easy and straightforward and everything worked very well.
12. Fit Handlebar Tape.
I seem to be getting used to this, and it all went smoothly. I used faux leather type tape as the brown suited the bike.
13. Fit Chain.
I had a spare, lightly used, 9-speed chain from a bike or groupset. So, I went with this as a "why not". If it gives problems, then I'll change it. It is only a single step-up in chain width as the chainset/cassette/derailleurs are 7-speed, and all 6-7-8-speed chains are the same width. A single step difference between chains and the rest is normally ok. That was the plan, but the chain was two links too short, and all my spare links were either another brand or for a different speed chain. So, I ordered a new chain.
Contact me by email : alan_cowzer@hotmail.com
Contact me through Facebook : My Peugeot CFX-10 Facebook Page
© 2018- 2025 Alan Cowzer
